
At SproutVideo, we make it easy to create and start a live stream. Many of the steps to set up your live stream are similar to normal video uploads. One of the key differences is the need for encoding software. In this article, we’ll be looking at how to use OBS with SproutVideo to live stream.
What is OBS?
OBS, or Open Broadcaster Software, is free, feature-rich encoding software. It allows you to not only encode your video feed for delivery online, but to also set up multiple cameras, add graphics, audio, overlays, and many different sources to make your live stream look as professional as possible.
Using OBS with SproutVideo
Before you get started, you’ll need a SproutVideo account and you’ll need to download OBS.
-
First, set up your live stream in your SproutVideo Account. See our How to Live Stream with SproutVideo article for those steps.
-
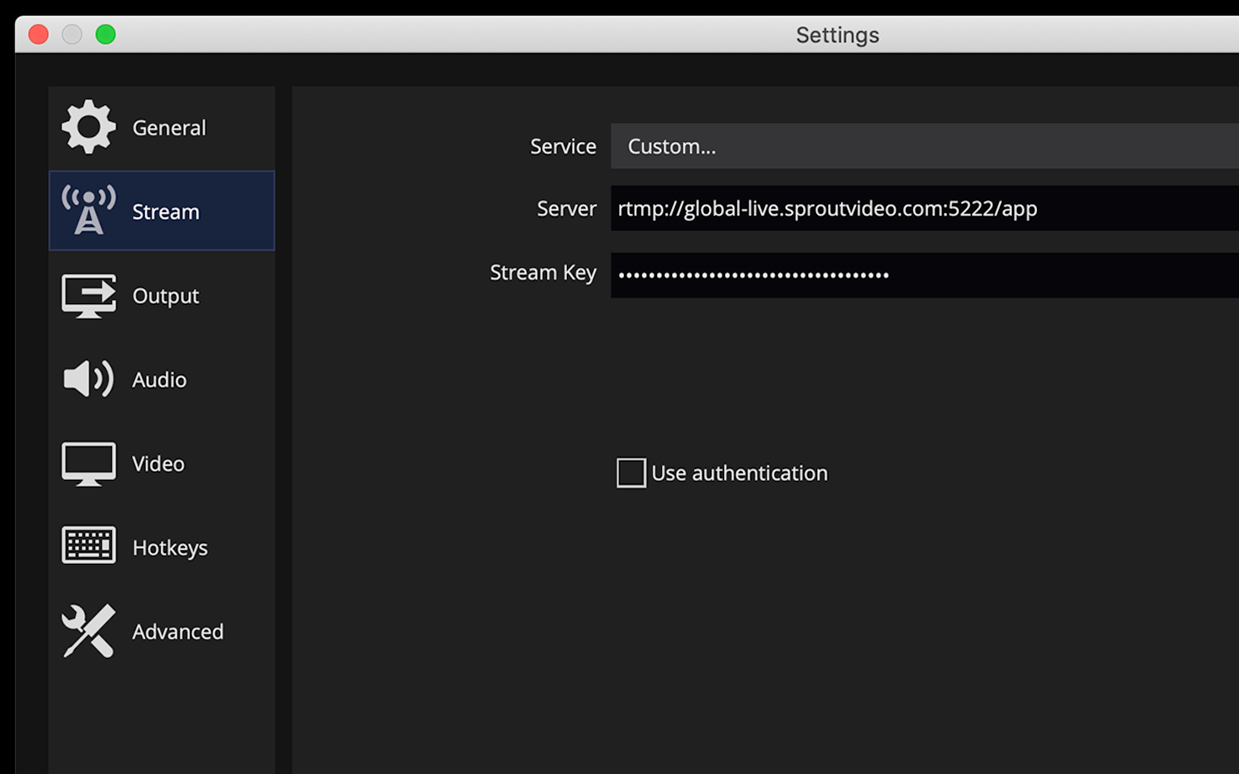
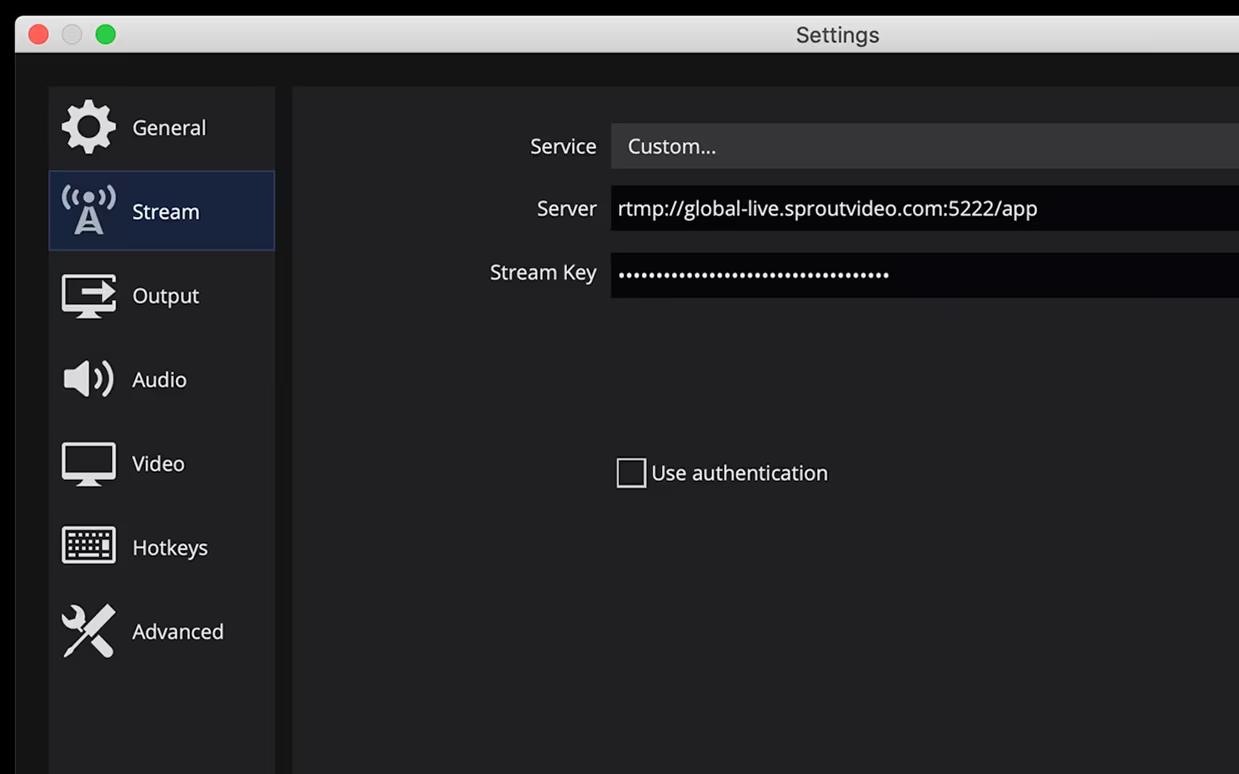
Once OBS is downloaded, you’ll need to go to settings to add your RTMP URL and Stream Key. You’ll find this information in the settings page of your Live stream.
-
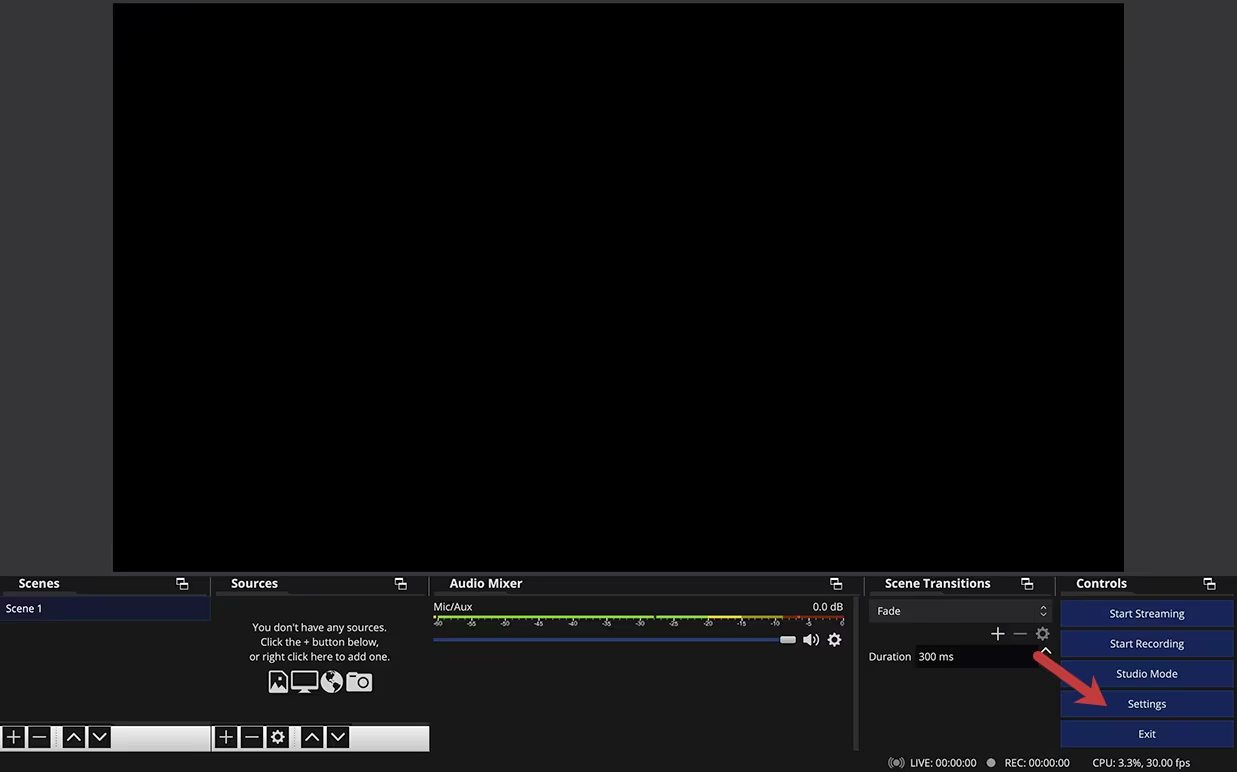
Click on Settings in the bottom right corner of OBS.

-
Select stream on the left side of the settings menu.
-
Select Custom from the Service drop down menu.
-
Enter the RTMP URL into the Server space and your Stream Key into the Stream Key space. Note that your stream key is similar to a password, and should not be shared.
-
Once these are entered, your OBS software will be linked to the Live Stream in your SproutVideo account, and you’ll be ready to go.
OBS Configuration
OBS is very powerful and can be used in a lot of different ways. For the most robust overview of the platform, read the OBS Studio Overview Guide.
Alternatives to OBS
OBS provides a lot of features, and all for free, but there are still other options to choose from. A few are listed below.
Free Options
Paid Options
Other articles in the Live Streaming section:
- Live Stream Latency Explained
- Live Input, Live Delivery and Additional Usage FAQs
- Adding Live Chat to a Live Stream
- How to Configure your Broadcast Encoding Software
- How to Live Stream with SproutVideo
- All About Live Streaming Encoding Software and Hardware Options
- Analytics and Engagement Metrics for Live Streams
