
Note: This guide is only for sites hosted with WordPress.com. If you self-host your WordPress site, or are using a premium version of WordPress, please refer to our How to embed a video guide.
To add a video on a WordPress hosted site, you will be using the Share Video URL we provide. WordPress will automatically pull the video from that URL and display it on your site. Your video must be listed as Public for this to work.
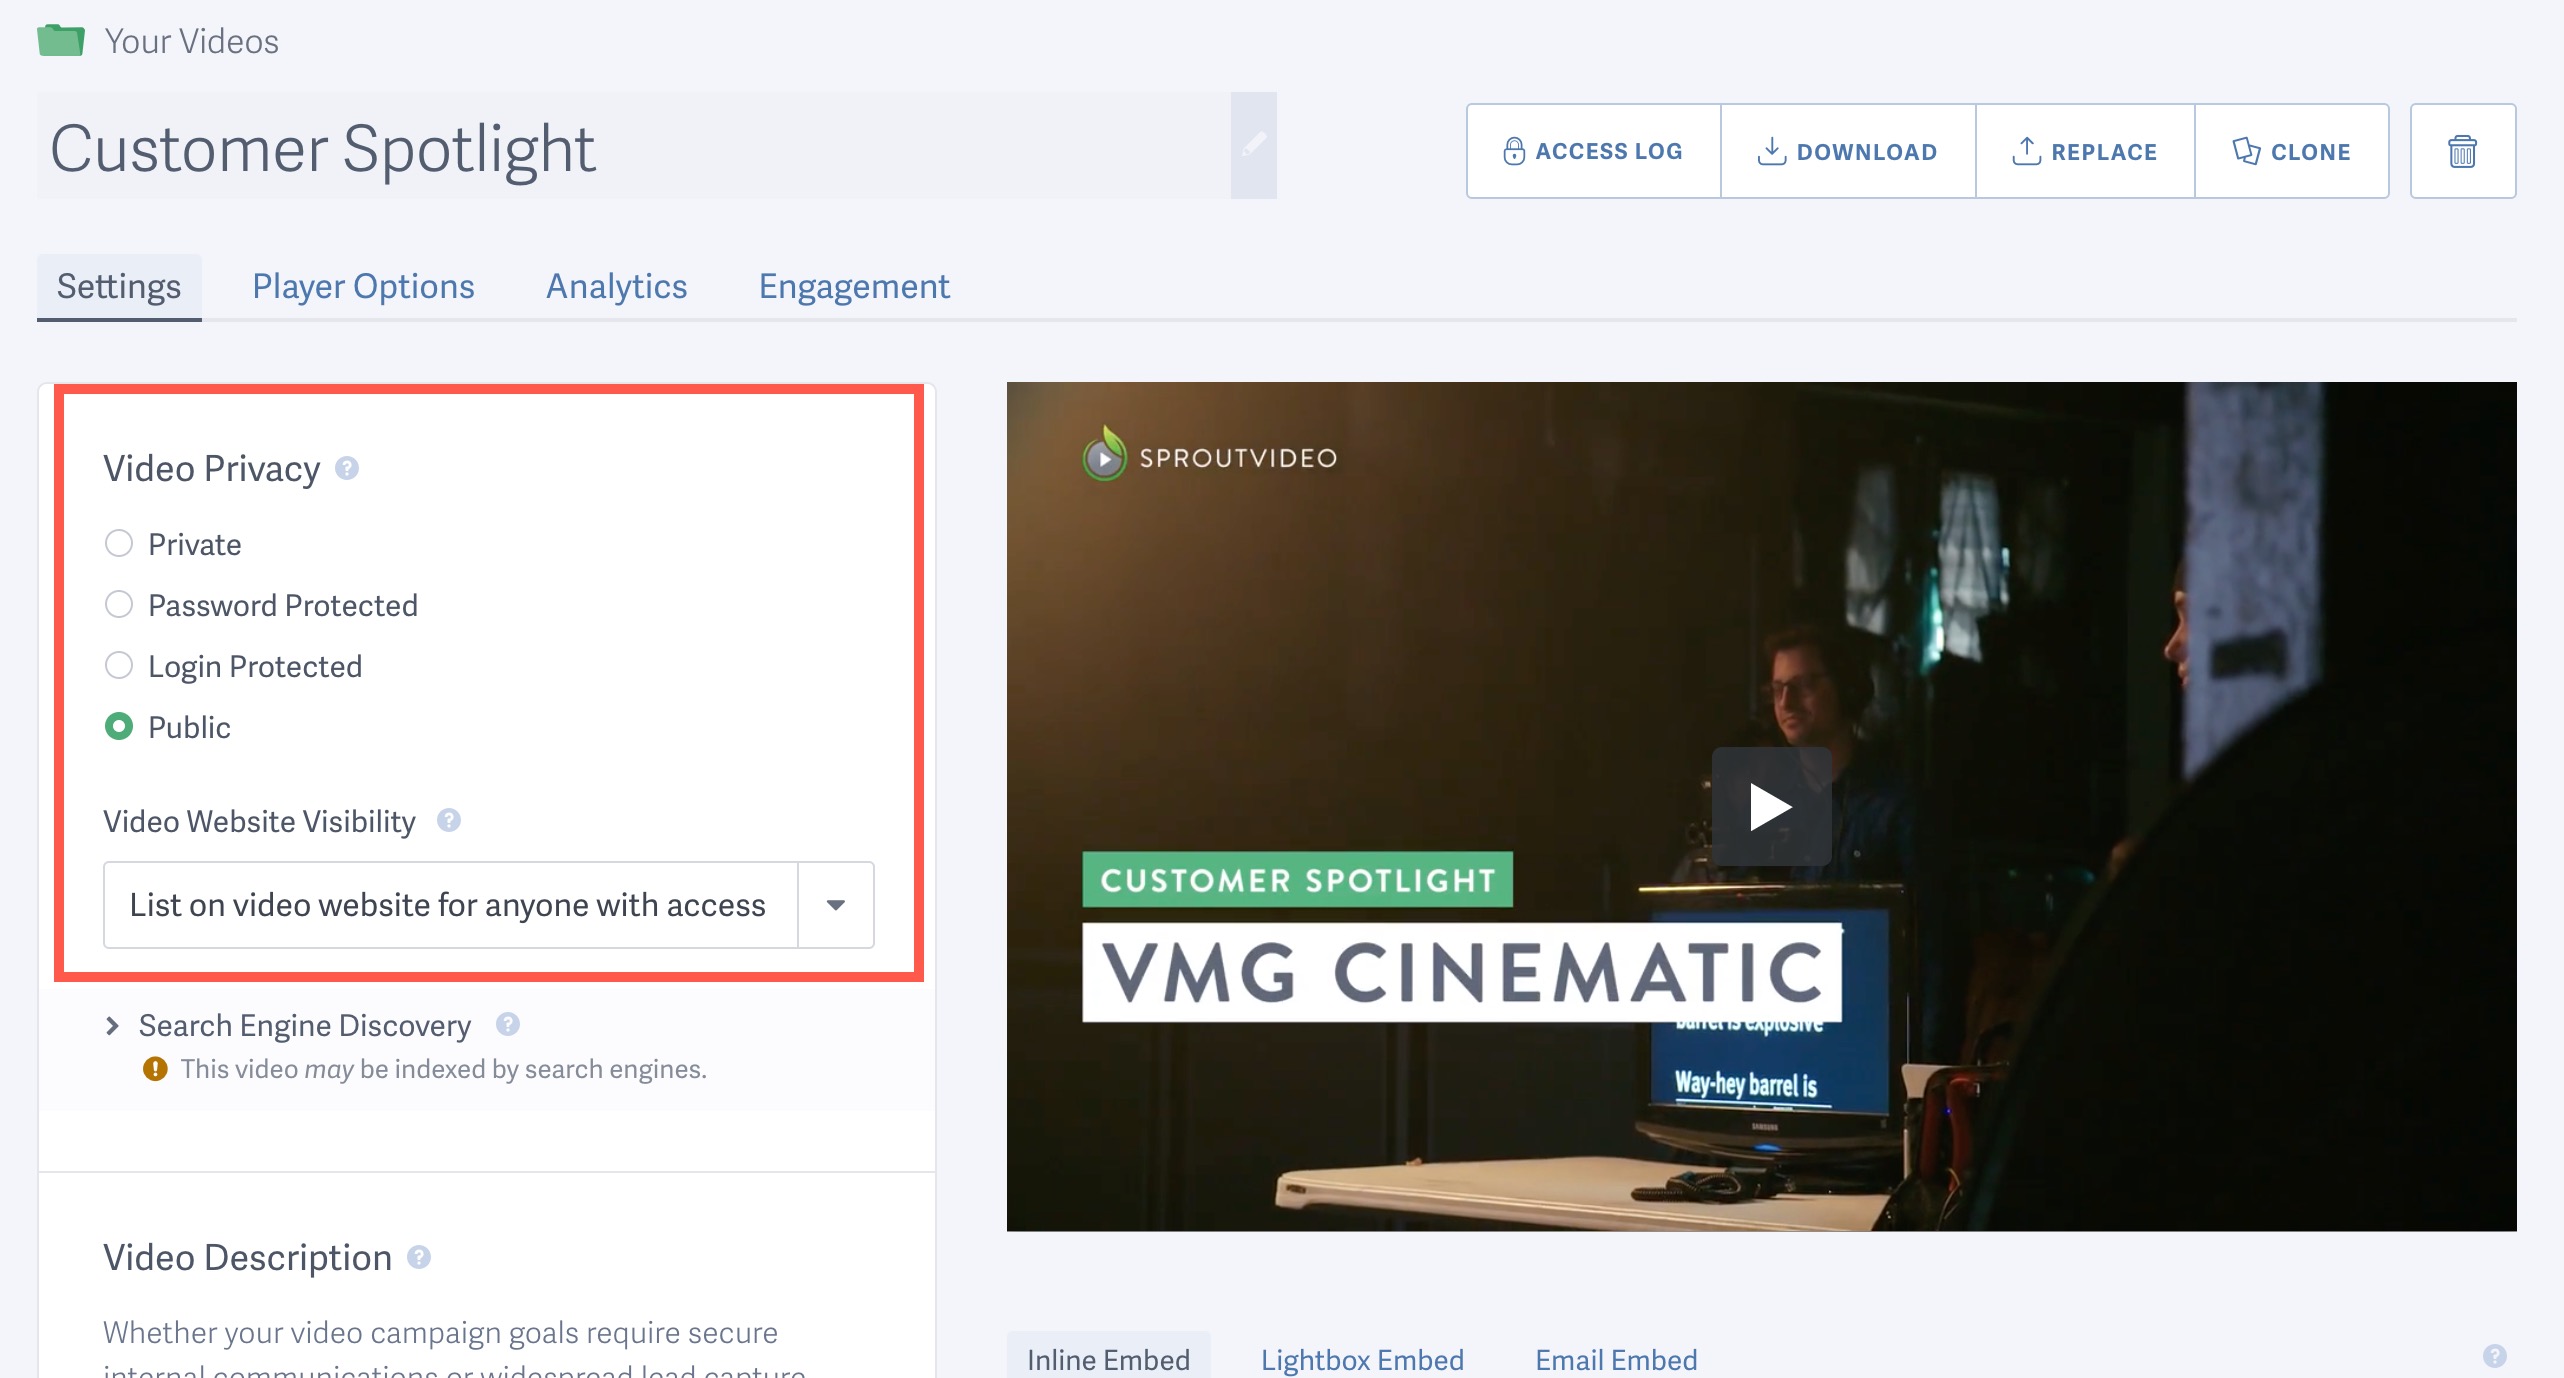
When sharing a SproutVideo URL on WordPress.com, it is important that you set the video to be Public before copying the Share Video URL and pasting it into your WordPress post. The video needs to be Public so that WordPress can pull the Embed code from our platform. Once the post is published on WordPress, you can set the video back to Private, Password Protected, or Login Protected within your SproutVideo account to secure the video.
-
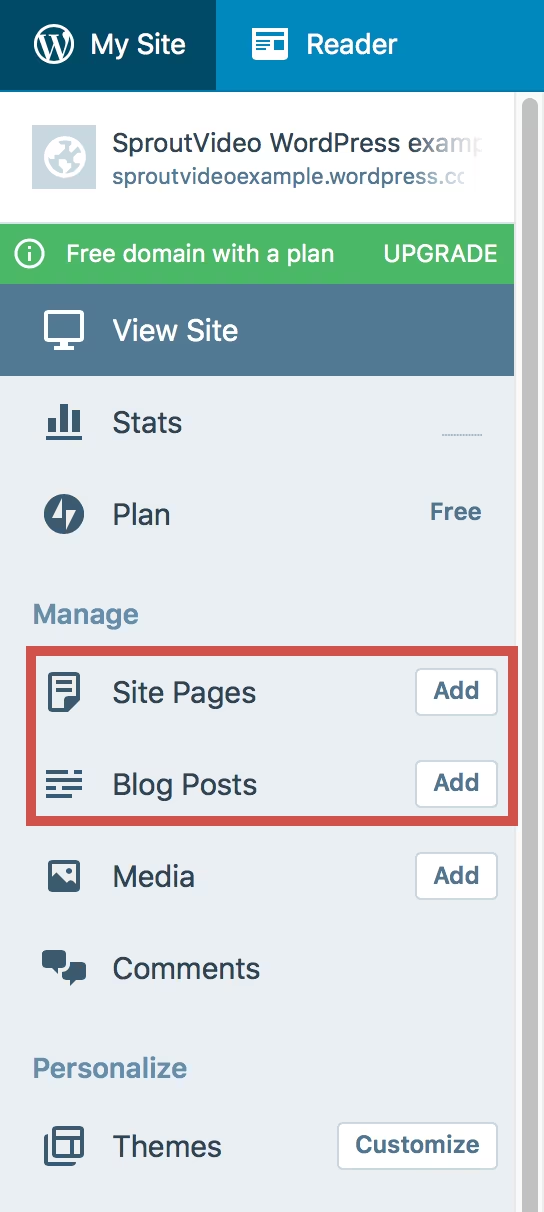
Navigate to your WordPress admin panel.
-
Select the ‘Add’ button next to ‘Site Pages’ or ‘Blog Posts.’

-
Build your page as you desire with a title and content.
-
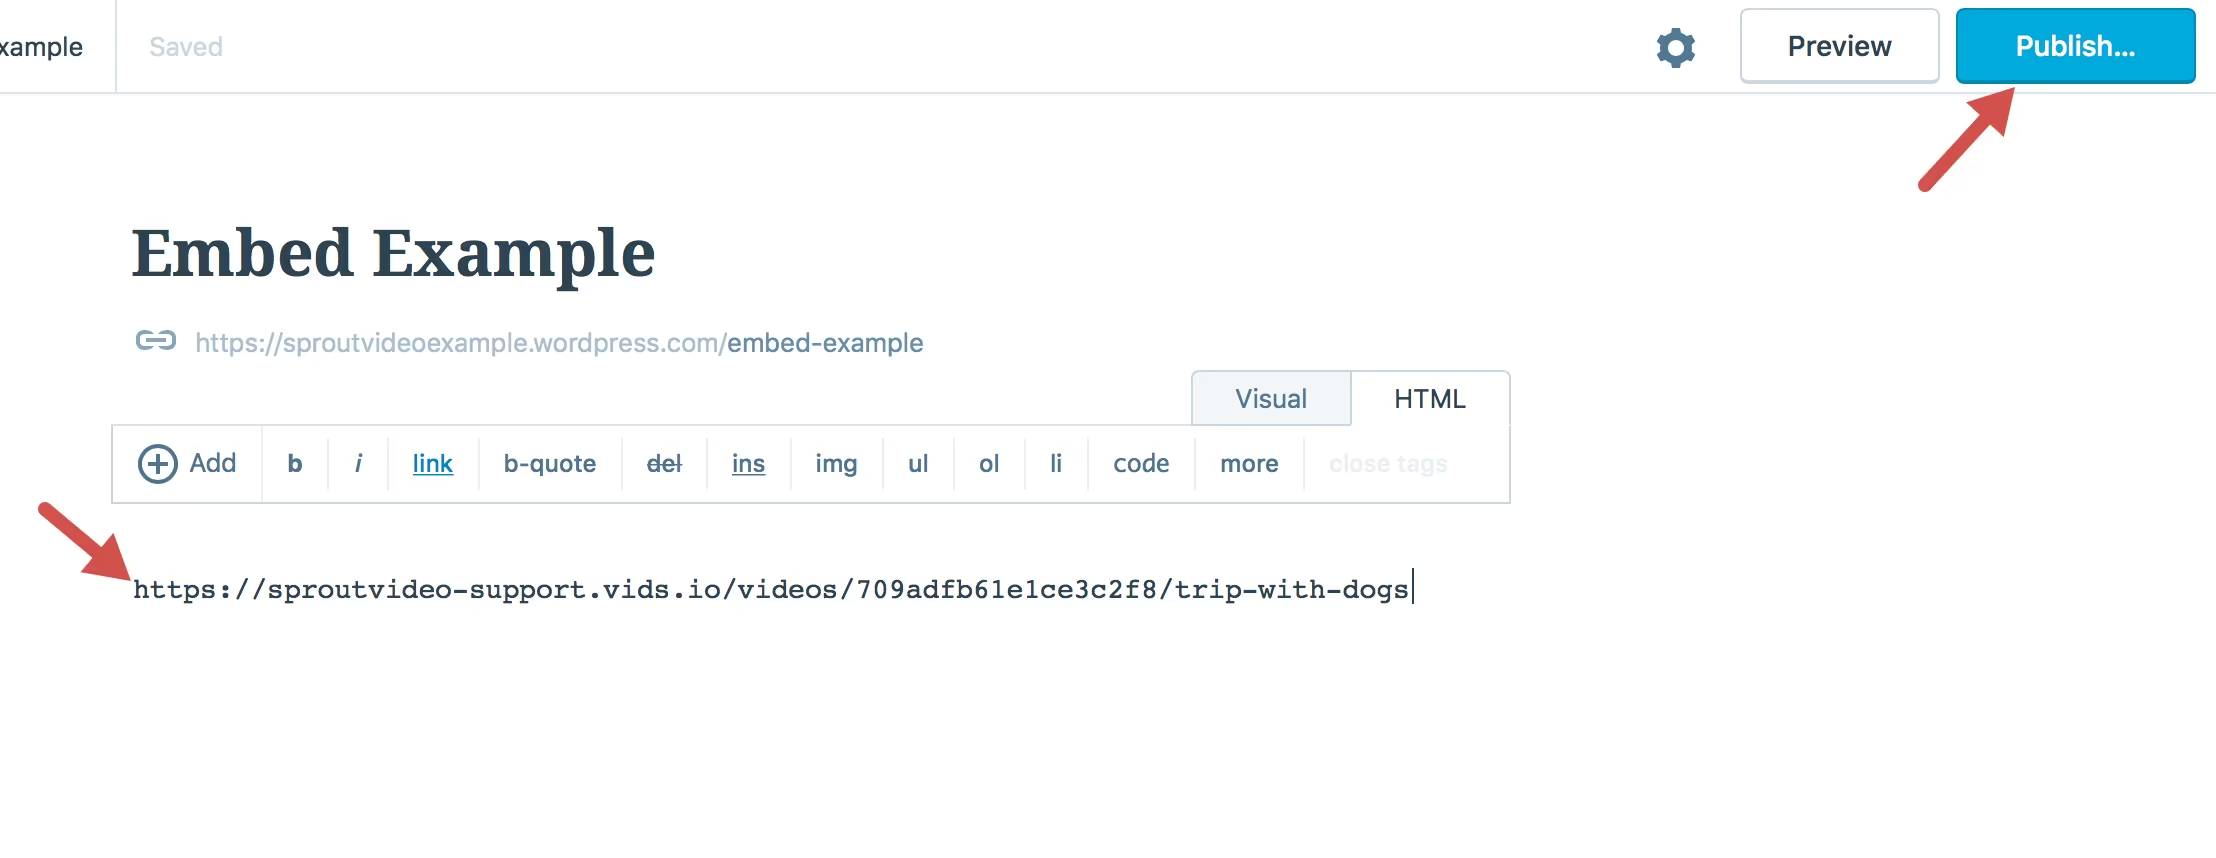
Copy the Share Video URL from your SproutVideo account and paste that into your WordPress post. Your video must be listed as Public at the time you create the post for this to work.

Note: If you’ve pasted the URL in the WordPress post before setting it to Public and the URL isn’t working, you will need to make a clone of your video in your SproutVideo account. Ensure that the cloned video is set to Public, copy the new Share Video URL and then paste the new URL in the WordPress post.
-
You can click ‘Preview’ to see what your page will look like or click ‘Publish’ to save your changes.
-
Once the post is Published you can change the privacy for the video back to your desired setting and it will continue to work on WordPress.


Other articles in the Embedding Videos and Live Streams section:
