DaVinci Resolve is a free, all-in-one video editing application that’s become increasingly common in professional workflows.
Many editors, including our own Nick LaClair, moved to Resolve after years of editing in other tools. We’ve previously examined what’s driving that shift and how Resolve compares with Premiere Pro.
Now, we’re excited to help you get started. This beginner-friendly tutorial will prepare any DaVinci Resolve newbie, whether you’re new to the software or video editing altogether.
In this episode on DaVinci Resolve, LaClair walks through the full video editing process:
- Get organized in the Media tab.
- Tell your story in the Edit tab
- Make it shine and export from Delivery.
DaVinci Resolve is available for free, making it easy for anyone to edit videos. From footage to finish, grab your clips and follow along.
Thank you to Redfitz Films for the footage used in this video.
10 Quick Tips for Beginners Editing in DaVinci Resolve
1. What Are The “Tabs” in DaVinci Resolve?

DaVinci Resolve has seven primary tabs at the bottom of the screen. Left to right, they contain the entire post-production process of making a video.
- Media: Organize assets (footage, audio, graphics, etc.)
- Cut & Edit: Tell the story; add effects
- Fusion: Motion graphics
- Color: Color grading
- Fairlight: Audio and mixing
- Delivery: Export project
The Cut and Edit tabs in DaVinci Resolve are spaces for editing video.
The main difference is that the Cut tab is ideal for short projects (such as social media shorts) and rough assemblies, while the Edit tab is the traditional editing workspace that’s ideal for complex projects.
2. Avoid the “Media Offline” Problem
A common DaVinci Resolve issue is the “Media Offline” problem. This error occurs when footage imported into Resolve is moved on your computer or external hard drive.
In other words, if the source location of your footage changes, the link in Resolve breaks.
To prevent this error, determine the folder or drive where you will permanently store your footage before bringing it into DaVinci.
To fix this issue, select one or more clips. Right-click the footage and hover over Clip Operations. Select Relink Selected Clips and find the footage’s new location.
3. Sync Video and Audio with Ease
If you record audio separately from your video, DaVinci Resolve makes it quick and easy to sync the audio with the video.
To do this,
- Select (control on a PC or command on a Mac) the audio and video clips you want to sync.
- Right-click and choose Auto Sync Audio, then Waveform.
Resolve will listen to each track’s audio and use it to align the waveforms. Once done, the footage automatically plays with the synced audio, simplifying your editing process.
4. Add Sound Effects with Resolve’s Built-in Library
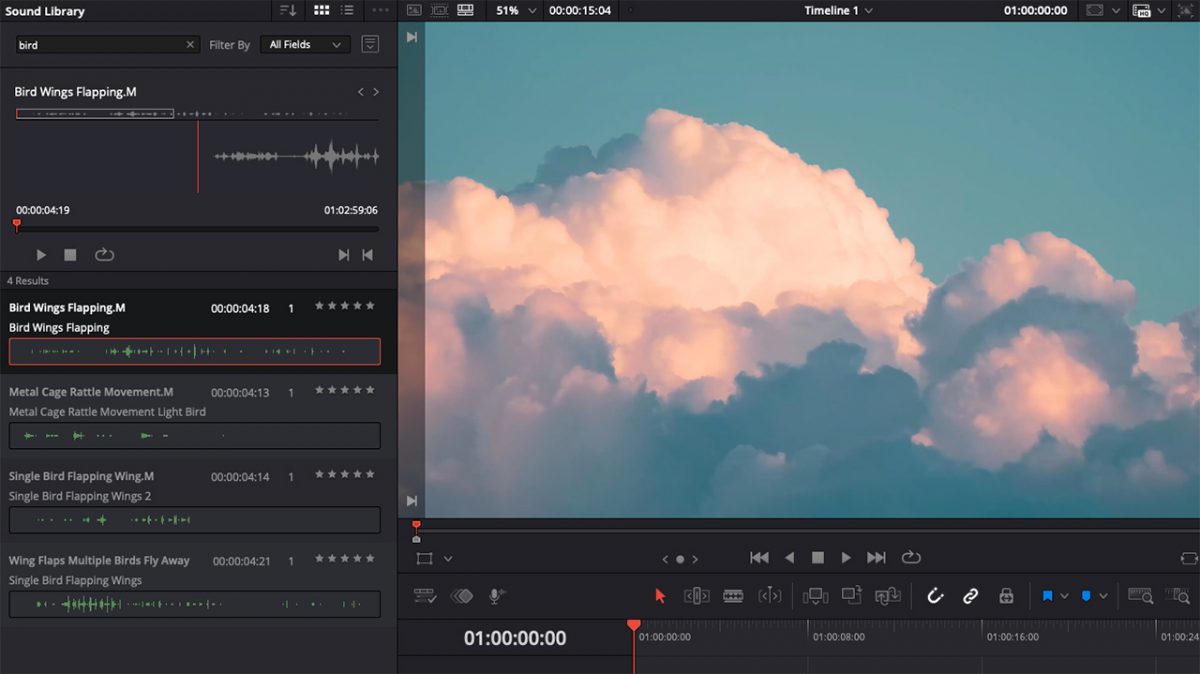
In the upper-left section of the Edit tab are various primary menus: Media Pool, Effects, Index, and Sound Library. When you open the Sound Library for the first time, the software prompts you to download it. Once downloaded, you can search for countless sound effects and easily drag them into your videos.
Pro Tip: Search three asterisks—”***”— to see all effects available in the Sound Library.
5. Gain Speed with Keyboard Shortcuts
One of DaVinci Resolve’s strengths is the ability to use your keyboard almost entirely in the editing process. Like learning the piano notes in a song, it takes some practice to bring them together. But once you do, editing goes much quicker, and you rarely need to use your mouse.
Additionally, if you’re switching from another software, like Premiere Pro, you can import your keyboard shortcuts and continue using them. For our tutorial, we’re using the default shortcuts. We also made a reference sheet (below) of all the shortcuts mentioned in the video above.
Basic Editing Keyboard Shortcuts
Use these to cut through your footage and find the parts you want.
- J: Back; increase play speed with additional taps.
- K: Stop
- L: Forward; increase play speed with additional taps.
- Space bar: Play and pause.
- I: Create In Point (begin a cut)
- O: Create Out Point (end a cut)
- F9: Insert cut footage into the timeline.
- Q: Toggles between the source and timeline views.
6. Scrub All Footage with Source Tape Viewer
If your project is large, selecting each clip individually can be a pain. In that case, you can choose the source tape viewer. When selected, the source viewer displays all your video files in a single stream. Source Tape Viewer makes it easy to go through and find your in and out points, which can be especially helpful when sorting through b-roll clips repeatedly.
7. Automate Video Parameters with Keyframes
Keyframes allow you to change a parameter over time. Want a slow punch in? Keyframe. Dramatic zoom? Keyframe. Motion graphics? You get the idea: there are keyframes for every parameter imaginable.
Let’s walk through the basics of using keyframes.
- Select the clip you want to edit. This opens the Inspector in the upper-right corner.
- Place your playhead where you want the parameter change to start.
- In the Inspector, locate the keyframes. They are the column of diamonds.
- Click on the keyframe diamond next to the parameter change you’re making, such as the zoom effect. This action adds a keyframe at the playhead for that parameter.
- Next, move your playhead to the place where you want the parameter change to occur. Add another keyframe by clicking the diamond again. Changing the parameters will also automatically create another keyframe.
Watch the video for more tips on keyframing in DaVinci Resolve.
8. Mass Apply A Change Across Multiple Clips
Let’s say you change the volume of one clip and want all or multiple other clips to also apply the same change. Here’s how.
- Select the clip you changed.
- Copy it with Ctrl + C (PC) or Command + C (Mac).
- Select all the clips you want to mimic that change and hit Alt + V (PC) or Option + V (Mac).
- A paste menu will pop up, allowing you to choose which parameters to apply across the clips. Select the parameters you wish to change.
Other attributes you can copy and paste include zoom, crop, equalizer, and many more.
9. Normalize Audio Levels Across Clips
DaVinci Resolve makes it easy to normalize audio levels, allowing you to even out clips with varying high and low volumes.
To do this,
- Select all clips in the Timeline, right-click, and choose Normalize Audio Levels.
- Choose your Normalization Mode. For most people, the differences don’t matter.
- Choose Independent, which normalizes each clip individually to create a consistent volume range throughout the video.
10. Auto Color Correct Your Video
In later episodes of our DaVinci Resolve for Beginners, we’ll cover color grading in depth. But here’s a quick beginner hack, and you don’t need to know anything about color grading to use it.
- From the Color tab, select a clip and hit the little “A” to auto color correct.
- Select all the other clips to apply the same color correction.
- Then right-click and select Apply Grade.
11. Quick Export Projects in the Edit Tab
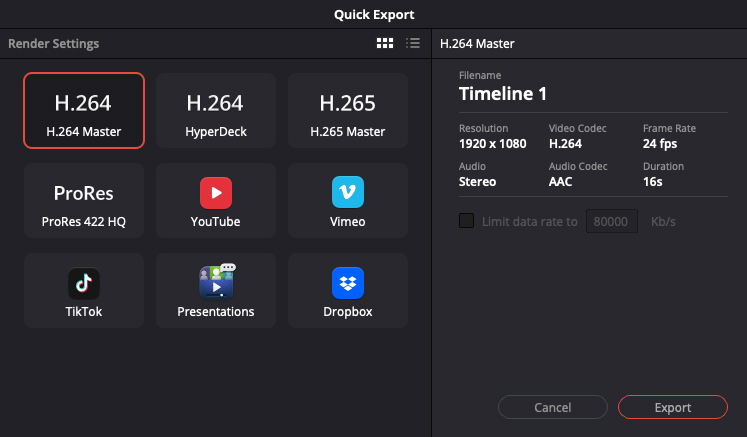
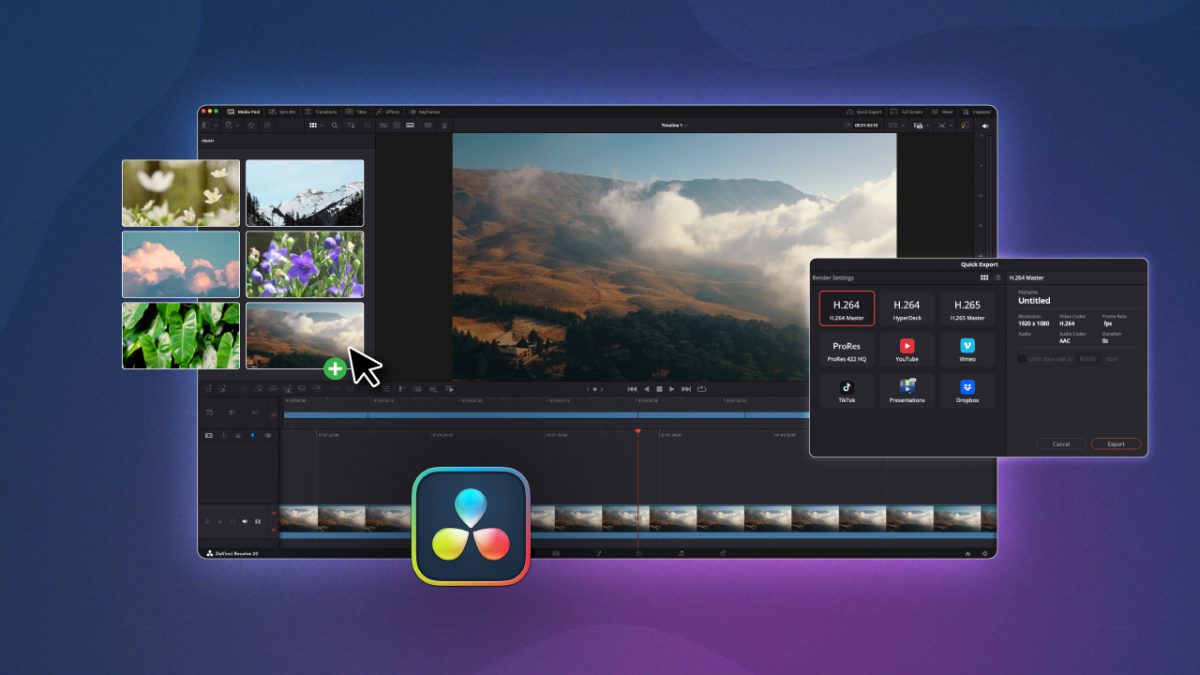
Quick Export lets you export your project without going through the delivery tab. Find the option within the upper right corner of the Edit tab.
The pop-up window lets you quickly choose your render settings (H.264 Master is a good place to start, but there are many presets as well), add a filename, and export to your computer or hard drive.
You’re Ready to Edit In DaVinci Resolve
Whew. That was a lot to cover! But now you’ve walked through the core process of editing in DaVinci Resolve, from organizing media to exporting the final product. As you keep practicing, these steps will become second nature.
If you have questions, tips of your own, or want to see specific topics covered in future tutorials, we’d love to hear from you. See you next time!