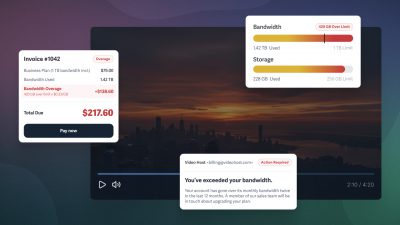
Ever wish our player had really customized controls, or a specialized design? Using our Javascript Player API, it’s very easy to create your own unique user interface for your videos.
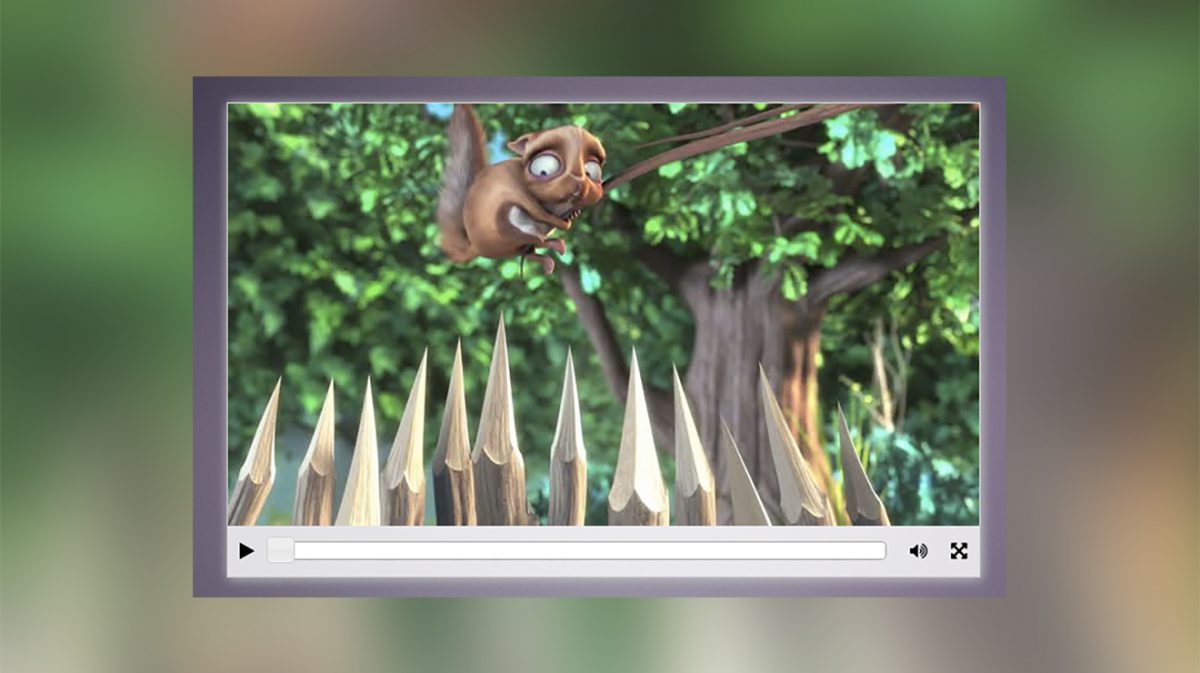
Here is a quick example using JQuery UI to help demonstrate the possibilities. Before we get started, here is what we’re going to build.
Step 1: Set up the embed code
The first thing you’ll need to do is set up your embed code so that it hides all of the SproutVideo UI around the player. To do that, open the video in question, navigate to Customizations, and use the “In-Line” option. Under “Pre-Play Settings,” check the box “Show Controls,” and under “Visible Player Controls,” check “Hide All Controls.”
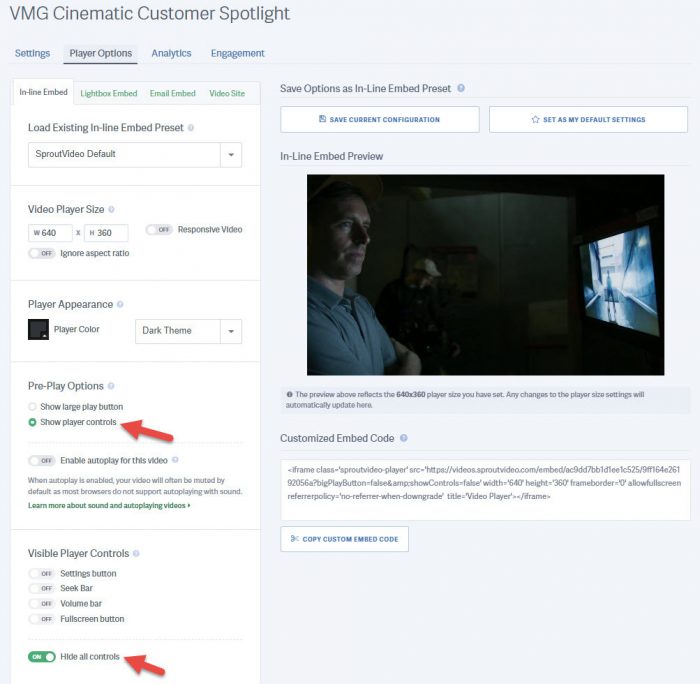
Grab your new embed code by clicking in the “Customized Embed Code” box, or using the “Copy Embed Code” button underneath it.
Step 2: Setup our dependencies.
To easily interact with the SproutVideo API and create our UI, we’ll use JQuery and JQuery UI. This will make building things like our progress bar far easier.
Add the two libraries to the head of your HTML document, along with the default JQuery UI theme stylesheet. We’re also going to add the excellent Font Awesome web font. This web font has tons of great icons and will make adding things like play, pause, fullscreen and volume buttons a breeze without having to create any images.
Lastly, we need to add the SproutVideo Javascript API. Here is what our <head> section looks like now:
<head>
  <script type="text/javascript" src="https://code.jquery.com/jquery-1.9.1.js"></script>
  <script type="text/javascript" src="https://code.jquery.com/ui/1.10.2/jquery-ui.js"></script>
  <link rel="stylesheet" href="https://code.jquery.com/ui/1.10.2/themes/smoothness/jquery-ui.css">
  <link rel="stylesheet" href="https://cdnjs.cloudflare.com/ajax/libs/font-awesome/3.0.2/css/font-awesome.min.css">
  <script type="text/javascript" src="https://c.sproutvideo.com/player_api.js"></script>
</head>
Step 3: Set up UI containers
We’re going to create a very basic player in this example and include the following controls:
- A play / pause button
- A progress bar that allows the viewer to seek within the video
- A volume on / off button
- A full screen button
Let’s set up our HTML:
<body>
	<div class="player">
		<div class="video">
			<iframe class='sproutvideo-player' type='text/html' src='https://videos.sproutvideo.com/embed/709adcb31f19e5c6f8/cd8cf2e796aa69d3?noBigPlay=true&showcontrols=false' width='100%' height='100%' frameborder='0'></iframe>
		</div>
		<div class="toolbar">
			<div class="control play-pause"><a href="#"><i class="icon-play"></i></a></div>
			<div class="progress-container">
				<div class="progress"></div>
			</div>
			<div class="control fullscreen"><a href="#"><i class="icon-fullscreen"></i></a></div>
			<div class="control volume"><a href="#"><i class="icon-volume-up"></i></a></div>
		</div>
	</div>
</body>
OK, so now we’ve set up all of our necessary UI elements for our player and gave them reasonable class names so we can easily access them in javascript and style them. Here is what it looks like now.
Next, lets set up our progress bar:
$('.progress').slider({
	value: 0,
	orientation: "horizontal",
	range: "min",
	animate: true
});
Great. Now we have a progress bar but everything looks like a mess. Let’s make things a little more attractive.
.player {
width: 640px;
height: 403px;
position: relative;
margin: 50px auto;
}
.video {
position: absolute;
left: 0;
right: 0;
top: 0;
bottom: 43px;
}
.control {
float: left;
padding: 0 10px;
}
.toolbar {
position: absolute;
left: 0;
right: 0;
bottom: 0;
padding: 13px 0 13px;
}
.control a {
text-decoration: none;
color: #000000;
}
.progress-container {
position: absolute;
left: 43px;
right: 79px;
width: auto;
}
.volume, .fullscreen {
float: right;
}
Now this is starting to look like an actual video player. Now we just have to start hooking up the UI to the actual player.
Step 4: Hooking up the UI to the Javascript API
The next thing we need to do is create an instance of the SproutVideo player in our javascript and set it up to listen for the appropriate events and set up some state variable:
var _duration = 0, _playing = false, _volume = 1, _fullscreen = false;
var videoPlayer = new SV.Player({videoId: '709adcb31f19e5c6f8'});
videoPlayer.bind('ready', function(event){
_duration = event.data.duration;
$(".progress").slider("option", "max", _duration);
});
videoPlayer.bind('progress', function(event){
$('.progress').slider("option", "value", (event.data.time));
});
videoPlayer.bind('pause', function(event){
_playing = false;
$('.play-pause i').removeClass('icon-pause').addClass('icon-play');
});
videoPlayer.bind('play', function(event){
_playing = true;
$('.play-pause i').removeClass('icon-play').addClass('icon-pause');
});
videoPlayer.bind('volume', function(event){
_volume = event.data;
if (_volume == 1) {
$('.volume i').removeClass('icon-volume-off').addClass('icon-volume-up');
} else if (_volume == 0) {
$('.volume i').removeClass('icon-volume-up').addClass('icon-volume-off');
}
});
Now our UI will properly respond to the events from the Javascript player API. Try clicking on the poster frame in the example and you’ll see that the progress bar updates!
You’ll notice that we set the “max” value of our slider to the duration of the video that we get from the “ready” event. This helps us get nice, smooth, updates on our progress bar once every second, and it’ll make seeking that much easier as well.
Next, we set the “value” option for our slider to the current second value from the “progress” event from the API. This updates our progress bar position. We also toggle the class of our play / pause and volume on / off buttons based on the events from the API. Now it’s time to make our buttons and progress bar interact with the player:
$('.play-pause a').click(function(){
if (!_playing) {
videoPlayer.play();
} else {
videoPlayer.pause();
}
});
$('.volume a').click(function(){
if (_volume == 0) {
_volume = 1;
} else {
_volume = 0;
}
videoPlayer.setVolume(_volume);
});
$('.fullscreen a').click(function(){
var elem = $('.player')[0];
if (!_fullscreen) {
if (elem.requestFullscreen) {
elem.requestFullscreen();
} else if (elem.mozRequestFullScreen) {
elem.mozRequestFullScreen();
} else if (elem.webkitRequestFullscreen) {
elem.webkitRequestFullscreen();
}
_fullscreen = true;
} else {
if (document.exitFullscreen) {
document.exitFullscreen();
} else if (document.mozCancelFullScreen) {
document.mozCancelFullScreen();
} else if (document.webkitCancelFullScreen) {
document.webkitCancelFullScreen();
}
_fullscreen = false;
}
});
As you can see above, we’ve bound the click event on play/pause button to tell our player object to play or pause the video based on the currently playback state stored in our _playing variable. Next up, we toggle the volume on and off based on the _volume state variable. Finally we handle entering and exiting fullscreen mode. Since there isn’t a universal method for doing this yet, we use feature detection to use the browser specific methods and keep track of the state in our _fullscreen state variable.
Lastly, we just need to allow dragging our progress bar to seek within the video:
$('.progress').slider({
value: 0,
orientation: "horizontal",
range: "min",
animate: true,
slide: function(event, ui) {
videoPlayer.seek(ui.value);
}
});
To do that, we’ve just added a new slide parameter when initializing our slider. This function is called every time the user changes the value of the slider either by dragging or clicking on it. Since we set the maximum value of the slider to be the total duration of our video, each step of the slider represents one second. The ui.value parameter represents the newly selected value of the slider and that will be equivalent to the second in the video to which we’d like to seek. Therefore we can directly pass that video to the seek function of our player object to seek to that second in the video.
With that final step, we’re all done building our quick and dirty custom video player. After adding a few minor css touches, here is the final result.
While this is just a quick example, it should give you an idea of what’s possible. So, get out there and start building your own custom players! If you’ve built one you’re proud of, or if you have any questions about using the API, let us know in the comments below!