InPlayer is a paywall provider that can be used to protect video content hosted by SproutVideo. In just a few easy steps, you can implement InPlayer for any video hosted on SproutVideo and start charging viewers for access.
InPlayer supports both Pay Per View (PPV) and Subscription pricing options. This article will walk you through setting up both.
Getting Started
To get started, you’ll need an InPlayer account, a SproutVideo account, and at least one video uploaded to your SproutVideo account. You’ll also need a website where you can embed your video content - almost any website hosting provider will work for this purpose.
SproutVideo Settings to Use
Navigate to your SproutVideo account, and do the following:
-
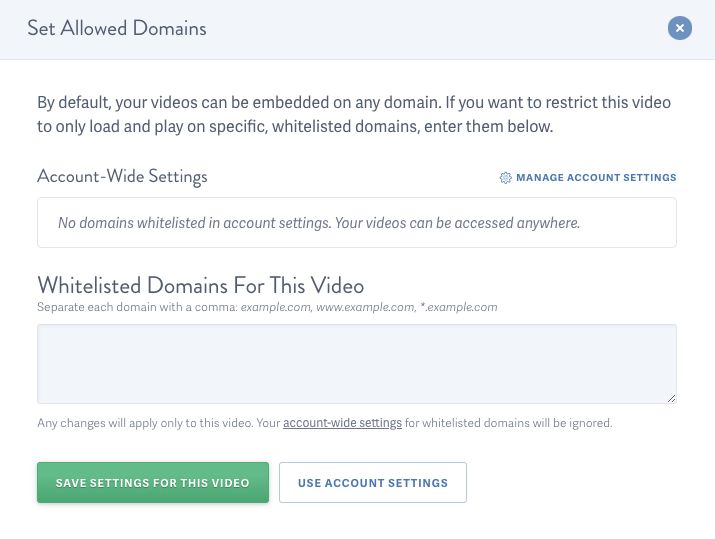
Enable Allowed Domains for your video. Enter your website domain name, or the specific URL where your video will be located. This will ensure your video embed code only works on your website.
-
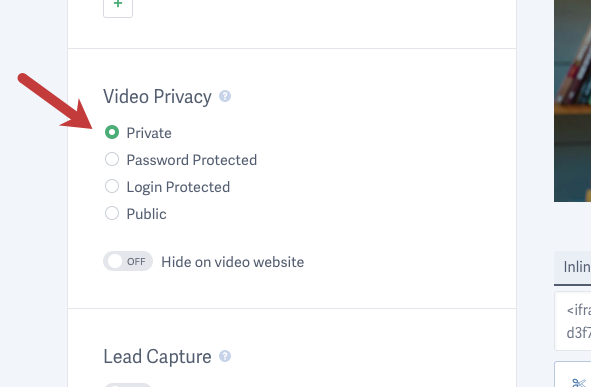
Ensure your video is set to private. Private videos only appear where they are embedded.
Creating Assets in InPlayer
Now that you’ve uploaded a video and adjusted its settings, you’re ready to use that video to create an asset in your InPlayer account. InPlayer will wrap that asset in their own embed code, which requires viewers to complete a purchase before the SproutVideo embed code will load and become playable.
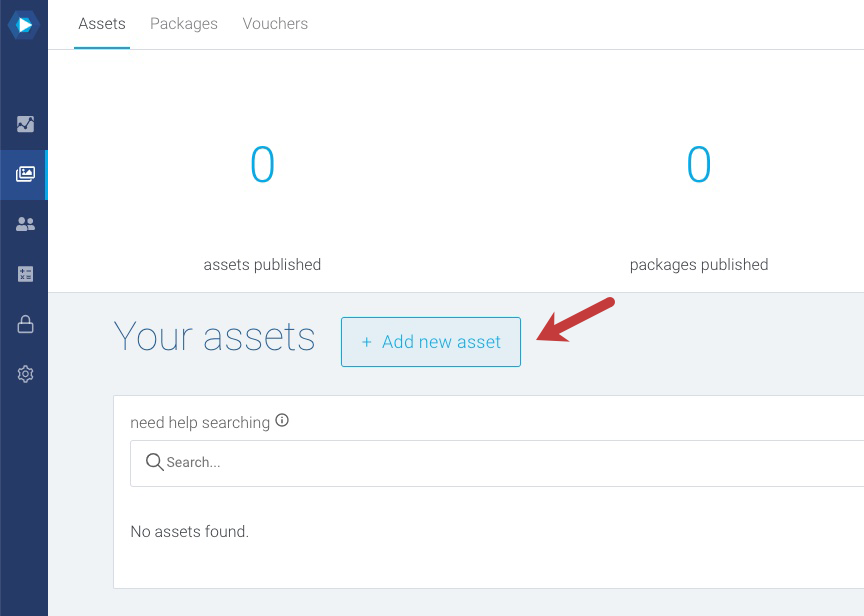
Log into InPlayer, and navigate to Assets on the left-hand side of the screen. Click “Add New Asset” to begin setting up your video for monetization.
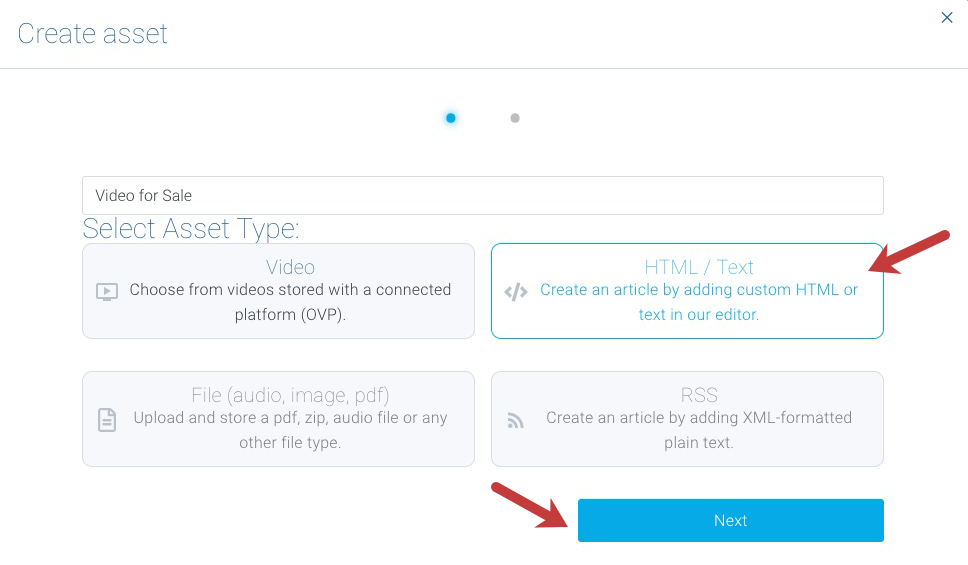
Enter the name for your video and select the HTML / Text option, then click Next.
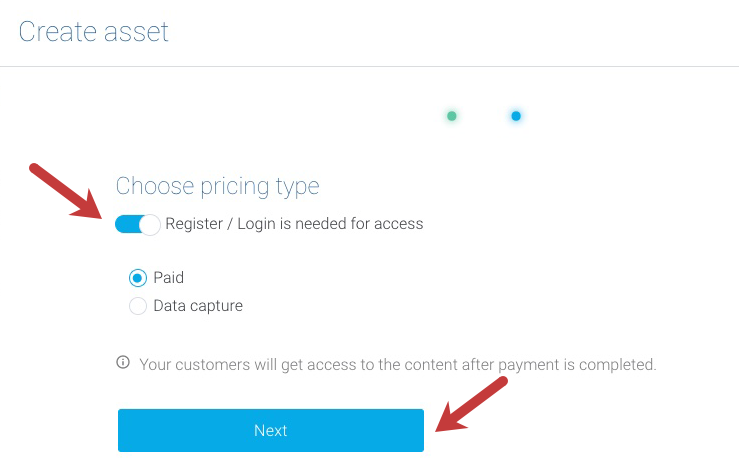
Set the Pricing Type to “Register/Login Needed for Access”, select “Paid” and then click Next.
Now, you have to describe the video you are planning to sell. Enter the video title, description, and edit the button label if you wish. Add an attractive poster frame that will catch viewer attention.
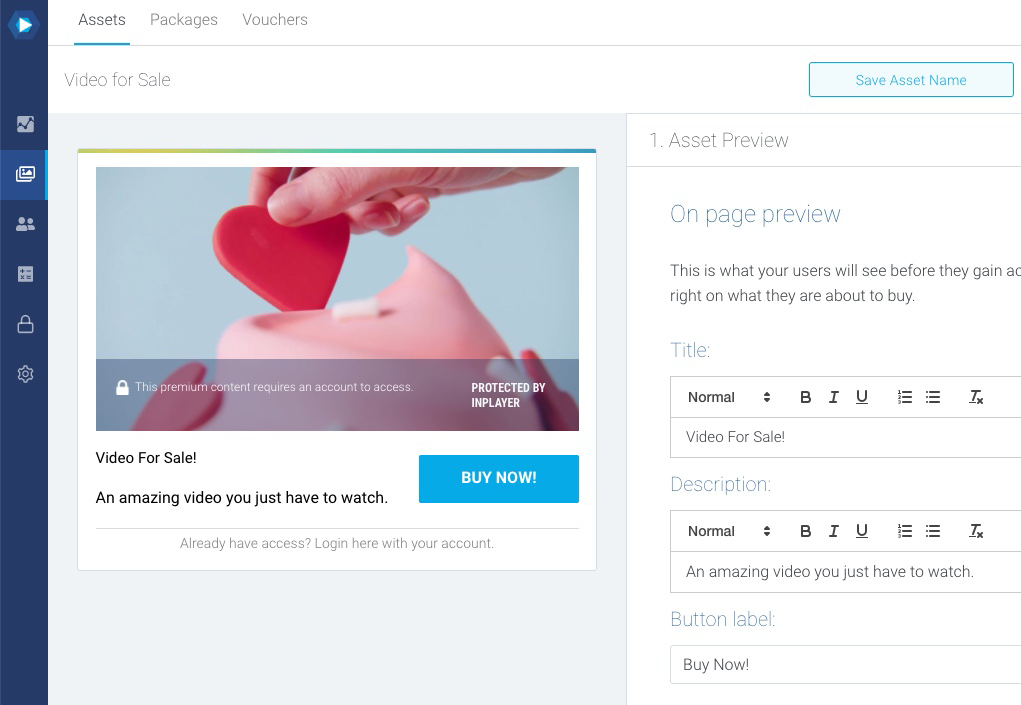
If you need an image, you can use the SproutVideo poster frame picker to grab any frame from your video. Simply select the frame you want, and then right click (command click on a Mac) to save the image to your computer. Then, you can upload it to InPlayer.
Once your asset is configured in InPlayer, click Save.
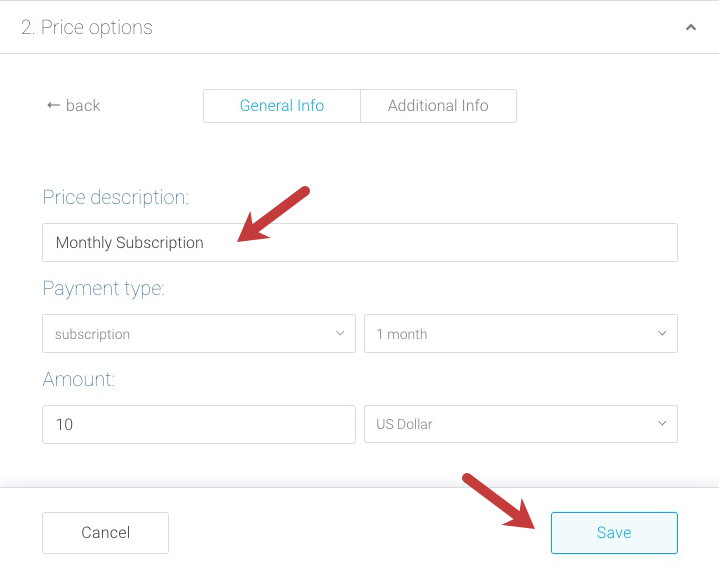
Under Price Options, select “Monthly Subscription” or PPV for pay-per-view, pick a timeframe for the subscription or PPV access, set the price and the currency, and click Save.
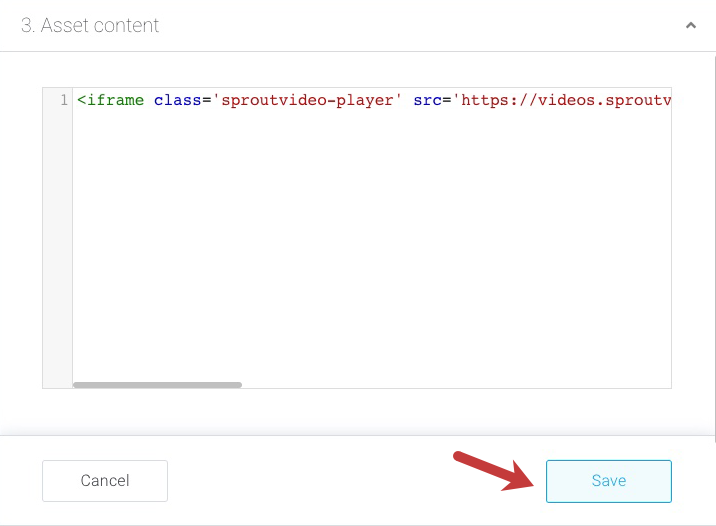
For the Asset Content, copy the embed code from your SproutVideo account for the video you are monetizing. Paste it into the corresponding field in InPlayer, then click Save.
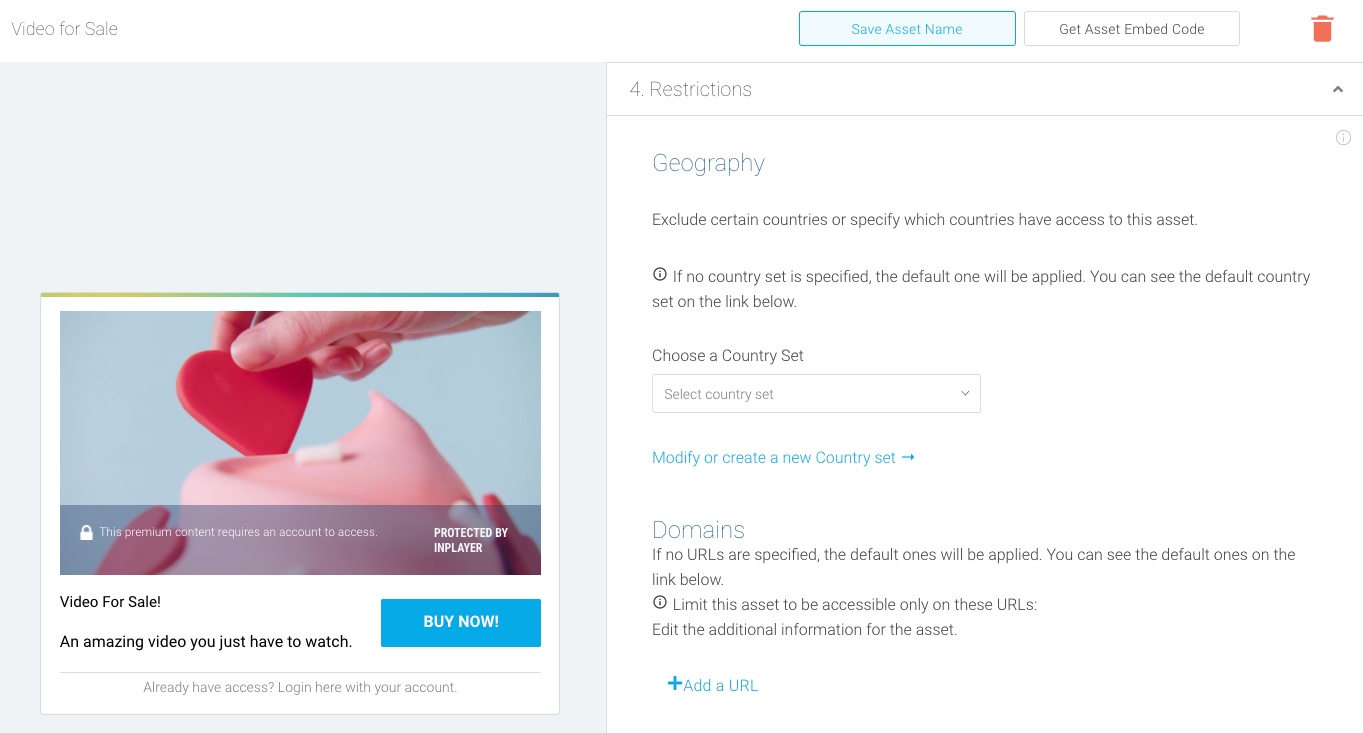
Add any restrictions you might need to implement through InPlayer.
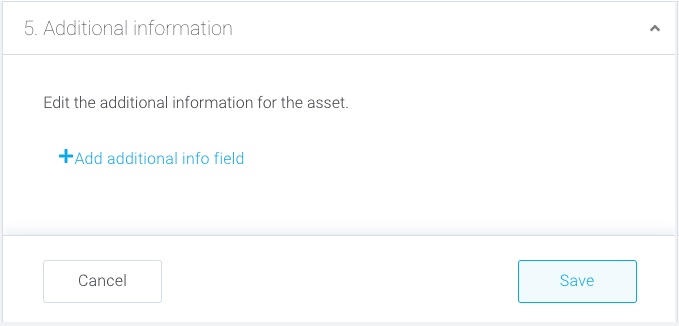
Finally, enter any additional information you’d like to include for your video asset (optional) and click Save.
Start Selling
You are ready to embed your monetized video! Click “Get Asset Embed Code,” be sure to select your payment terms (whether PPV or subscription) from the “Preselected Price” drop down, and copy the InPlayer Scripts and the InPlayer Embed Code. Paste them to the webpage where you would like your monetized video to appear.
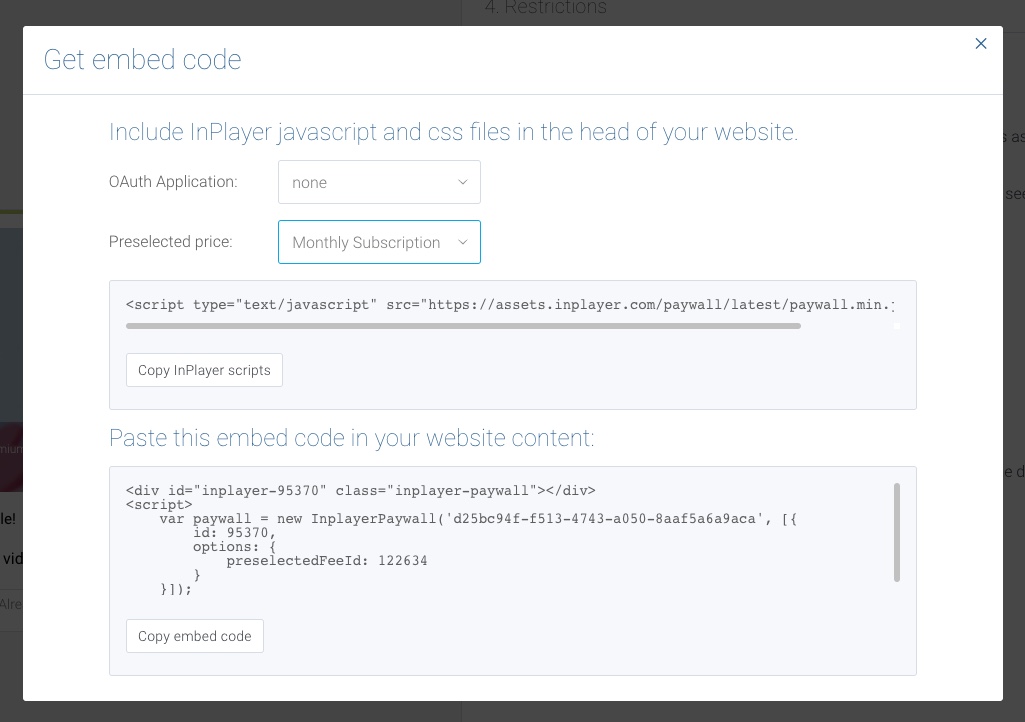
Note that although InPlayer recommends placing the script in the header of your website, you can also add it to the HTML of the page or post where the embed code is located. If you are using WordPress, you may want to use a plugin instead of editing the header.php file directly.
Once your page or post is edited to your specifications, publish it and start promoting your content!
Other articles in the Selling Videos section:
- How to Monetize Your Videos With SproutVideo
- How to Sell Your Videos with SproutVideo and MemberPress
- How to Sell Your Videos with Cleeng and SproutVideo
- How to Sell Your Videos with LearnDash and SproutVideo
- How to Sell Your Videos on Squarespace with MemberSpace and SproutVideo
- Adding Videos to a Shopify Listing


