
Creating and selling subscription video courses is quick and easy with SproutVideo, WordPress, and LearnDash. This article covers how to start selling videos with SproutVideo and LearnDash.
Getting Started
Before you get started, you’ll need a SproutVideo account, a WordPress website, and a LearnDash account. You’ll also want to have uploaded at least one video to test with.
There are seven steps to this process:
- Configure video settings within your SproutVideo account.
- Install LearnDash to your WordPress account.
- Select and install a payment processor (PayPal, Stripe, 2Checkout, or WooCommerce).
- Setup User Registration (only if you are not using WooCommerce).
- Create Courses.
- Add Lessons to your courses, and embed your videos.
- Start selling your courses!
1. SproutVideo Settings to Use
Navigate to your SproutVideo account, and do the following:
-
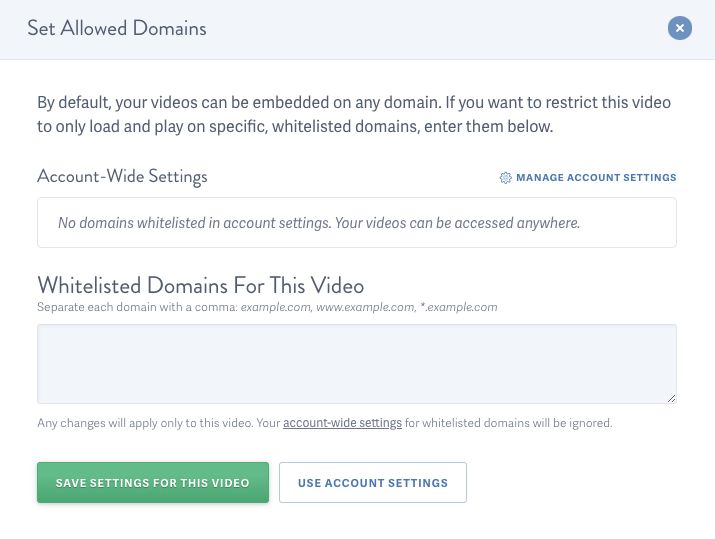
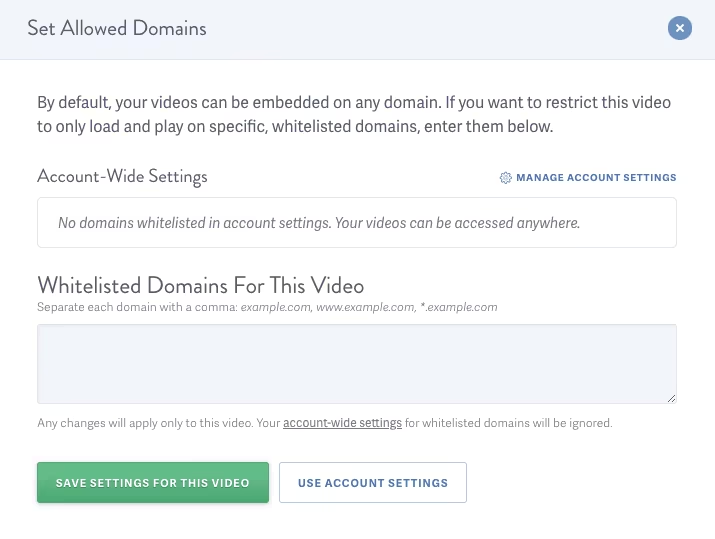
Enable Allowed Domains for your video. Enter your website domain name, or the specific URL where your video will be located. This will ensure your video embed code only works on your website.
-
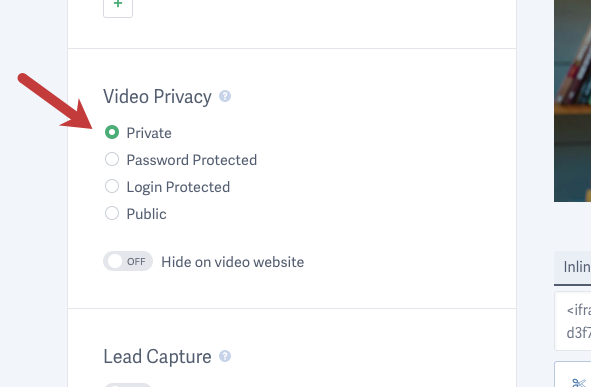
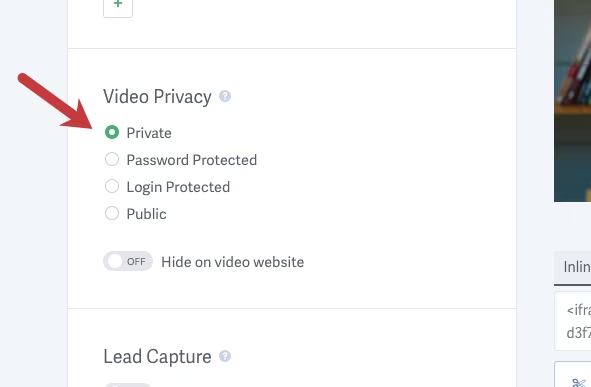
Ensure your video is set to private. Private videos only appear where they are embedded.
2. Installing LearnDash
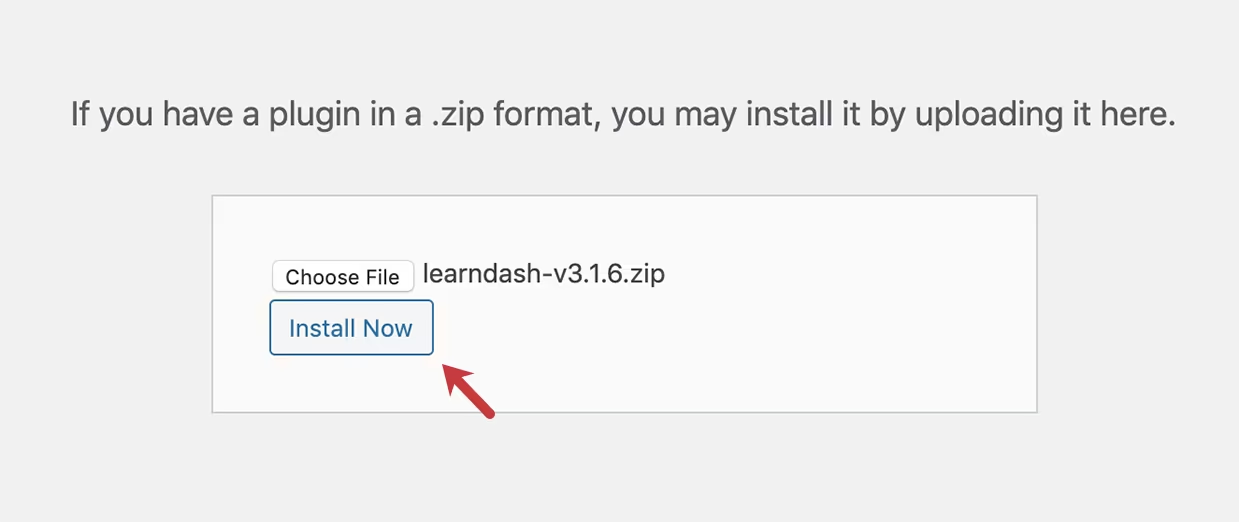
Log into WordPress, upload the LearnDash zip file, and follow the instructions to install and activate the LearnDash plugin.
3. Select and Configure a Payment Processor
Once LearnDash is activated, you can now begin creating your courses and lessons. You’ll be able to process payments with built-in support for PayPal, Stripe, and 2Checkout, or configure LearnDash to work with WooCommerce.
NOTE: You’ll need to have a Paypal, Stripe, or 2Checkout account to use one of these options as your payment processor. Skip to the instructions for your preferred payment processor.
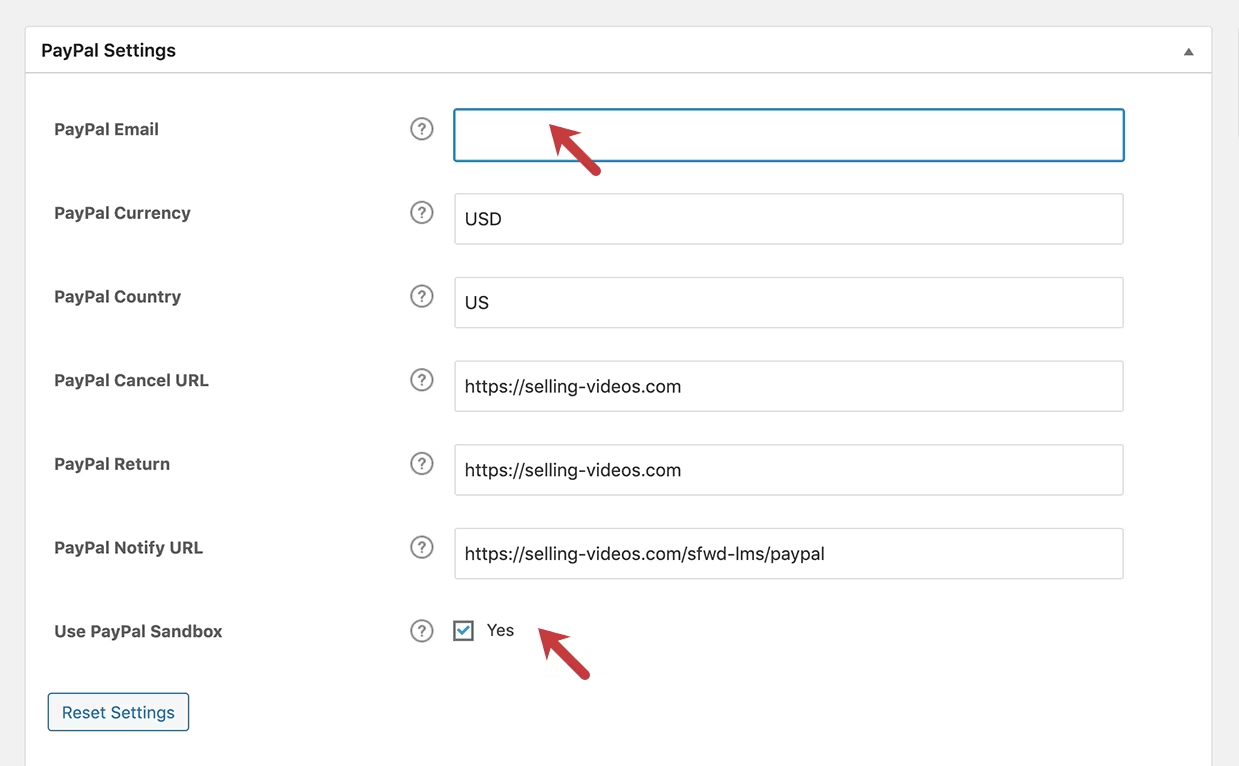
PayPal Setup
Navigate to Settings in the LearnDash LMS menu within WordPress, and select PayPal Settings. Enter your PayPal email address to enable payments, and complete the other fields. Use the sandbox for testing once your courses are completely set up.
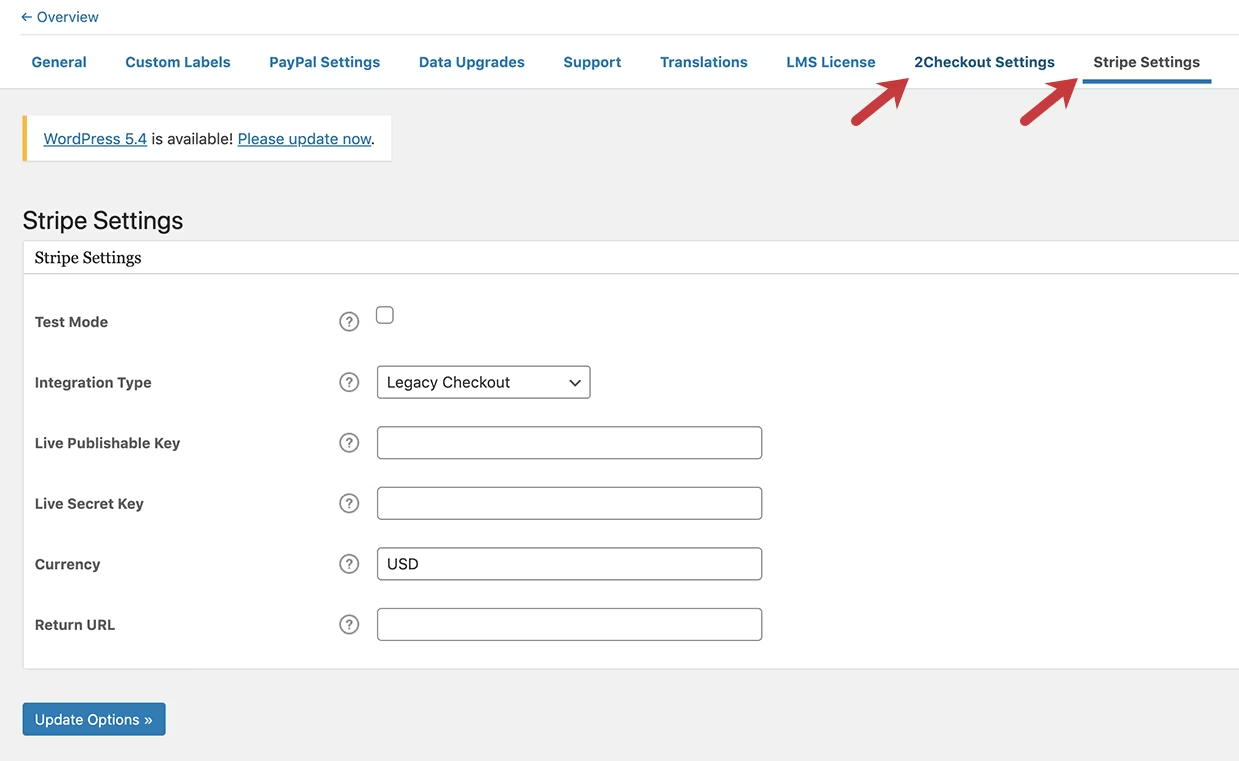
Stripe and 2Checkout Setup
To integrate either Stripe or 2Checkout, navigate to the LearnDash LMS Add-ons section and select one of these add-ons.
Once activated, navigate to settings, and input the required information for these payment gateways.
WooCommerce Setup
If you’d like to sell your courses in your WooCommerce store, the setup is a bit different. You’ll already need to have WooCommerce installed on your WordPress site to get started.
- In the LearnDash LMS menu in WordPress, navigate to the Add-ons section and select, install, and activate the WooCommerce for LearnDash add-on.
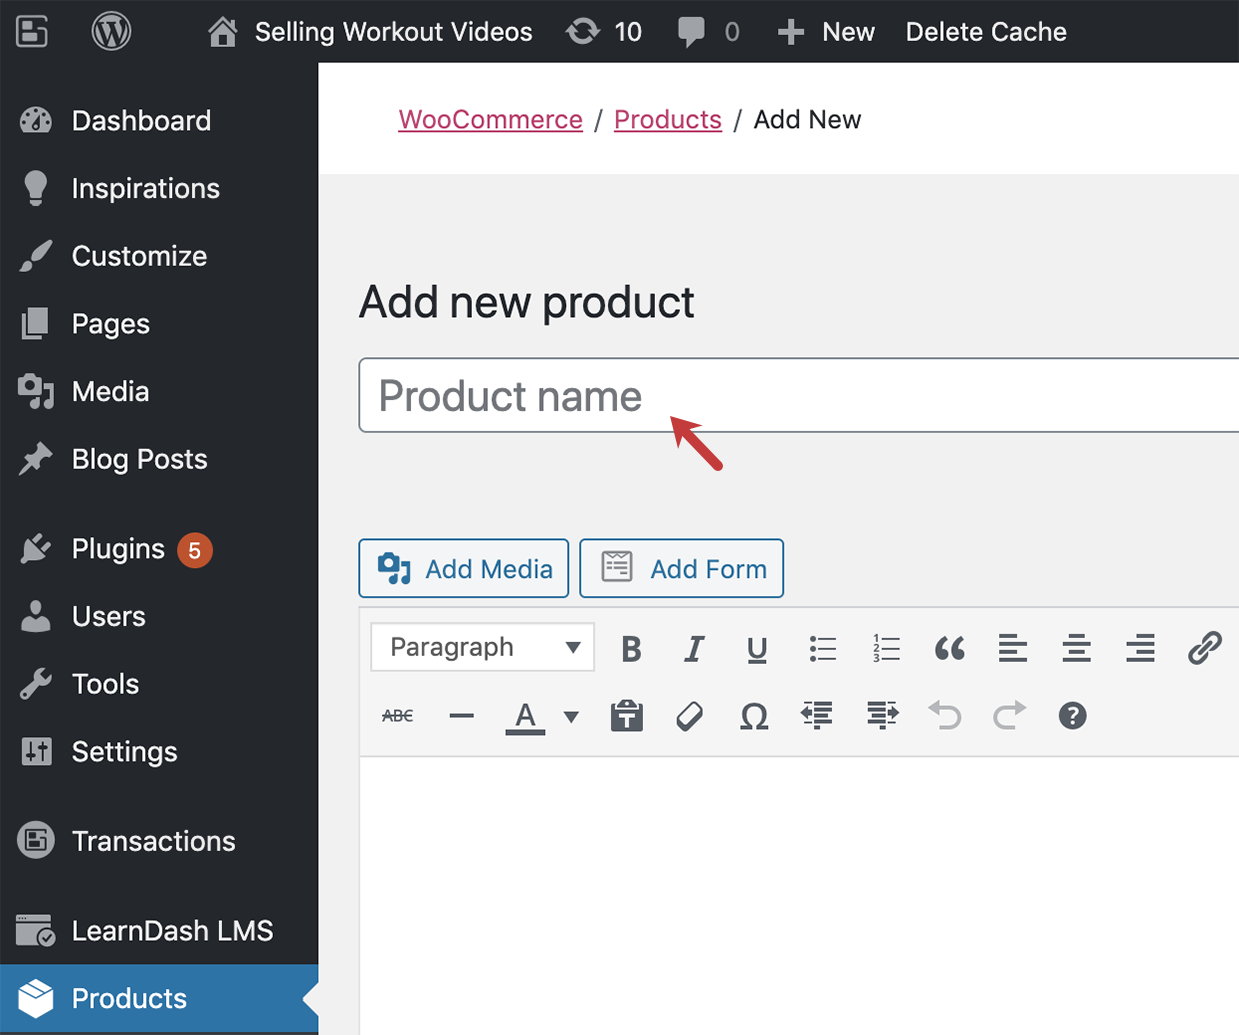
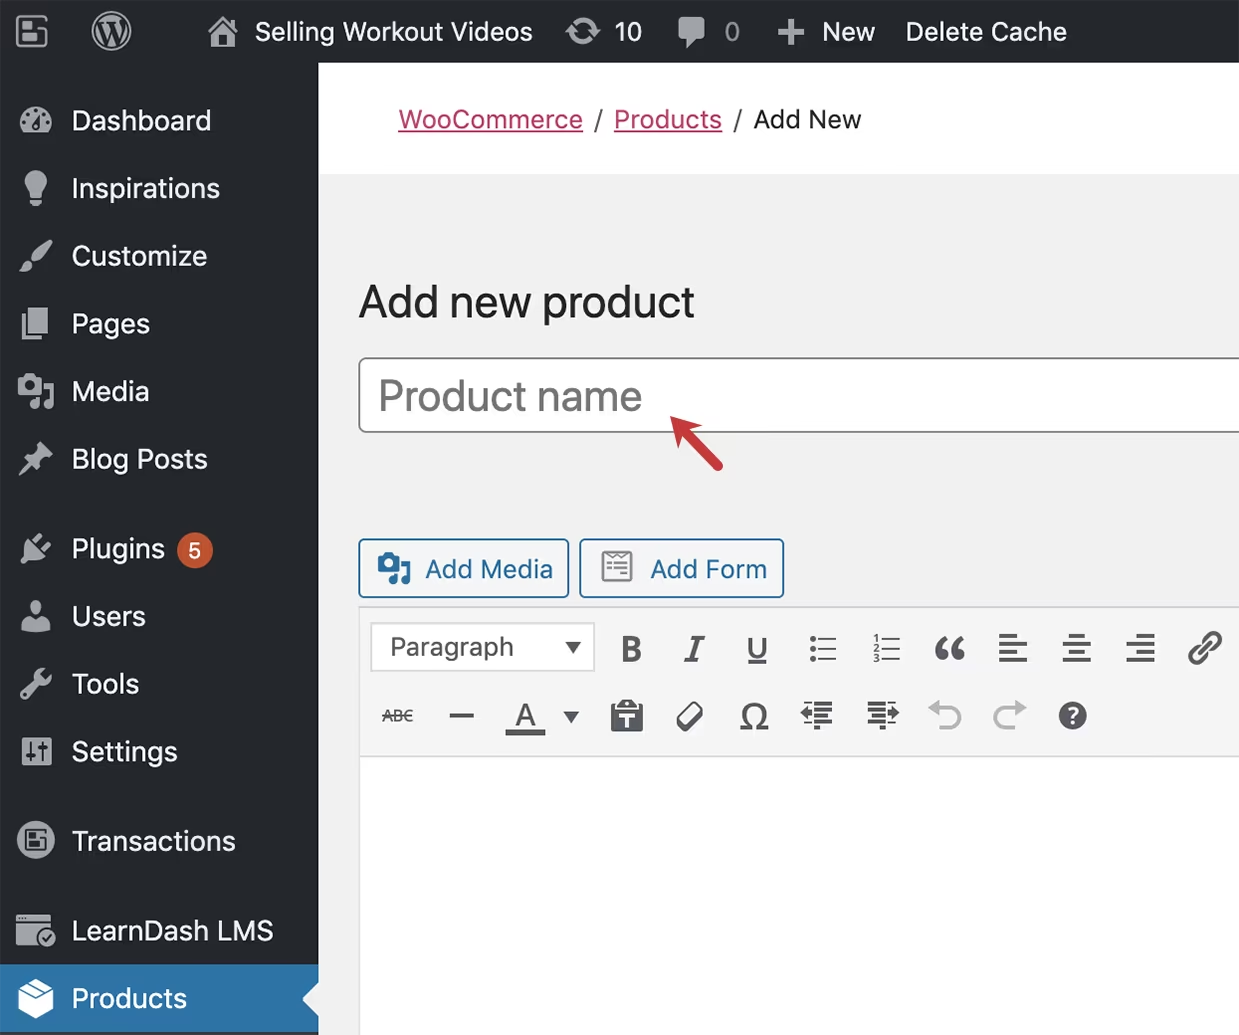
- At this point, you’ll be able to create a new product for your course. Enter the name and description of your course, then scroll to Product Data.
- In Product Data, change the Simple Product drop-down to Course, add a Regular Price, then, select the Related Course in that drop-down menu. Lastly, add a Product Image.

- When a user purchases this product, they will be registered and enrolled in that course.

NOTE: You can skip Step 4. if you are using WooCommerce with LearnDash.
4. User Registration Setup
- Navigate to the Settings tab in the LearnDash LMS menu within WordPress.
- On the General tab, change the LearnDash Theme to LearnDash 3.0
- Customize the registration pop-up to match your branding and upload a logo.
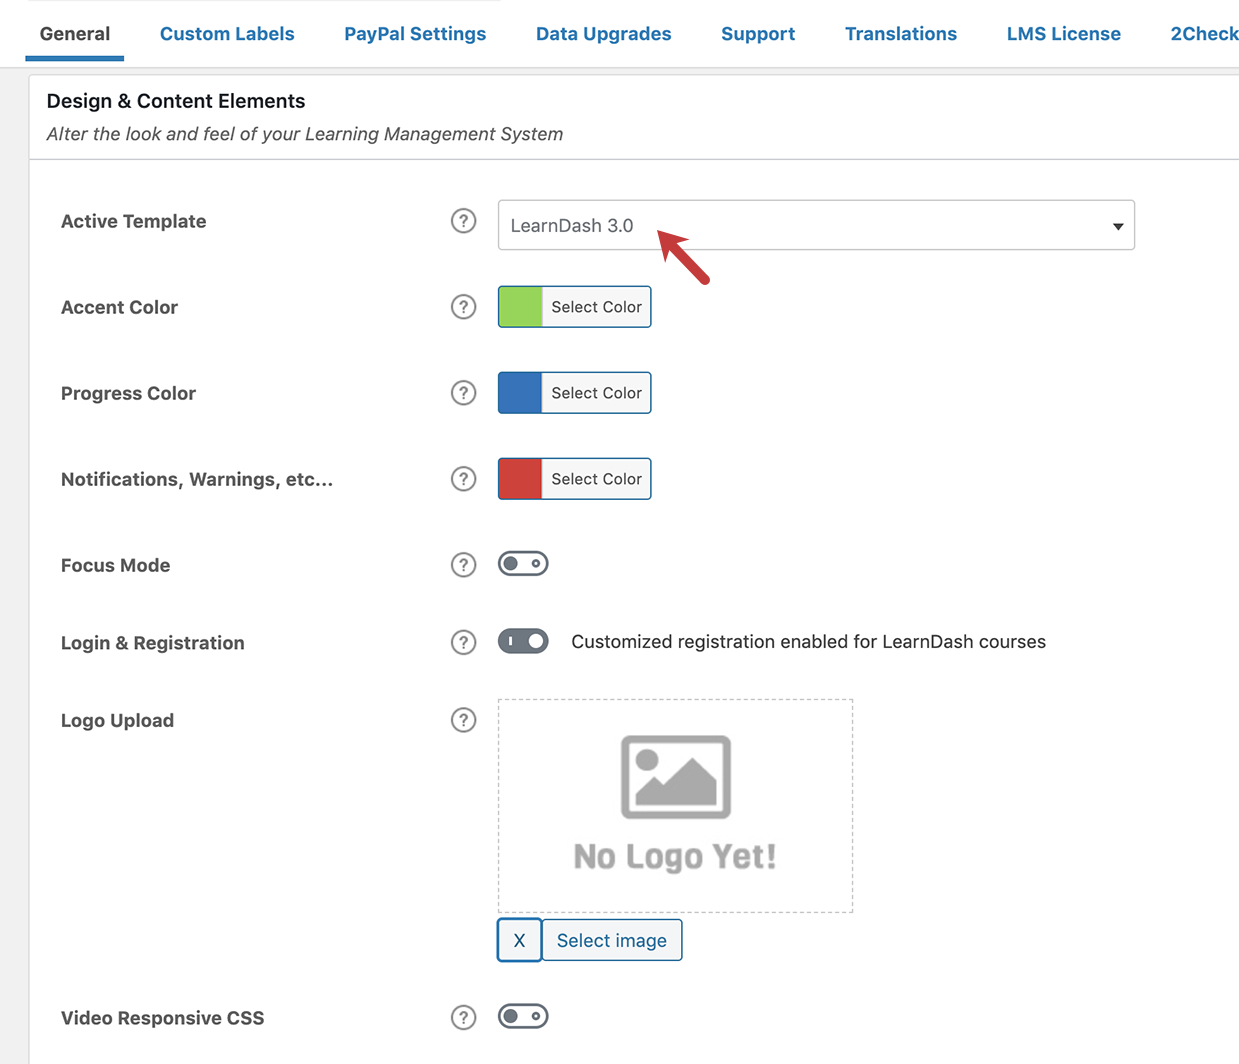
- Be sure to select Login & Registration, which will activate the LearnDash template to be used for user login and registration. Saving your settings will activate user registration.

5. Creating Courses
With LearnDash, you can create Lessons that house the videos you want to sell. Each Lesson has to be associated with a Course. The Course is the level at which people will register and pay for your Video Lessons.
Before you can create a Lesson, where your video will be embeded, you need to create a Course. This is where you will add a description and set the price or membership level.
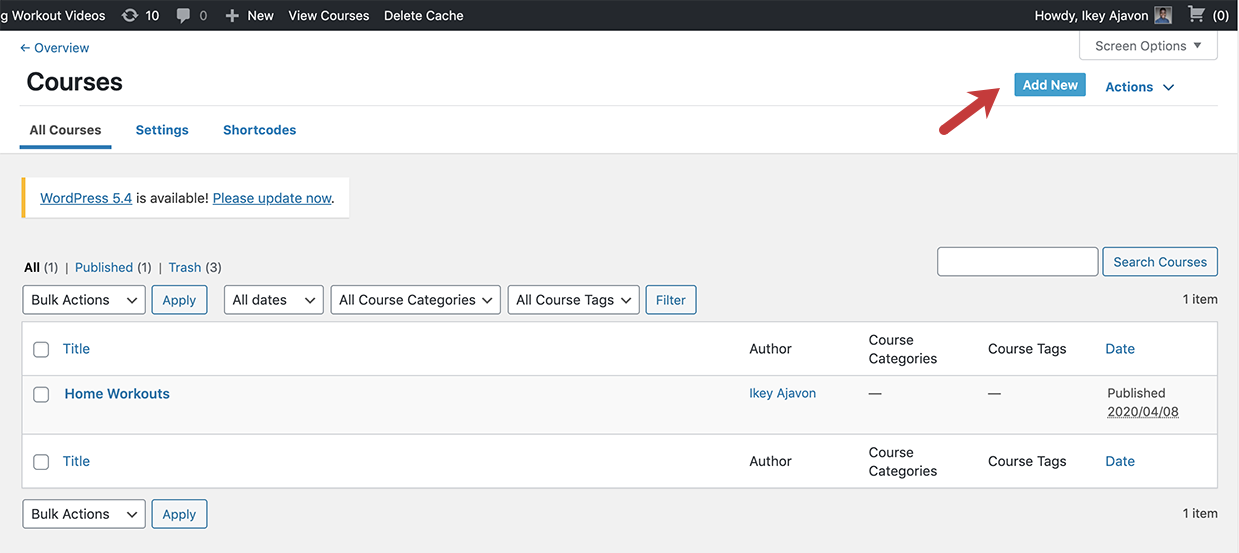
- Select Courses in the LearnDash LMS menu, then select Add New in top right to create your first Course.
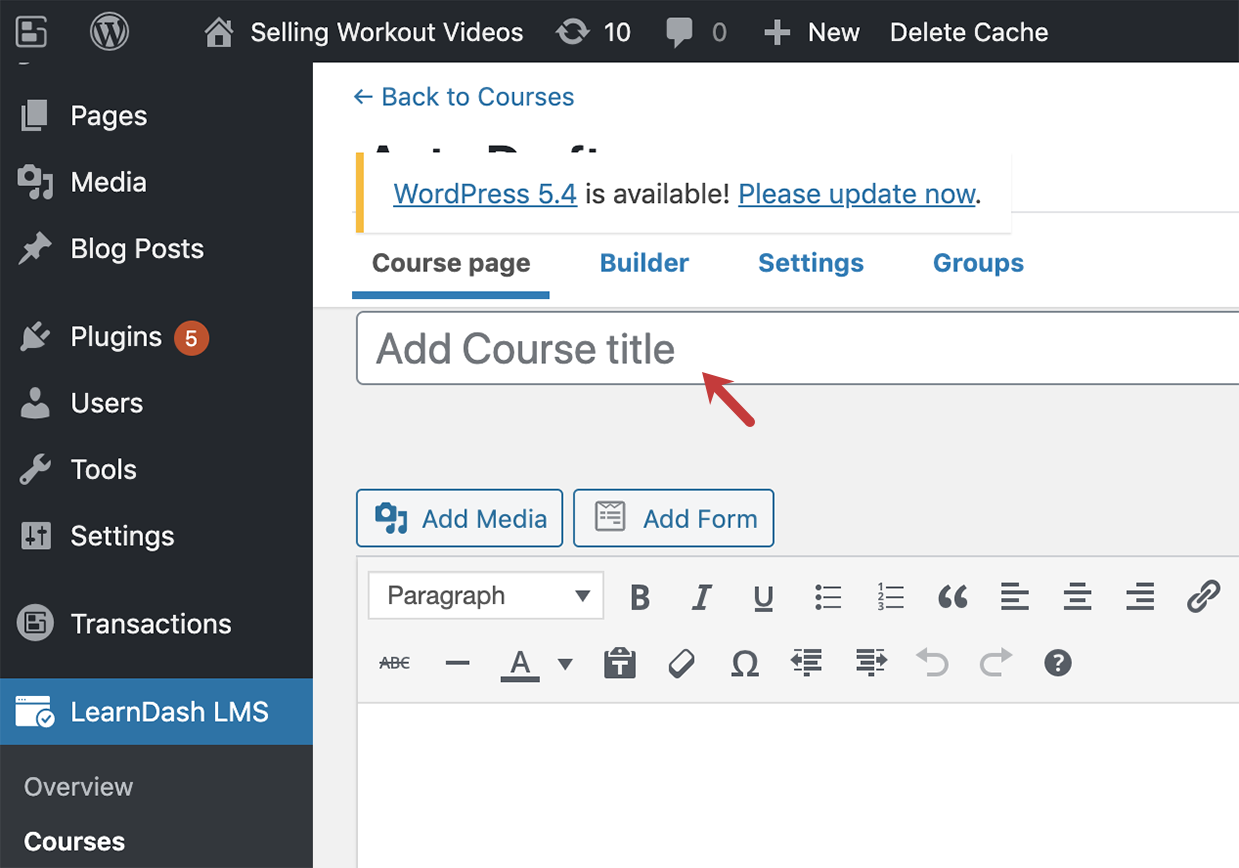
- Next, you’ll add a Course title and any details for the Lessons and video content you plan on adding to this Course.
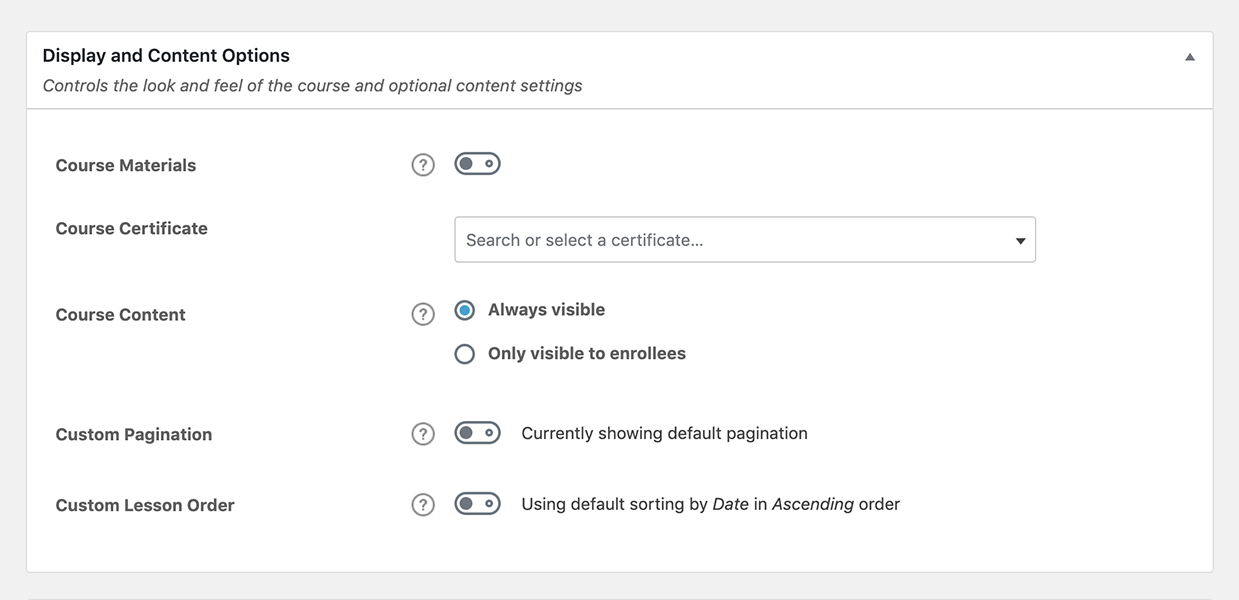
- In the settings tab at the top, you can choose several Display and Content options. This includes: Adding additional Course materials, visibility of Course content, custom pagination, and Lesson order.
- Below that section is where you can customize access. The Buy Now option will allow you to add a Course price. The Recurring option allows you to set a Course price and billing cycle.
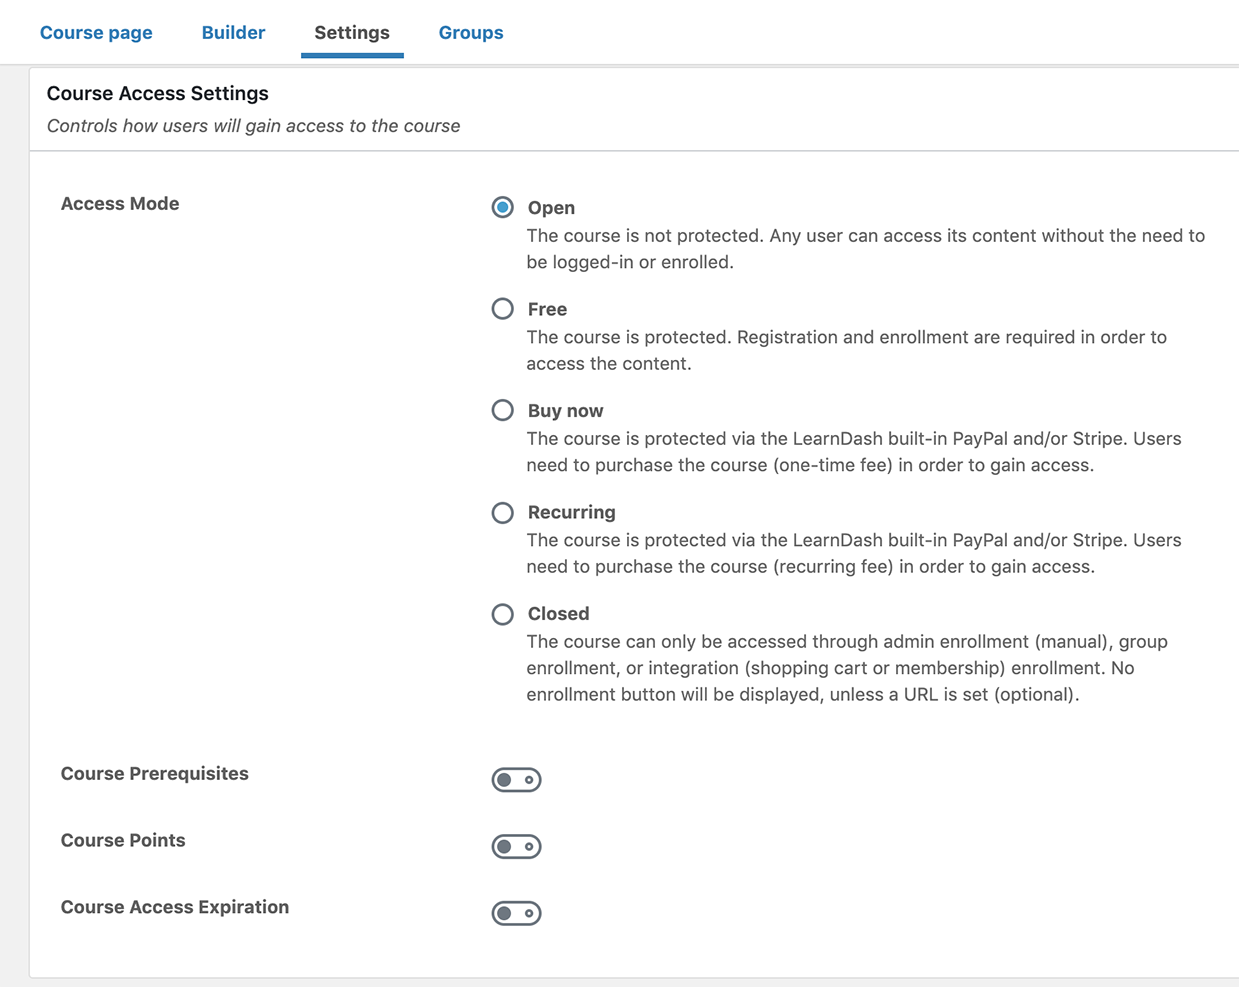
- The last option, Closed, should only be used if you are using WooComerce. You’ll need to set the same Course Price as you did for your Product and add the Button URL for your product.


Once you have finished your Course, save it as a draft. This will ensure your content is not live on your website before you have all necessary measures in place.
6. Create a Lesson
At this point your Course is ready to go. The next step is to create at least one Lesson, which is where your video will be placed.
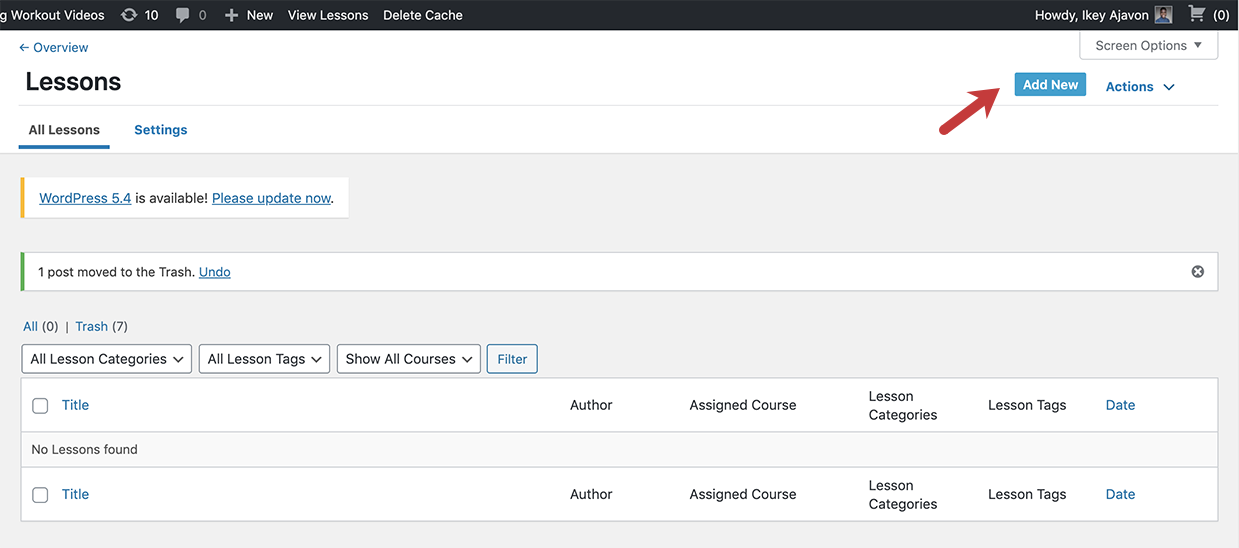
- Select Lessons in the LearnDash LMS menu in WordPress, then select Add New in the top right to create your first Lesson.
- Next, you’ll add a Lesson title and any details for the video you plan on adding.

- Then, copy the video embed code from your SproutVideo account and paste your video embed code to the page. Refer to our handy guide on embedding videos on WordPress.com if needed.
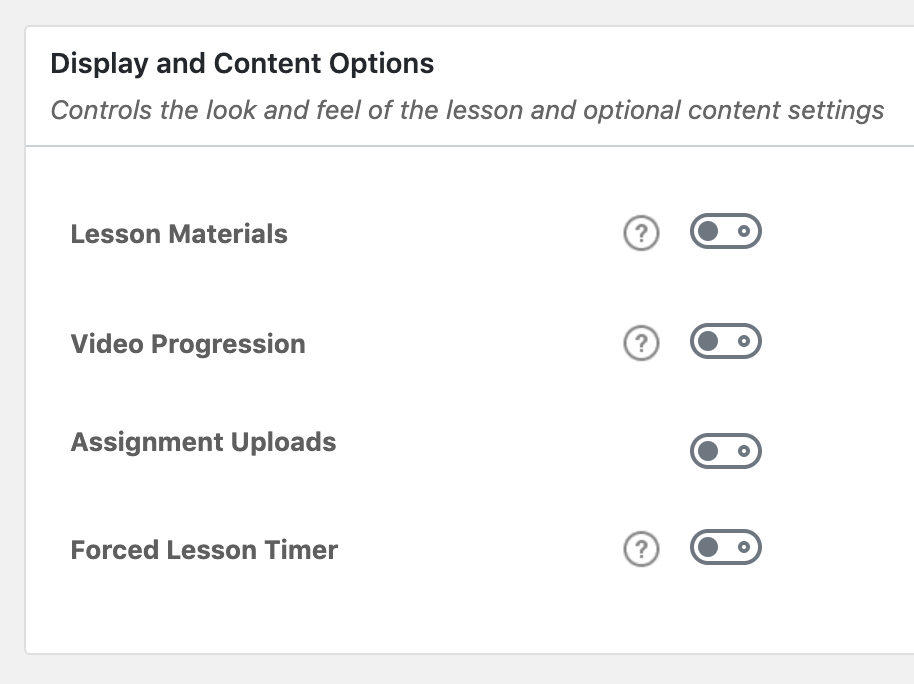
- Next, in the settings tab at the top, you can choose several Display and Content options. This includes: Adding additional Lesson Materials, Video Progression (currently unsupported with SproutVideo), Assignment Uploads, and Forced Lesson Timer.
- Below, in the Lesson Access Settings, you’ll select the Associated Course (which you created in the prior step), decide if this is a Sample Lesson, and choose a Lesson Release Schedule.


Once you have finished your Lesson, save it as a draft. This will ensure your content is not live on your website before you have all necessary measures in place. If you plan on having multiple Lessons within your Course, follow the steps again and be sure to associate them with the proper Course.
7. Final Testing and Launch
Once all these steps are complete, preview your Courses and Lessons, and test your payment methods and user registration. If everything checks out, you can publish your Course and associated Lessons and your videos will be ready for sale!
Other articles in the Selling Videos section:
- How to Monetize Your Videos With SproutVideo
- How to Sell Your Videos with SproutVideo and MemberPress
- How to Sell Your Videos with Cleeng and SproutVideo
- How to Sell Your Videos with InPlayer and SproutVideo
- How to Sell Your Videos on Squarespace with MemberSpace and SproutVideo
- Adding Videos to a Shopify Listing
