Color grading is an advanced video editing technique. It allows you to edit the way colors appear on film in post-production. With color grading, you can make scenes more lifelike, achieve a specific look, or infuse emotion into a scene.
In this three-part tutorial on color grading, we’ll cover everything, from basic fundamentals to advanced techniques. Although this tutorial is based on Adobe Premiere Pro and DaVinci Resolve, the process is essentially the same no matter what software you’re using.
Let’s dive into the first episode – color grading fundamentals in Adobe Premiere Pro!
Overview of Color Grading Fundamentals
In this episode of our How To Video: Post Production series, Nick LaClair, head of video production at SproutVideo, walks us through the basics of color grading in Adobe Premiere. Even if you use a different editing suite for your videos, his thorough guide will still help you optimize your workflow since the basic concepts will carry over.
When Is Color Grading Necessary?
If your video looks a little flat, if you filmed on different cameras, or if you’re recording LOG footage, you’ll probably need to color grade your footage.
Note: LOG footage is desaturated, low-contrast footage that many professional cameras shoot. It is designed to retain the most information in the footage (without losing highlights that are blown out or shadows that are too dark). It is the best way to shoot footage, but it is an intermediary, and needs to be color graded into a final image before it’s ready for viewing.
Usually, color grading is the last step after editing your video down to a final cut. All your other edits should be locked before you get to this stage. Otherwise, you’ll waste a lot of time redoing your tweaks to colors. Depending on the process you use, that could be a lot of time!
How to Color Grade in Adobe Premiere
Adobe Premiere is best if your color grading needs are minimal. For instance, it can handle tweaks to exposure and color temperature very well.
Applying Lumetri as an Effect
Lumetri is a tool built into Adobe, and can be applied as an effect to the clips you’re editing in the timeline from the Effects list. If you access it in that manner, you’ll use the Effect Controls menu to make changes.

Accessing the Color Grading Workspace in Premiere
Alternatively, you can navigate to Lumetri within Premiere by selecting the Color tab at the top of the screen to bring up the color grading workspace.
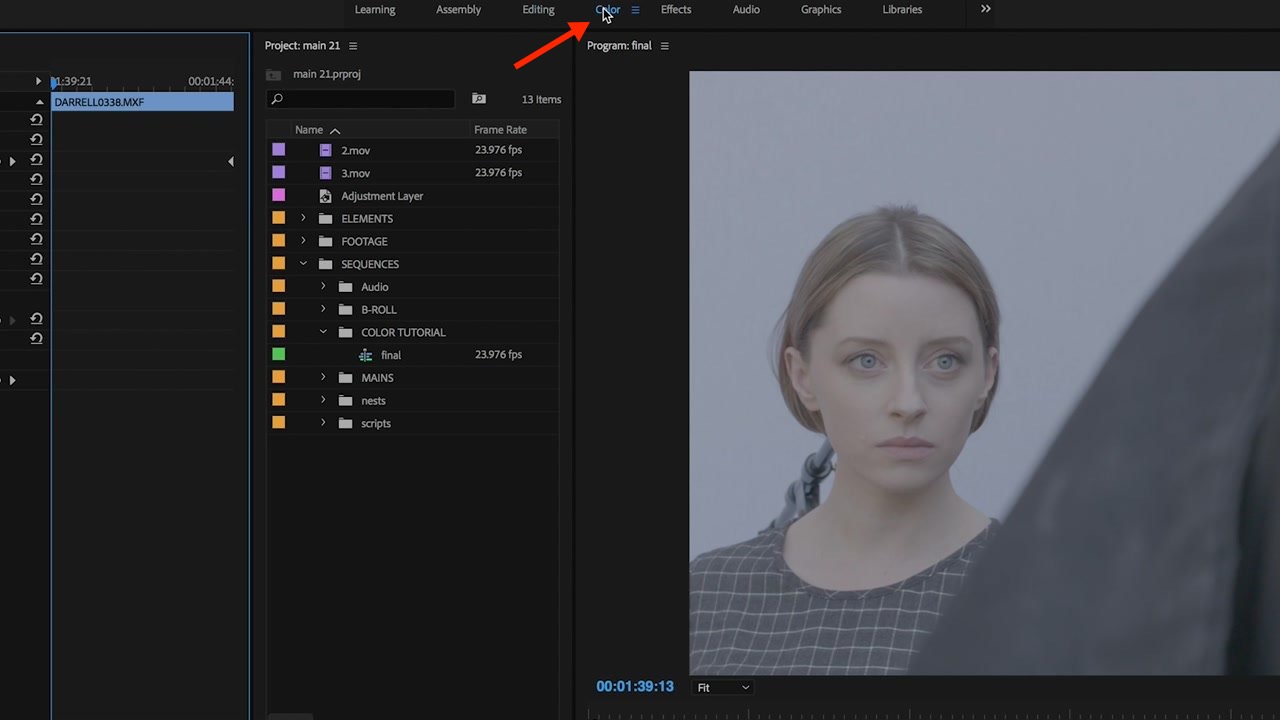
Premiere will automatically select the clip under the playhead, and the Lumetri corrections will open on the right hand side of the screen. Then, you’ll want to make sure the Lumetri scopes are also visible on the left.
The waveform scope appears automatically (more on exactly what that is below), but if you right click it, you can open other options as well.
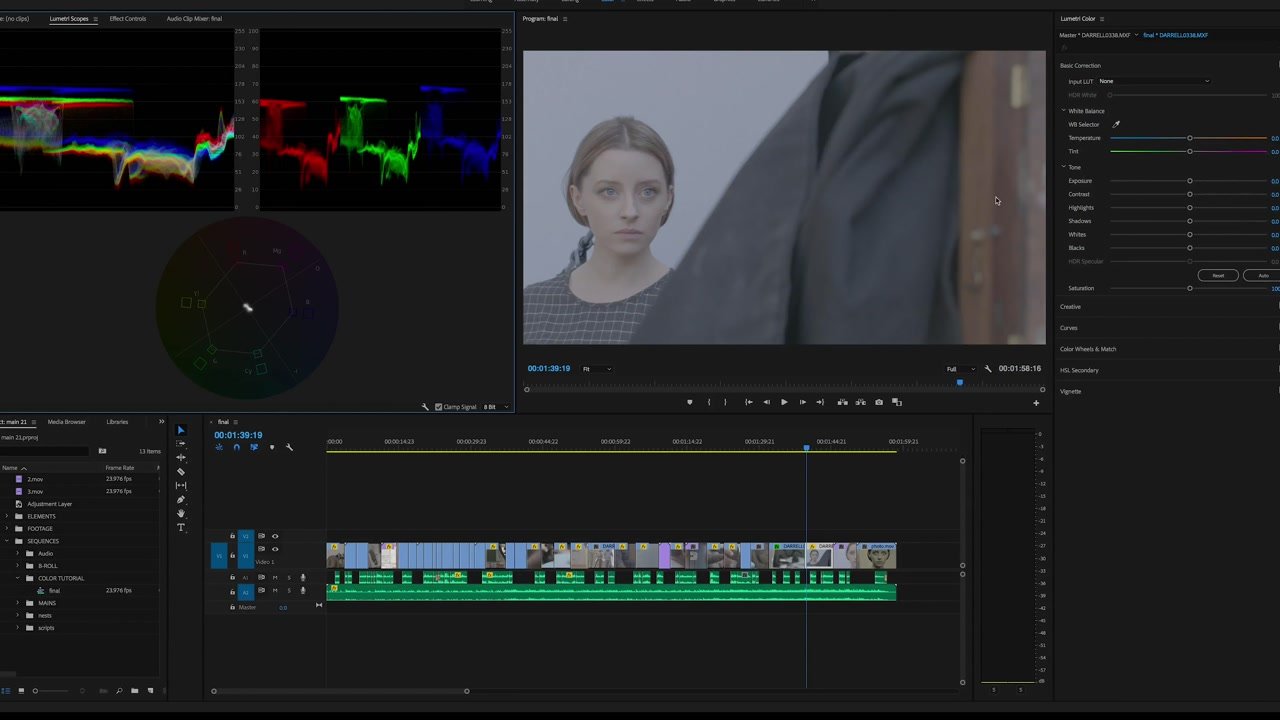
Overview of Lumetri Scopes
There are different scopes available to help you adjust the colors in your video. We’ve covered the three main types available (shown on the left in the image above), with tips for using each one.
Waveform Monitor
The colorful, nebulous graph shown in the top left of the image above is called a waveform. Waveforms are the most reliable tool for adjusting the color of your image because while monitors and settings can vary tremendously, the scope will always be consistent.
The Y axis goes from zero, or pure black, to one hundred, pure white. It shows you how dark or bright different areas of your image are.
The waveform, from left to right, corresponds to your image. In the example below, the bright areas to the left represent a bright area behind the female subject, while the dark areas to the right correspond to the person in the foreground, partially blocking our view.
Seeing the relative brightness of every element in your frame is a powerful tool because gives you precise data on where your picture exists in the space between too-dark and too-bright, and allows you to adjust it within that space.
Parade
The parade scope is shown to the right of the waveform in the image above. This option breaks out the red, green, and blue waveforms of your image so you can evaluate them side-by-side. This is handy when you need to achieve a specific white balance in your image.
Vectorscope
The circular scope below the waveform and the parade scope is called a vectorscope. This scope shows you where your image falls on the color wheel. It’s particularly useful for finding a neutral white point.
Using the Scopes
Each of these scopes will adjust dynamically as you make changes to the brightness, contrast, and white balance in your image. They give you quantitative data to complement how the image looks to you subjectively.
If you have any white elements in your image, you’ll know your color settings are just about right when the red, green and blue waveforms all look equal.
Additional Adjustments
Basic Correction
The Basic Correction section might be more aptly named Major Correction. It contains settings for dramatically changing your visuals.
For starters, you can add a LUT, which stands for Look Up Table. A LUT is essentially a shortcut for adding preconfigured color settings based on the color space in which your footage is shot. For instance, if you shoot LOG footage, a LUT will convert it to full-color, full-contrast footage automatically so you don’t have to do it by hand.
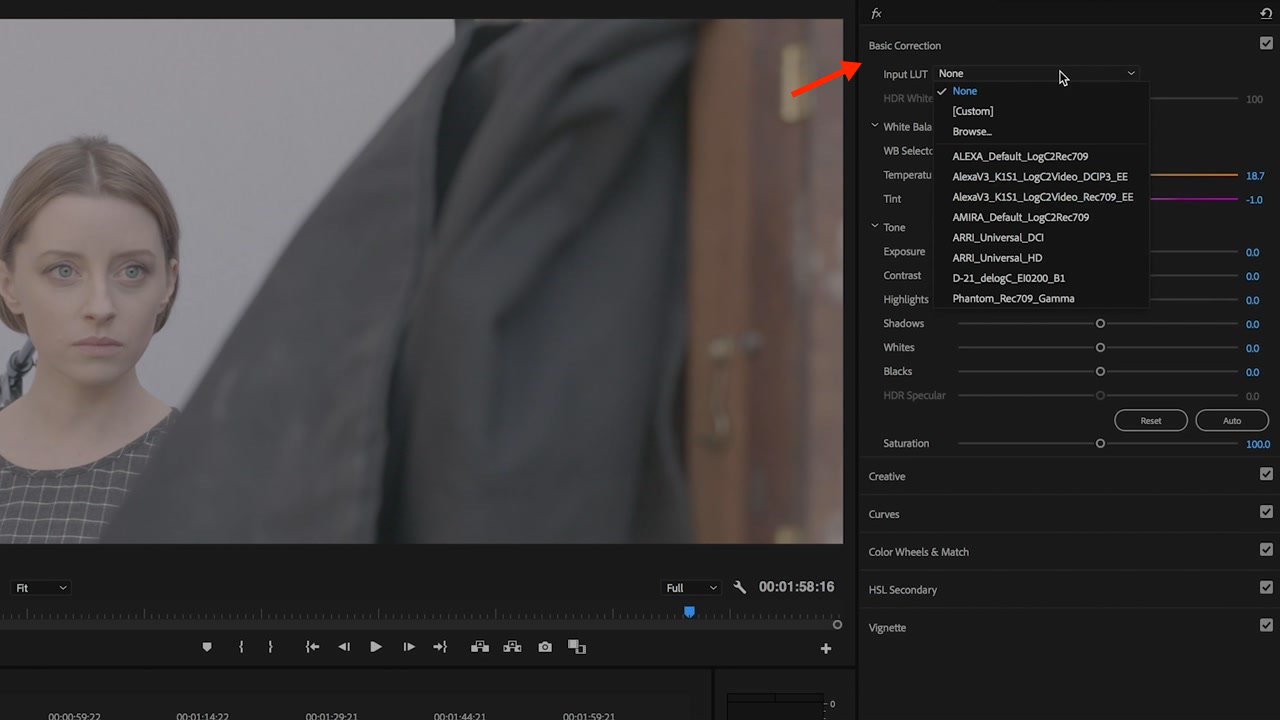
Beyond LUTs, you can tweak the color temperature, hue, exposure, and contrast. You can even use sliders to adjust different areas of luminance in your image. The latter is handy if you have an area that is too bright or too dark in your image.
Creative and Curves
You can also add what are known as Creative looks in the next section. Pick from preconfigured settings, or, create something unique by going with the Custom option. And you can edit curves, which are a more finely controllable way of changing the contrast of your footage.
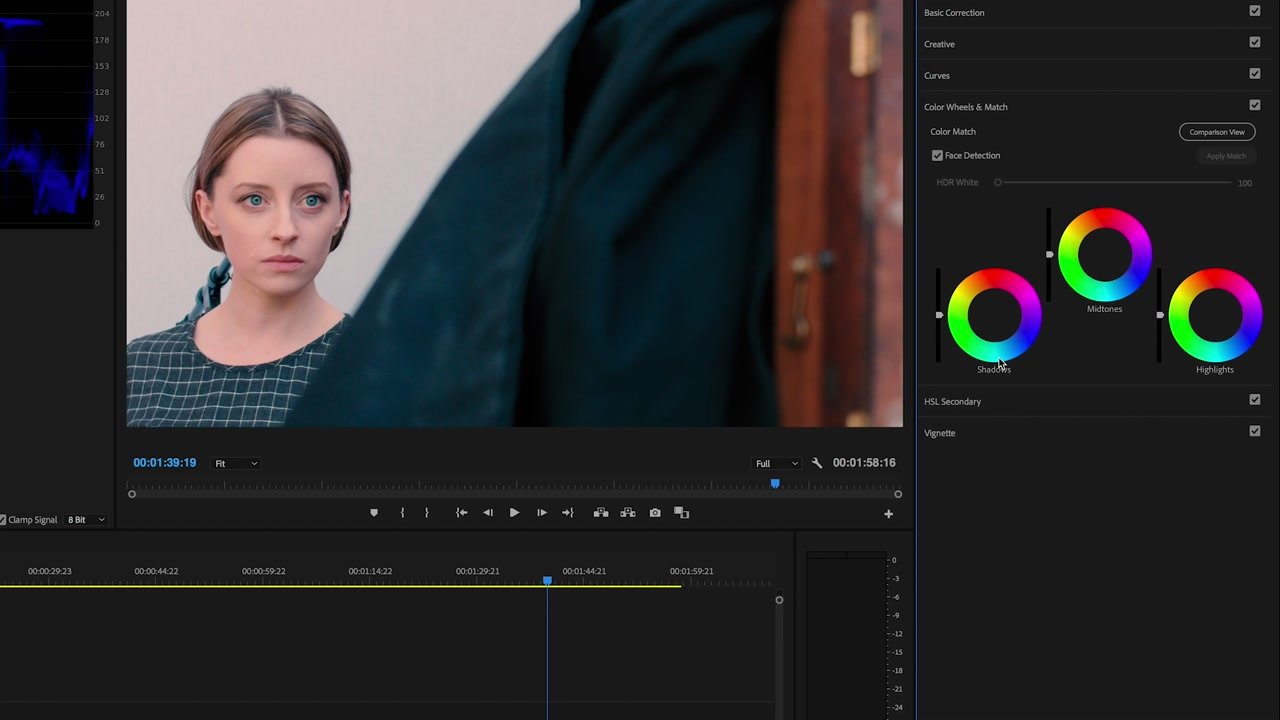
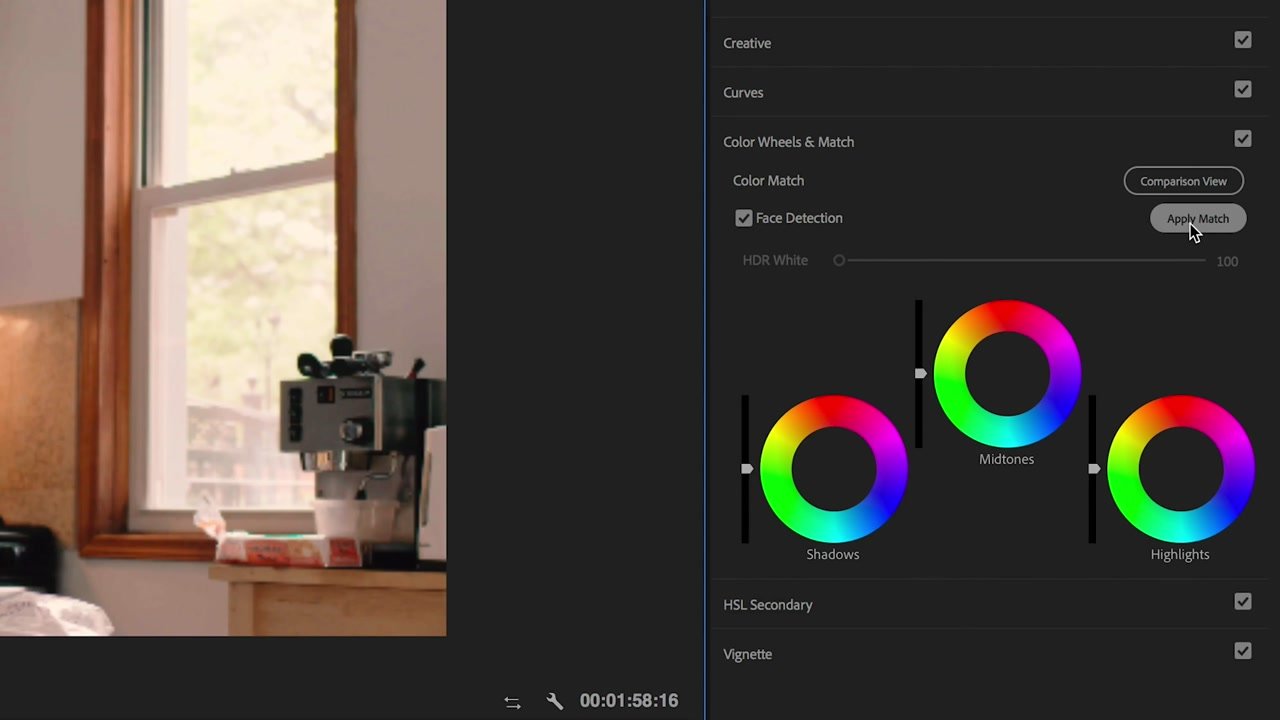
Color Wheels and Match
Professional colorists use tools built around the concept of these different wheels. They enable minute adjustments to different aspects of the image, and are beyond the purview of this primer in color grading fundamentals in Adobe.
Color Grading Workflows in Premiere
One big advantage of using Adobe Premiere is that you can keep editing your video after you’ve graded your footage. However, there are some drawbacks.
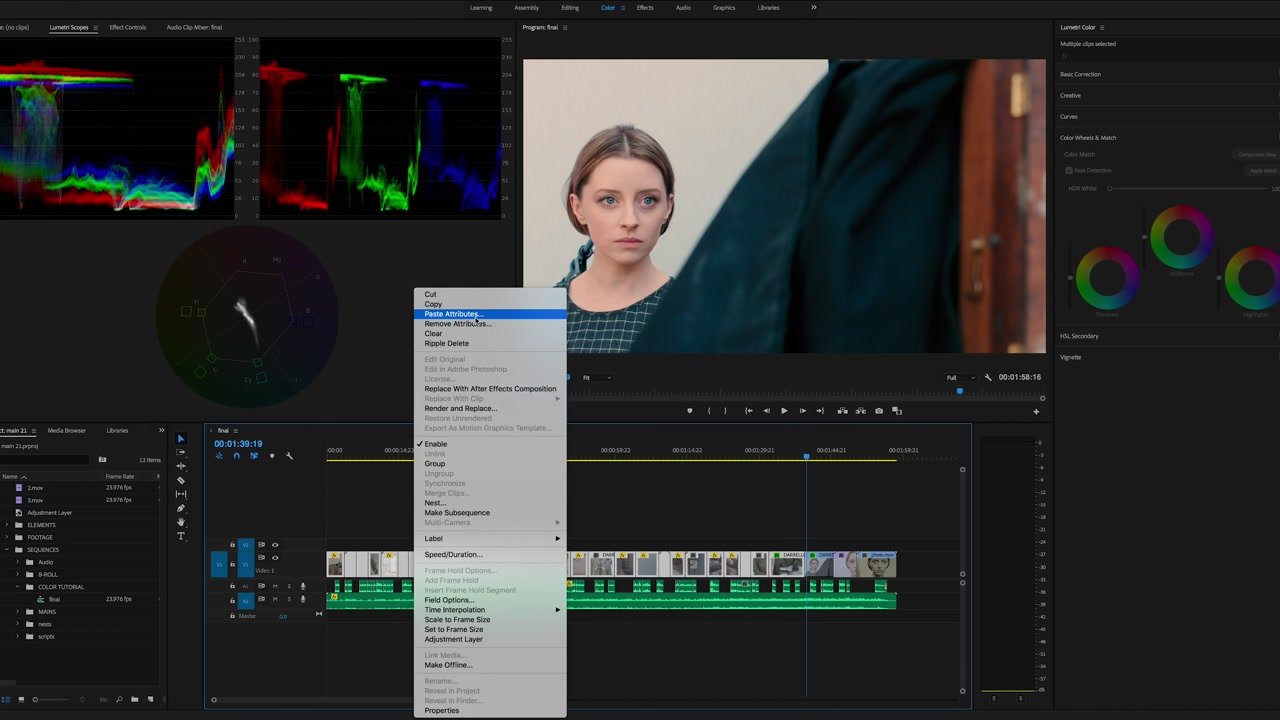
Each of these grades is applied to your clip as an effect. It’s relatively easy to copy the settings from one clip and apply them to other clips. You simply right click the clip you’ve already graded and select copy. Then, select your other clips, right click, and use Paste Attributes to apply those settings to the selected clips.
Color Matching
However, you might find that the exact same color settings don’t work across all the scenes in your video. Lumetri provides convenient tools for correcting that issue. Simply compare the two clips side by side, and use the Color Match tool to achieve a more consistent look.
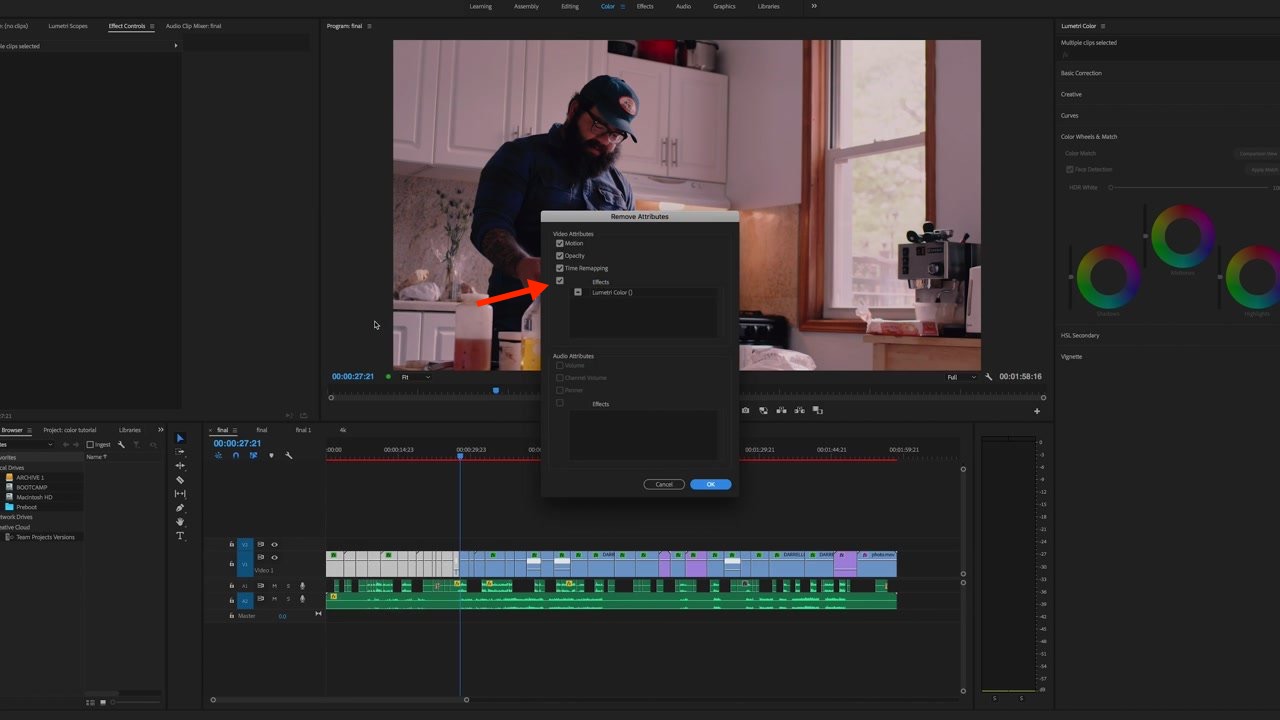
Applying the new settings to other clips is a little tricky. If you just copy and paste the attributes, as described above, you will be adding one color effect on top of another. This is unlikely to deliver the desired result.
Instead, you have to first remove any existing Lumetri effects from the clips you want to adjust. After doing so, you can then paste the attributes from your color matched clip. Select the clips that have existing Lumetri effects, right click, and select “Remove Attributes”. Be sure the “Effects” option is checked.
Adjustment Layer
The above workflow can admittedly be pretty clunky. Whether or not it’ll work for you largely depends on the complexity of the film you are editing.
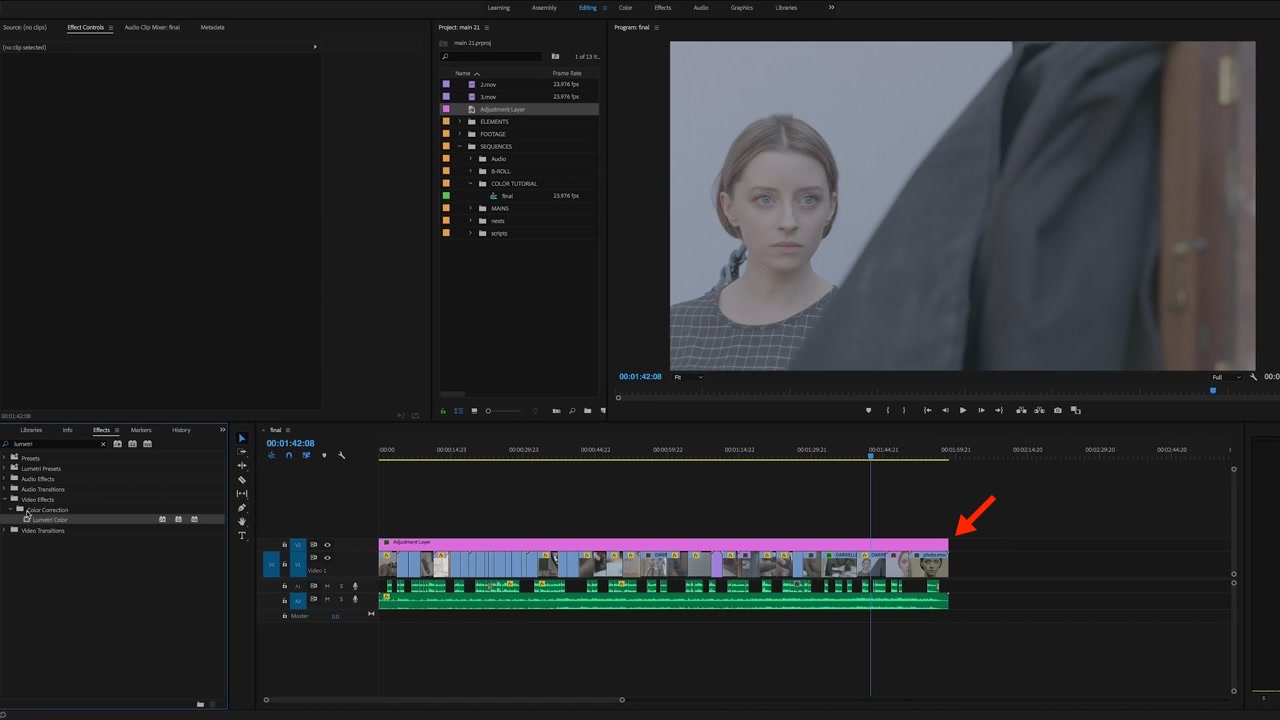
Another option is to use adjustment layers instead of applying the Lumetri effects directly to your clips. This enables you to cut your adjustment layer to fit only certain clips, and avoid having to copy, paste, adjust, remove, paste… repeatedly. The adjustment layer is the purple layer in the timeline shown in the image below.
Drawbacks to Using Premiere
While you can certainly achieve good results when using Premiere for color grading, it isn’t considered a professional color workflow. The main reason is because Premiere isn’t a “color managed” application. So, what does that mean exactly?
Basically, your footage won’t look the same in Premiere as it does on the web or wherever it’s being shared. This makes achieving a specific end result challenging, since it’s really difficult to compensate for these changes. If you want to know more than that, and really want your head to spin, here is a fun entry point to the rabbit hole on color management in video applications.
Solutions for Color Management
In some cases, getting the color just right really, really matters and the differences between what you see in Premiere and your final output might be too different to make it a viable option for you. Luckily, there are solutions for situations like that.
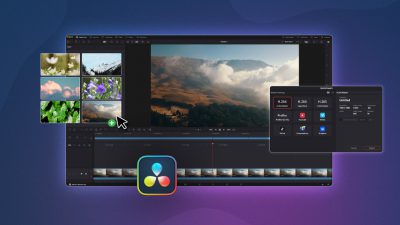
One potential option is to use a color managed video editing application from the start, such as Final Cut Pro. However, you’re likely to be better off using a purpose-built color grading application, like DaVinci Resolve.
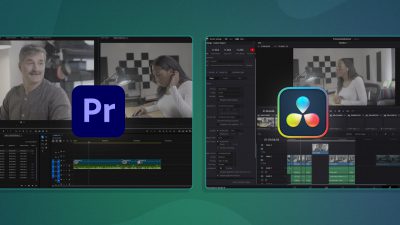
DaVinci Resolve has more advanced features than Lumetri. More importantly, it enables you to achieve a consistent look no matter how you share your video once it’s finalized. In the upcoming second episode of this three-part series on color grading, we’ll walk you through the round trip workflow of editing in Premiere, color grading in DaVinci, and finalizing your film in Premiere.