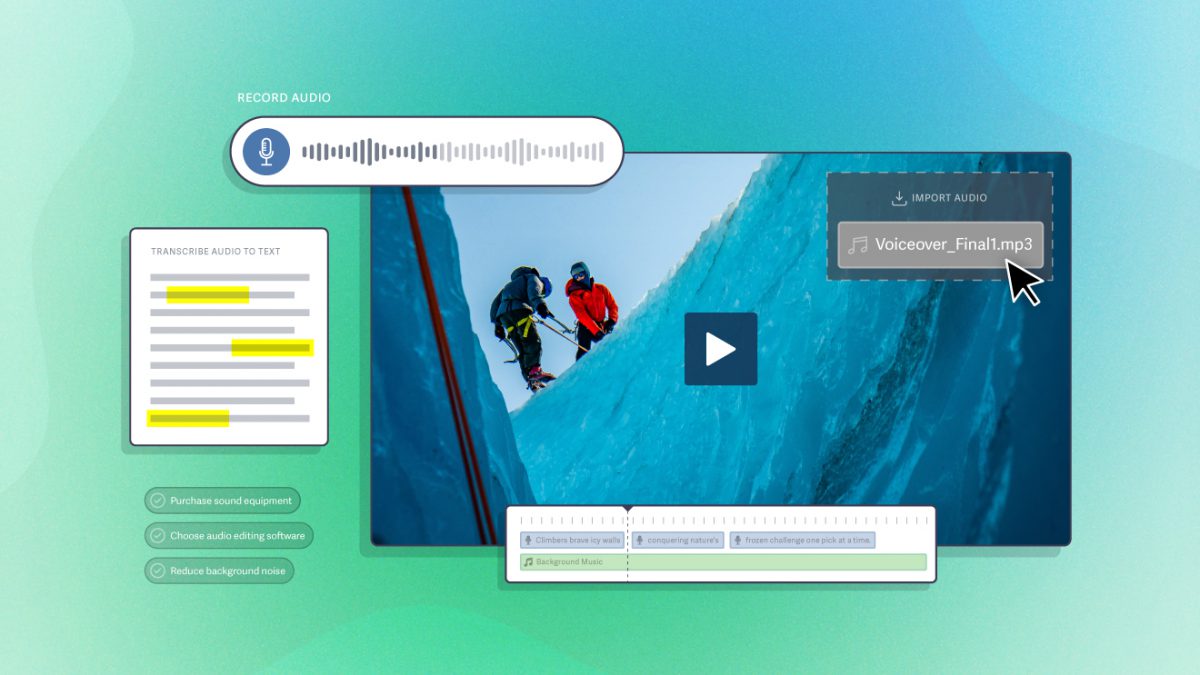
It’s never been easier (or cheaper) to record a voiceover. But we all know that bad audio can quickly make good content difficult to watch.
Whether recording at home or in an office, you don’t need a large budget or significant experience to create professional voiceovers.
In this complete guide, we’ll walk through everything you need to record voiceovers that sound professional, from delivering an engaging performance to setting up a voiceover studio.
Whether you want to launch a podcast, make viral TikTok videos, or convert viewers into customers, here’s how to record voiceovers from the comfort of your home. Let’s get started!
Recording Voiceover: The Complete Guide
- TL;DR: How to Do Voiceover from Home
- What Is a Voiceover?
- How to Record Voiceover in 7 Steps
- Create a DIY Voiceover Studio
- Select the Microphone & Audio Software
- Write the Script
- Conduct a Test Recording
- Record Your Audio
- Edit Voiceover Audio
- Sync Audio & Complete Video
- Why Are Good Voiceovers Important?
- Key Aspects of a Good Voiceover
TL;DR: How to Do Voiceovers from Home
- Create a DIY Voiceover Studio. Build a blanket fort, or use your closet. Record professional voiceovers for cheap by using low-cost materials to prevent sound from bouncing around the room.
- Choose a Software. Acquire audio or video editing software. Try out free trials of paid software before investing in a professional product.
- Practice, Practice, Practice. Read the script internally and out loud. Internalize its message and find a natural pacing. Record once you feel ready to perform.
- Upgrade Your Sound Equipment. It doesn’t need to cost an arm and a leg to improve your voiceover quality with an audio interface and XLR microphone.
- Pay Attention to the Details of Your Setup. Invest in high-quality over-ear headphones, pick up a pop filter, and stay close to the microphone when recording.
- Get Multiple Takes and Edit the Audio. When it comes time to record, get multiple takes. Review each one with headphones. Don’t be afraid to splice parts of the best takes together or re-record over small mistakes in the editing process.
What Is a Voiceover?
A voiceover recording refers to voice narration that does not feature the narrator’s image.
Voiceovers are common in entertainment, such as audiobooks, video games, and animated television. But they are also ideal for businesses, whether you’re creating educational content, professional screencasts, or corporate commercials.
In marketing videos, it is common for B-roll footage to play while an off-screen voice tells the brand story, describes the benefits of a product or service, and encourages the customer to take action.
For businesses and creators, voiceovers offer the versatility to provide additional context and create an emotional connection. They are often used to narrate animated promotions, knowledge-based content, marketing videos, and social media shorts.
How to Record Voiceovers in 7 Steps
We’ve broken down how to create a professional voiceover into three parts: pre-production, recording, and post-production. This guide will help you level up your voiceover’s quality.
Pre-Production
1. Create a DIY Voiceover Studio
Not all voiceovers need to be of professional quality. There are millions of examples of off-the-cuff voiceovers on social media that simply use a standard earbud’s microphone. For those videos, a quiet place free from interruptions is sufficient.
But if you’re buying a microphone for quality voiceovers, it’s time to upgrade your setup.
A wide open room is full of dense, hard surfaces for your voice to bounce off; this creates “reflections,” which negatively affects the recorded audio quality. Luckily, you can create a cheap voiceover studio.
To develop good audio, consider how to prevent sound from bouncing around the room. Here are two common, incredibly low-cost options:
- Turn a closet into a makeshift sound booth. Line the walls with thick blankets, pillows, or foam boards to create surfaces that will absorb sound.
- Create a blanket “fort.” A thick blanket over your head works surprisingly well; however, creating a blanket “tent” is even better to avoid picking up any movements.
Of course, you can implement far more impressive setups. If you plan to record multiple voiceovers, consider creating an at-home studio. Buy (or make) sound-absorbing foam panels for your walls, or procure a portable booth with panels and a roof. The options are endless; choose the one that matches your needs and budget.
2. Select the Microphone & Audio Software
At a minimum, you will need an external microphone and audio or video editing software. You can purchase a USB microphone that plugs directly into your computer for under $100.
However, upgrade to an audio interface with an XLR microphone to create professional voiceovers. An audio interface will improve sound quality and latency. You can purchase a decent audio interface for under $250 and an XLR microphone for under $150.
Also, consider getting a pop filter to avoid picking up “pfft” sounds in your recordings.
What Is the Best Software for Recording Voiceovers?
Voiceovers can be recorded with the audio or video editing software of your choice; although, you can also use your computer’s built-in tools, like QuickTime to record audio.
Most video editing software provides sufficient tools for cleaning up audio, allowing creators to avoid the process of importing and exporting audio across software. Popular video editing options include Adobe Premiere Pro and DaVinci Resolve.
Consider using audio editing software if you need advanced audio editing or aren’t creating a video. The most popular options include Audacity and Adobe Audition.
3. Write the Script
A script illustrates your vision. It includes visual and spoken elements of the video.
Determine whether the visuals (such as a scene with a mix of dialogue and narration) or the voiceover (like a promotional product video) will set the video’s pacing. This decision will help you adequately convey the message in voiceover.
It can be tempting to skip the process of writing a script. But refining what you’re going to say and practicing your performance will go a long way in helping you craft a professional voiceover. When you’re ready to brainstorm, grab our free scriptwriting template as a jumping-off point.
Voiceover Recording
4. Conduct a Test Recording
Everything has to work together in sync to capture a high-quality recording. Therefore, you should conduct a test each time you begin a new recording session. Skipping this step is the quickest way to get frustrated with the recording process.
- Set up your recording equipment and prepare the software.
- Press record and voice the first minute or so of the script.
- Listen for errors in the recording with headphones. Check the audio levels. Alter your setup or audio settings as needed. Then, conduct another test.
- Repeat this process until you are satisfied with the initial audio quality.
Audio Levels for Recording Voiceover
Avoid vocal distortion by watching your recording levels. An ideal recording level will average somewhere between -18dB and -10dB. The peak meter should never peak over -6dB while recording. Furthermore, a final mastered recording should never go above 0dB.
Microphone Distance for Voiceovers
Make a fist and point your thumb and pinky in opposite directions, creating a Shaka sign. With your thumb to your mouth, your pinky should touch the pop filter of your microphone.
You should be about 6 to 12 inches away from the microphone when recording a voiceover. This closeness helps the microphone pick up your voice instead of various noises in the room.
The optimal distance will vary depending on the type of microphone you use and the level of sound treatment in your recording space, so determine the best-sounding distance with tests.
5. Record Your Audio
It’s time to record! You’ve done all the necessary preparatory work. Now, it’s time to perform. Here are some tips to make recording easier and more enjoyable:
- Get in the Zone First. Find a way to loosen up. Watch a funny video, do yoga stretches, or dance to your favorite song. A great performance comes from a relaxed and centered place. Take a few minutes to get yourself in the right state of mind.
- Don’t Stop for Mistakes. It’s good practice to complete each recording, even if you notice mistakes in your performance. You can fix some errors in editing; other errors will provide priceless feedback for future takes.
- Record Five Takes or Less. If you need more than five takes, practice more before recording. Performing takes a lot of energy as well. If you didn’t get an acceptable take in five attempts, take a break and allow your energy to replenish.
An effective voiceover makes it easy for the audience to absorb a video’s message. Keep the listener or viewer’s experience at the forefront of your mind when evaluating a recording.
Post-Production
6. Edit Voiceover Audio
Before beginning the editing process, listen to your recordings with headphones.
In an ideal situation, your voiceover requires minimal editing. Using the editing software of your choice, you might rerecord a section, remove breaths and mistakes, or delete long pauses.
Stop here if you will hand the recording off to an audio engineer; audio processing alters the recording in ways that limit the audio engineer’s ability to produce a high-quality mix.
If you are creating the final mix, there are a couple of basic considerations that will improve the sound of your voiceover audio: equalization and compression.
This is called mastering a mix. Mastering is its own specialization and career path. So don’t fret if you feel overwhelmed during this learning process. The ultimate goal is to create a quality listening experience by making the audio as clear, crisp, and easy to hear as possible.
Equalization
Different sounds fall into different frequencies. Equalization allows you to adjust the volume of certain frequencies without affecting others, making removing or boosting certain parts of a mix possible. Equalization removes background noise, word pops, and more.
It’s better to capture audio with fewer background noises and high-frequency sounds. It’s generally preferred to need as little equalization as possible. For those who aren’t familiar with manually adjusting equalization, it’s common to use plug-ins and software presets.
Compression
Compression reduces the dynamic range of audio, which allows you to create a consistent volume. It prevents the highest highs from being too loud and the lowest lows from being too quiet. Compression also prevents distortion while allowing you to increase volume.
7. Sync Audio & Complete Video
Congratulations! You’re ready to sync your audio with the visual story of your video.
Audio and video are recorded separately in traditional filmmaking. At the beginning of each take, the actor claps. This produces a spike that makes syncing audio and film easy.
Voiceover includes different challenges. Instead of syncing an on-screen actor’s lips with the spoken audio, you need to sync the voiceover pacing with the pacing of visual content.
For this reason, you may decide to record voiceover first. This allows you to edit the video to match the voiceover, rather than trying to get one that matches an edited video.
Either way, you now have all the tools to record a voiceover for your video!
Why Are Good Voiceovers Important?
Consumers want videos from brands. However, holding viewer engagement, even with short videos, can be challenging. After all, 20% of viewers click away in the first 10 seconds. Yet a website visitor who watches a product video is 64% more likely to make a purchase.
It is paramount to grab and hold attention. Don’t give viewers an easy reason to click or scroll away by underestimating the importance of good sound quality and an engaging performance.
Key Aspects of a Good Voiceover
Audio quality and vocal performance are two central aspects of a professional voiceover. As such, each has important attributes that result in a good voiceover.
Audio Quality
Generally speaking, voice recordings should sound realistic. The goal is not to create a new sound but to fully capture the vocal performance.
Therefore, recording hardware must be able to capture sound with a wide range of audible frequencies, the full dynamic range (the quietest and loudest sounds), and little-to-no distortion.
Errors can happen at any stage of the recording process. In a soundproof setting, use your equipment to create a test recording. Listen closely and alter your setup if you hear any of the following:
- Extraneous noises (hiss, hum, etc.)
- Background sounds
- Echos
- Vocal pops
- Audio processing errors
- Microphone bumps
Don’t fret if this process requires trial and error. Multiple factors of your voiceover studio contribute to the sound quality, including the microphone distance, equipment, room treatment, location (city versus country), and more.
Performance
There are several elements to a good voiceover performance. Even if your audio quality is pristine, a monotone script recitation quickly puts viewers to sleep. To improve how your voice sounds when recorded, consider pacing, diction, tone or inflection, and emotive performance.
Pacing and Volume
Pacing is the rate at which you recite the script. Aim for a natural, conversational pacing. Practice the script to internalize its messaging and make the words sound like your own (whether you wrote them or not).
Diction
A voiceover must be understood. Therefore, the first task of a good performance is to say the words correctly at an audible level.
Speak clearly and enunciate each word without letting it drop off. For example, “The boys walk down to the river and fetch a pail of water.” It would be easy for this sentence to sound like a garbled mess, “The boy wall dow to the rivah and fesh a pail of wafer.”
Pay particular attention to words with “s,” “er,” “ch,” and “t” sounds. It will be easier to focus on delivery the more you can recite the words without needing to recall or read them.
Tone and Inflection
Your tone is the pitch of your voice plus its resonating quality. You might speak in a higher pitch with a calming tone or have a deeper voice that naturally booms like an announcer.
Inflection is the way you alter your tone to express the script. Your cadence (the modulation or inflection of your voice when reading) will convey context, underlying information, and emotions.
Emotive Performance
The emotion and energy you bring to the performance will ultimately sell it and keep people engaged. The technical aspects of audio quality and performance ensure mistakes don’t cause people to tune out. But your emotive performance keeps people tuned in.
How Do I Improve the Sound of My Voice?
A common hurdle when you begin recording voiceovers is accepting the sound of your voice. It’s normal to feel shy or unsure about how your voice sounds. It may take some time to get used to it yourself, but you will focus on it far more than anyone else.
Another approach is to learn from professional voice actors. Voice actors can adjust tone, inflection, and pacing to create an immersive recording with their unique voices. Consider working with a vocal coach to improve your technique and gain new skills.
Voiceover sets the mood and tone of your video. With some planning and the right equipment, it can take your video to a new level.
But bad audio can ruin good content. After spending hours or days on a video, the last thing you want to do is ruin it with an amateurish voiceover.
Capturing professional recordings includes a learning curve, but producing an engaging, professional-quality voiceover is well worth the time and effort.


