As the nights grow longer, and the shadows deepen, our minds tend to turn to things that go bump in the night. With Halloween around the corner, it’s the perfect time of year to embrace the spookier side of filmmaking.
In this episode of our How To Video: Lighting series, we’re diving headfirst into the world of horror. Our video tutorial will walk you through exactly how to light a scene for a most frightful effect. You’ll learn tips for working in adverse conditions, adding atmosphere, avoiding lens flare, and getting a truly terrifying end result.
How To Light a Horror Scene
In this video, Nick LaClair, SproutVideo’s Head of Video Production, and Scott Jansson, a veteran Director of Photography, show us exactly how to light a scary set.
Creepy Classics
When you think of classic scary movies, your favorites almost certainly include the lighting setup we’re going to teach you in this tutorial. For instance, in this still from the Friday the 13th reboot released in 2009, iconic horror movie lighting is in full effect:
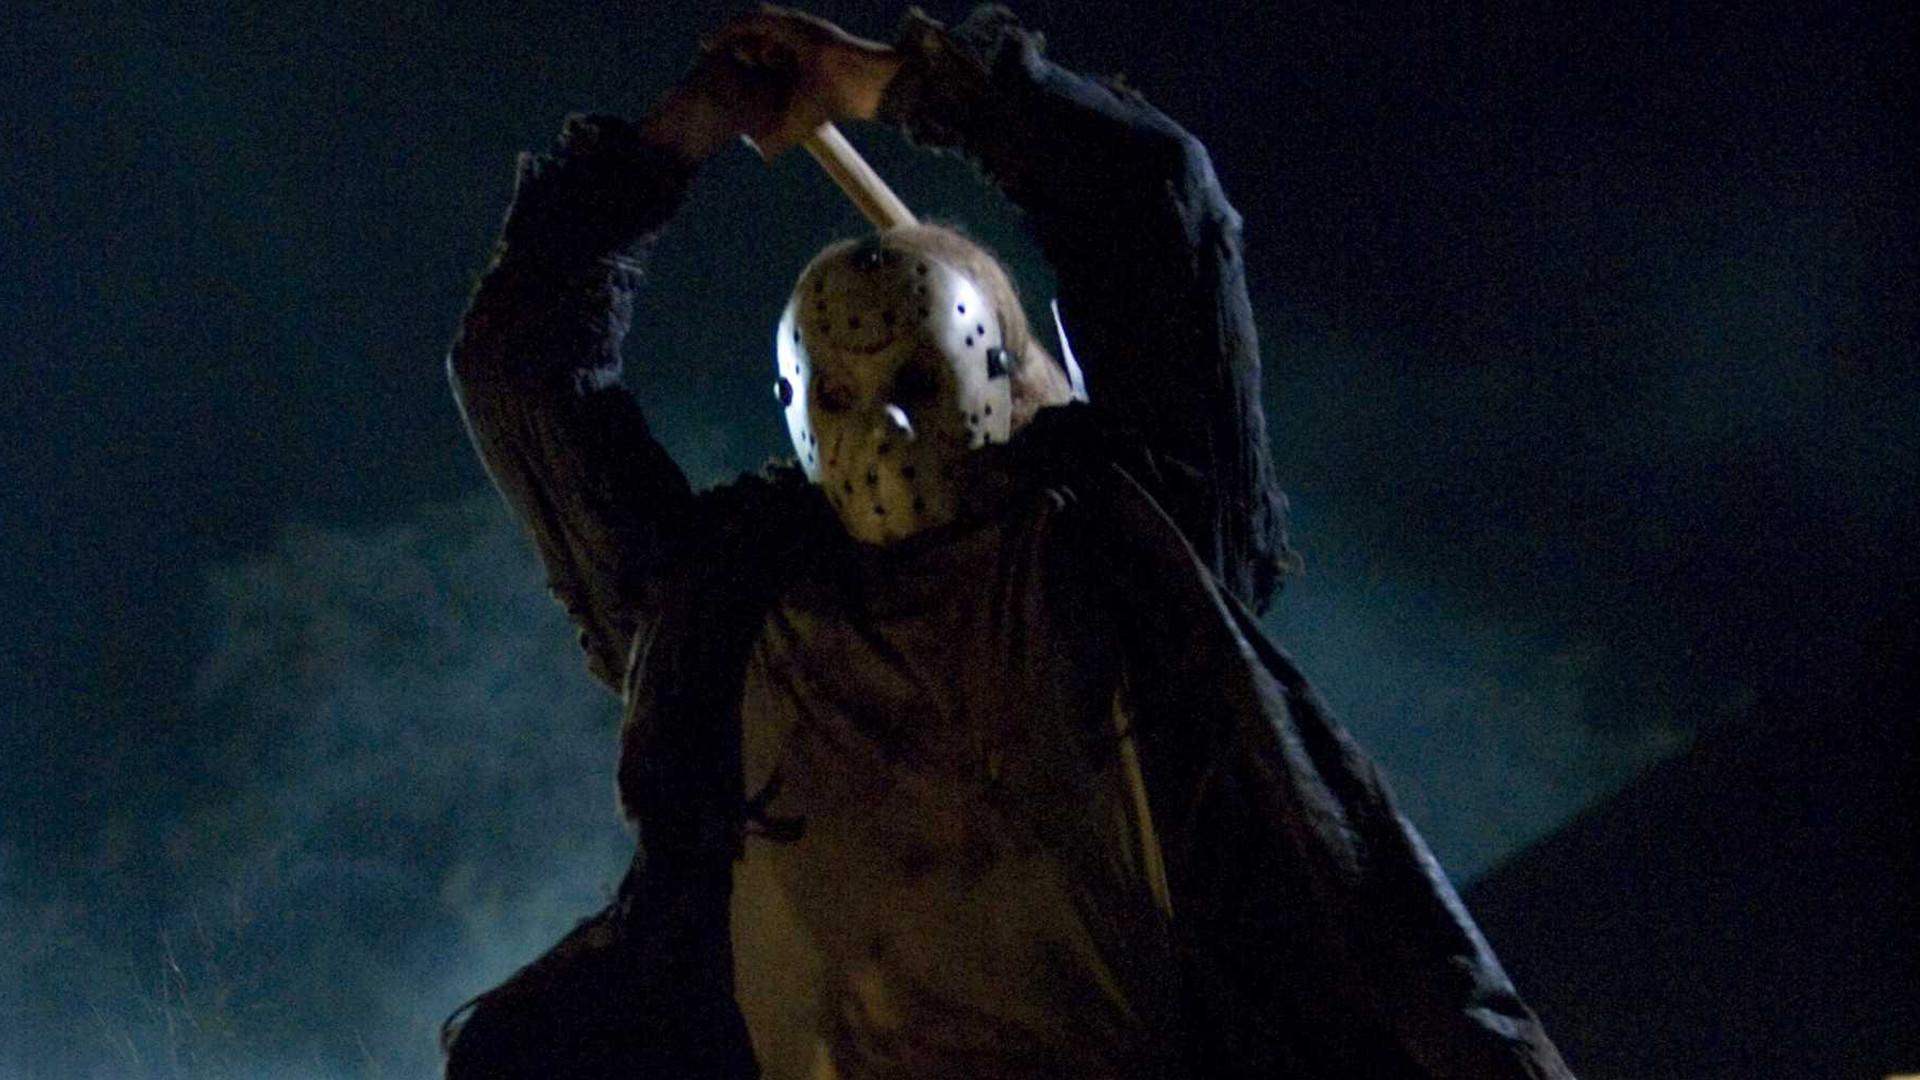
Let’s break down the lighting elements that help make a scary movie scene as terrifying as possible.
Darkness
As our lighting expert, Scott Jansson so plainly put it,
The fear is in the darkness, or the unknown.
Horror scenes are rarely brightly lit. Usually set at night, they feel mysterious, closed in, and tense because of the limited amount of light in use.
The challenge is to use enough light to capture the footage on camera, while still keeping it as dark as possible. The solution is to think of your lighting setup in a structural way. You have to shape what little light there is in a precise manner to get the right effect.
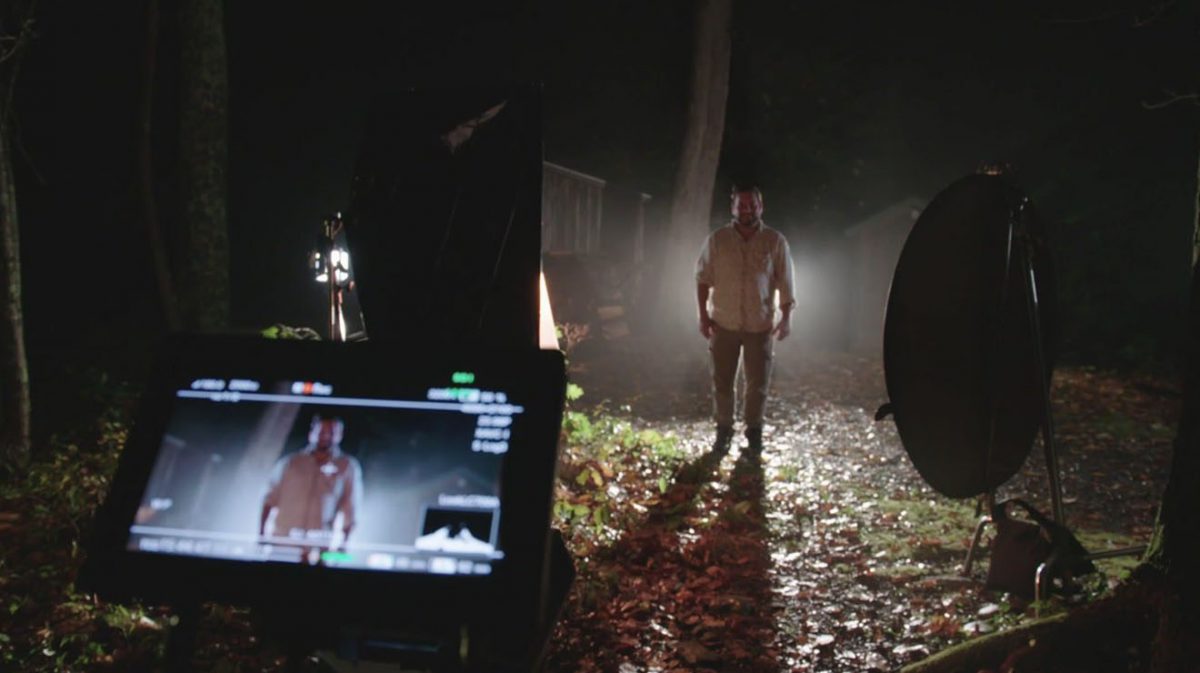
In order to use darkness to our advantage, we filmed everything at night, and were in the woods with a light rain. Although the drizzle presented some challenges given all the electrical equipment we were working with outside, it also meant we didn’t have any competing natural light sources.
Atmosphere
If you really want your audience to feel a chill up and down their spine, you need atmosphere. You usually know atmosphere when you feel it. So, how do you get the same impact on screen?
Typically, fog or steam. For example, there’s something about being able to see your breath on a dark night that immediately adds an element of tension. Just ask the White Walkers in Game of Thrones.
In our tutorial, we used a fog machine behind Scott to ramp up the atmosphere. Fog catches the light from our backlight, and makes it feel heavier, without actually brightening up the scene. It also visually closes in the space, triggering your viewers to feel trapped, like the victim in the film.
We also poured warm water on Scott’s shoulders right before our take. The rising steam makes him look more intimidating on camera, don’t you think?

Wrapping the Lighting Around the Subject
We’ve already established that darkness is our friend when it comes to filming a horror scene. However, you still need to be able to capture your subject (the villain) on camera. And, you need just enough terrifying detail to give your audience a memorable visual.
Using “rim” lights, we projected light at roughly a 90 degree angle to our subject. The lights are positioned on stands at the same height as our actor, out of the frame, essentially in line with his shoulders. The light wraps around the sides of his head to highlight his facial features, and create a contrast with the dark background.
Subtle Illumination in Front
With his outline nicely illuminated thanks to the rim lighting, we also need a warm glow in front of our subject so his face becomes visible. Remember, the fear is the unknown. We want just enough light to distinguish his face without giving away too much detail.
We placed a light in front of Scott, pointing slightly up at him. We set the stand at about half the height of our rim lights. The right positioning depends on the height of your subject, their distance from the camera, and the overall effect you’re going for.
Washing the Background
In the screenshot above, you probably didn’t notice the shed and the tree behind the axe-wielding murderer. However, they are an important part of the frame. The background provides context and helps ground the scene in a familiar reality, heightening the fear for the audience.
To make the background visible, we used a light diagonally behind our subject on a high stand, pointed at key background elements and adding dimension and depth to the scene.
Our Horror Movie Lighting Kit
You don’t need much to replicate our exact setup for your own scary movie shoot. We basically stuck to the quintessential indie light kit:
- 2 x 150W Fresnels
- 1 x 300W Fresnel
- 1 x 650W Fresnel
- 1 x ARRILITE 750 Plus Focusing Flood
B&H Photo sells that exact kit for under $4k. A lot of popular, low-budget horror films were filmed with not much more than that.
ARRI makes an upmarket version of it, and Lowel makes an even cheaper one. Kits like these have been a staple of low-budget and student productions, and were used a lot before more expensive and adjustable LED technology took over the market.
We wanted to use that five light setup specifically because it’s been used in so many great films. However, we faced a couple challenges on the day of the shoot that meant we had to make a few adjustments. It was raining and we had limited power outlets so we subbed the two 150W fresnels with two LED 1×1 panels running on batteries. Without those factors, you could do that lighting with just that five light kit.
Here’s how we used each light:
- Our 1000W ARRILITE served as the backlight directly behind our subject – you can use 750W and up
- Two 1×1 LED light panels as the rim lighting – placed at shoulder height at roughly 90 degrees to our subject
- 300W Fresnel on a tall stand to wash the background with light
- 650W Fresnel with diffusion and a full CTO gel to get that murder-y orange glow
Want more How To Video?
Get each new episode in your inbox by subscribing to the SproutVideo blog. You won’t want to miss the rest of our series on lighting, as well as cameras, audio, post-production, and more.
Questions about how we pulled off our scary movie shoot? Get expert advice in the comments below.