Footage can be recorded in several formats: uncompressed raw, Log, or standard color space to name a few. But, what do those terms even mean, and how do they impact your final result?
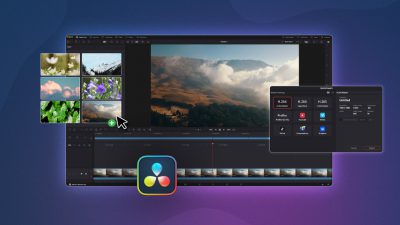
In this week’s How To Video: Post Production episode, we’re going to be taking a deep dive into the different types of video codecs, and the effect they have on your footage.
How Digital Cameras Record Footage
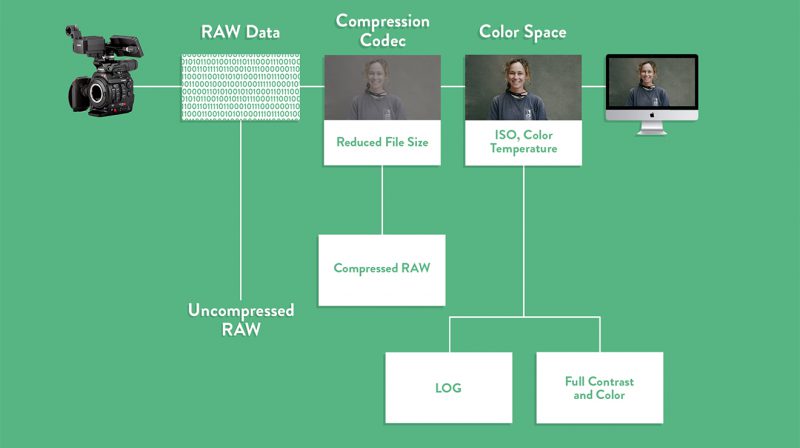
Like most digital processes, camera footage starts as just data – 1s and 0s. The camera’s sensor is made up of red, green, and blue pixels more commonly referred to as megapixels. These pixels capture light, and convert that energy into information that the camera can read, and which eventually, you’ll be able to edit in post-production before outputting a finished video.

Footage Format Options
In order for you to use the footage captured by the camera, the camera has to format the image. There are several different routes you can go when deciding how you want your camera to deliver your footage. You can get raw data, compressed raw data, or color space footage.
The options available vary depending on the camera you use. Below, we’ll look at the three most common formats.
Uncompressed Raw
This is basically the data that we referred to in the first section. These files are going to be enormous since this format contains the maximum amount of data possible.
Think of it as getting a raw photo for each frame of your video. That’s a lot of data!
Because of this, very few people, if anyone, use completely raw footage. However, in theory, this would give you the maximum editing options in post-production if you had a system that could handle such large files.
Compressed Raw
Compressed raw is exactly what it sounds like: a compressed version of raw footage. This format squeezes the footage down to something a bit more manageable without losing the ability to make big adjustments in post-production. ISO, color temperature, and color space are all aspects you’ll be able to control in post.
For many, this is one of the best options to choose if your camera supports it. You’ll lose the least amount of quality while maintaining a relatively manageable file size.
Unfortunately, the best raw compression codecs are usually reserved for higher-end camera systems like Red and Arri. Many other brands have raw options, but might end up losing some of the data when processing the image due to “lossy” compression.
Color Space Codecs
These options compress your footage even further. Consequently, you’ll lose some post-production options, but you’ll gain back huge amounts of space on your memory cards.F
Log
Log (Logarithmic) color space is a popular choice because it allows for the most dynamic range in your footage by keeping the darker areas from creating noise, and the brighter areas from being blown out. It does this by squeezing the image into the middle of the color spectrum to then be edited in post.
Once Log footage has been imported to your editing program of choice (we use Adobe Premiere Pro), you have to apply a LUT (look-up-table), which converts it to a standard color space. A LUT is basically a color preset that you apply to your footage. There are LUTs like the REC.709 LUT which will bring your footage from Log to a more standard look, and there are much more creative LUTs that can give your footage a unique look and feel.
The Standard or REC.709
This codec, which varies from manufacturer to manufacturer, will look the “best” straight out of the camera. Instead of applying a LUT to Log footage or extensive editing to raw footage, this footage needs very little editing in theory. It is the standard delivery color space, with full color and contrast.
Which is Right For You?
Depending on your camera, you might not get much of a choice in terms of how your image is compressed. If you do have options, here’s how to know which is right for your project.
Minimal Processing
If you need to use the footage right away, with minimal processing, The Standard is a perfectly fine choice. The trade-off is that you won’t be able to fine-tune the final result to the same extent as other formats. A great example of this would be if you’re shooting a documentary that accumulates hundreds of hours of footage. If you tried to shoot that raw you would end up with terabytes of footage that would be completely unmanageable. This is where your camera’s standard format will really help your process.
More Control
If your project requires a specific look, you’ll want more control over the color grading process. As your control over the image increases, so does your file size. Consider whether or not the rest of your workflow can manage large files for editing. If you’re not concerned about file sizes, compressed raw or the Log color space is a step up from REC.709 in terms of the ability to edit in post.
Maximum Color Correction
To go even further, uncompressed raw footage would be your next option. This is going to be for super-specific situations where you need complete control over the image.
One example where you’d need that level of control would be a detailed product shot that only lasts a couple of seconds. While the file size will be very large, you’ll have all the information you need to manipulate the footage to your liking.
One thing you have to take into consideration is your ability to actually color correct the footage for Log and raw. While there are lots of LUTs you could use, the color science involved to create the right look can be very complex. For more information, watch our How To Video episode on color grading.
Each of the different footage formats have their advantages and disadvantages. Questions about which one you should use? Share them in the comments below for expert advice.