Audio always needs fine-tuning to sound professional. Still, this highly technical process can be intimidating for lots of video editors, even those with plenty of experience under their belt.
In truth, post-production processing of audio is an entire career track because it’s so specialized and involved. Yet there is quite a lot you can do to improve your audio if you know the basics.
In this episode of our How To Video: Audio series, Nick LaClair, head of video production for SproutVideo, walks you through removing unwanted background noise, and optimizing your vocals in Adobe Premiere. Watch the video tutorial below to learn how to edit your audio, and work more efficiently when processing audio in post. His tips will help you save time and avoid common pitfalls when polishing your audio tracks.
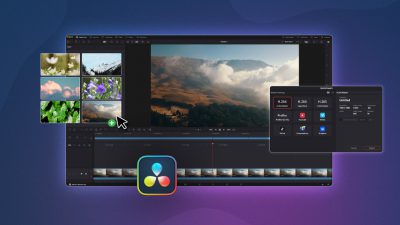
Audio Editing Video Tutorial
This in-depth audio editing tutorial will show you how to sync your audio in Adobe Premiere, edit your audio in Adobe Audition, and put it all back together for an optimal end result. Along the way, Nick provides plenty of additional pointers for improving your workflow when editing audio.
For guidance on making sure your audio inputs are as good as your outputs, check out our episodes on three popular mic types and when to use them, and advanced video audio techniques.
Keeping reading for step-by-step instructions to replicate Nick’s audio editing workflow.
1. Sync the Audio and Video in Premiere
First, you need to make sure your audio and video files are synced properly before beginning the editing process. This is key because ultimately, your edited audio track will be tied to your video track. By syncing them from the get go, you’ll save time and effort later on.
Note: if you did not use an external recording device, and recorded everything with your camera, your audio should already be synced.
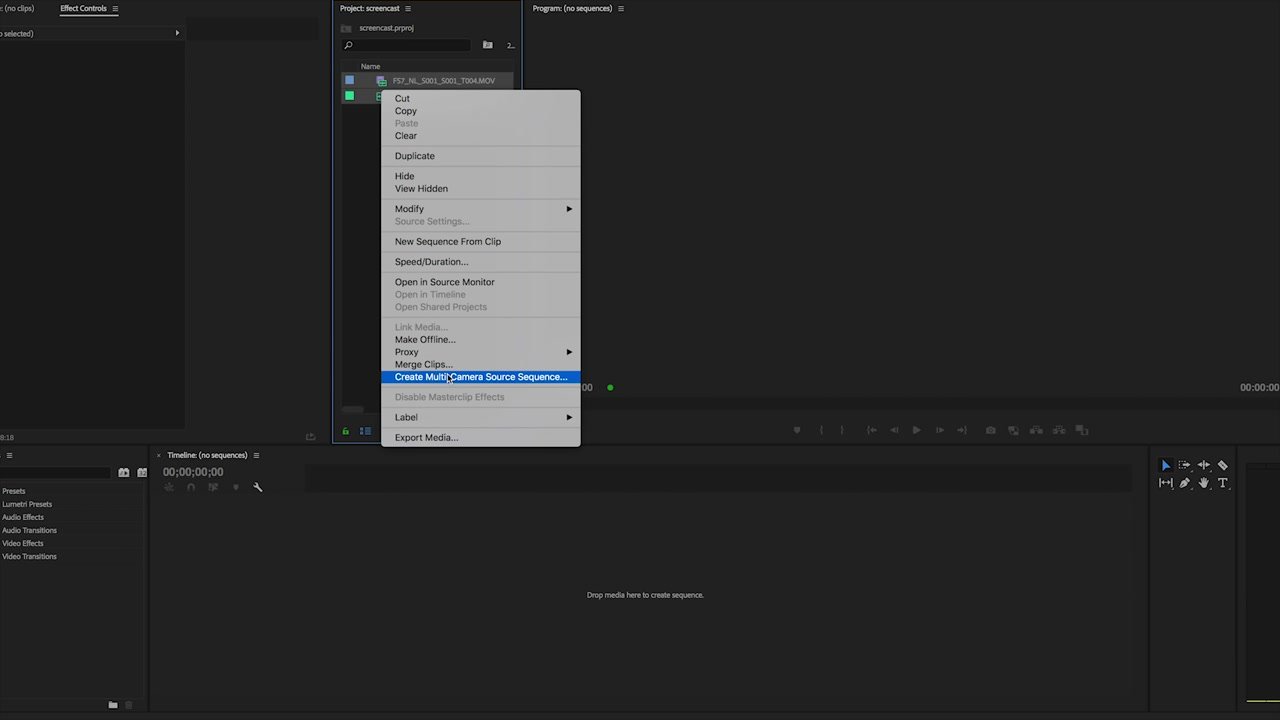
In Adobe Premiere, select your audio and video sequences, right click, and then select Create Multi-Camera Source Sequence.
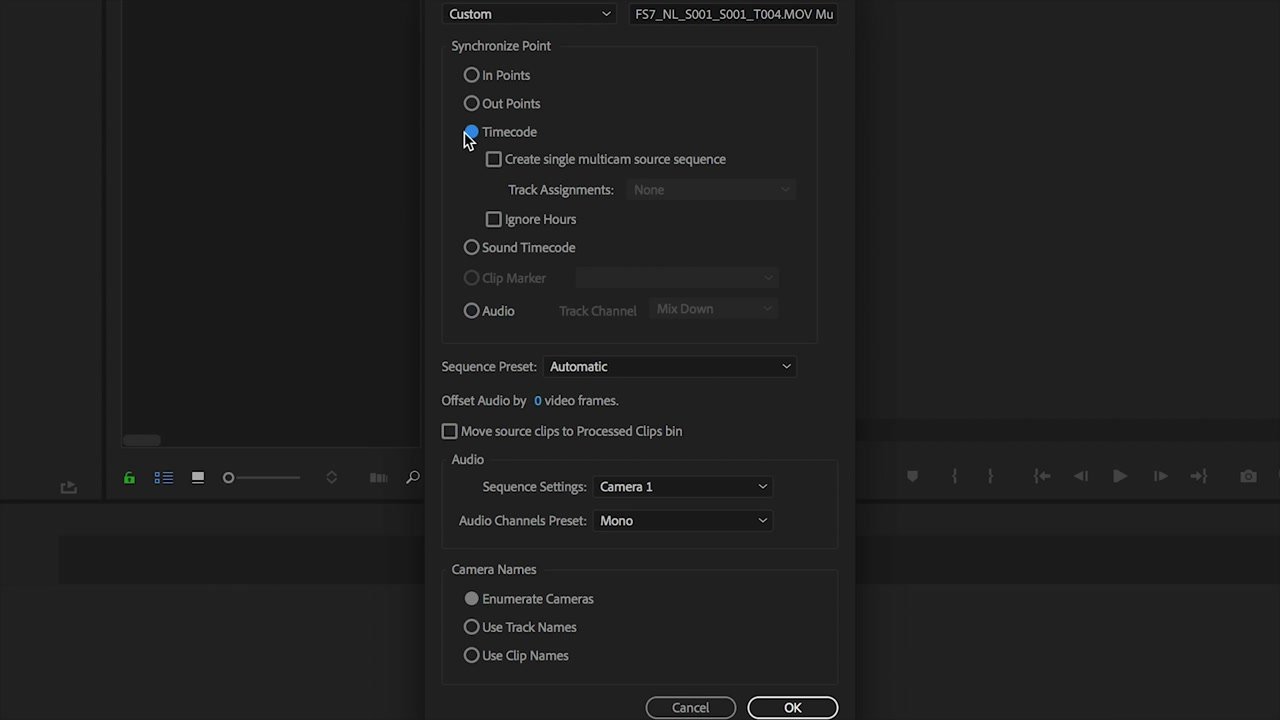
Nick uses the timecode option to sync his audio and video. Another option would be to use the audio waves to sync the audio from the external recorder and the camera.
Next, click OK, and you’ll have a new multi-camera sequence with your audio and video linked. Rename your sequence to something easy to remember – you’ll thank yourself later!
In Adobe Premiere, multi-camera sequences do not behave quite like regular sequences. To edit this one, right click it, and select open in timeline. Whether you have one camera, or ten, they should all be linked with your audio in your timeline.
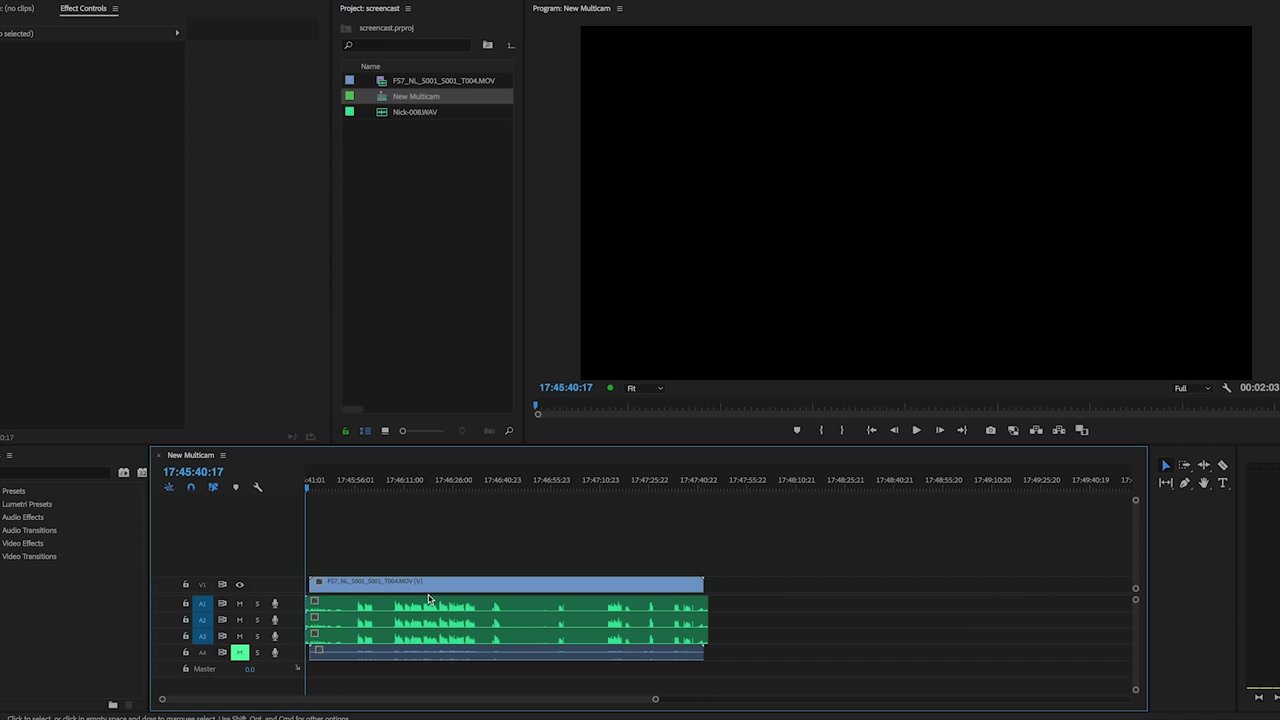
In the image above, you can see the blue video track is synced with the three green audio tracks below it.
2. Audio Editing in Adobe Audition
The next step is to import the audio into Adobe Audition to clean it up. It’s important to do this before you start editing your video.
Chances are, you’ll generate multiple clips when editing your video. If you don’t process your audio first, you’ll have to make changes to each individual audio clip. Not only is that very inefficient, it also introduces the possibility of mistakes or inconsistencies in your audio clips.
Selecting the Tracks to Edit
Your project might be a little different, but the idea here is the same. Simply select the project containing the audio track you want to clean up and follow these next steps.
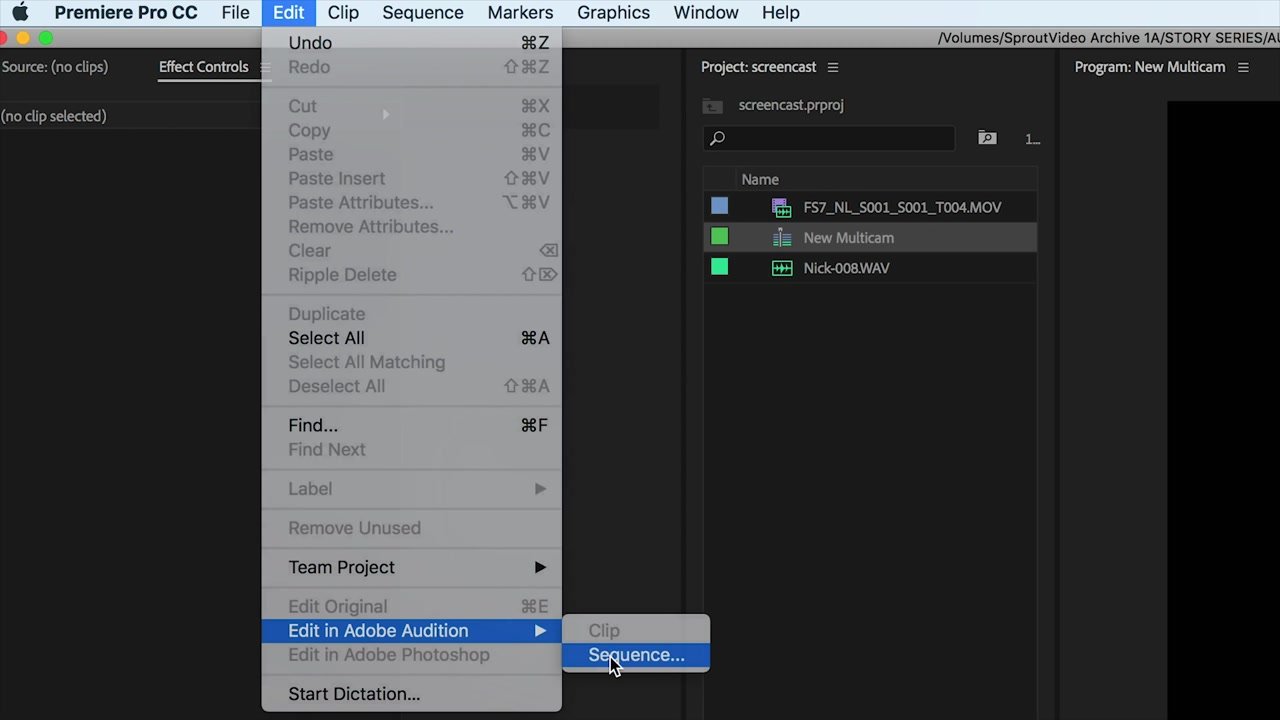
Highlight your project, then use the Edit dropdown menu to select Edit in Adobe Audition and select Sequence:
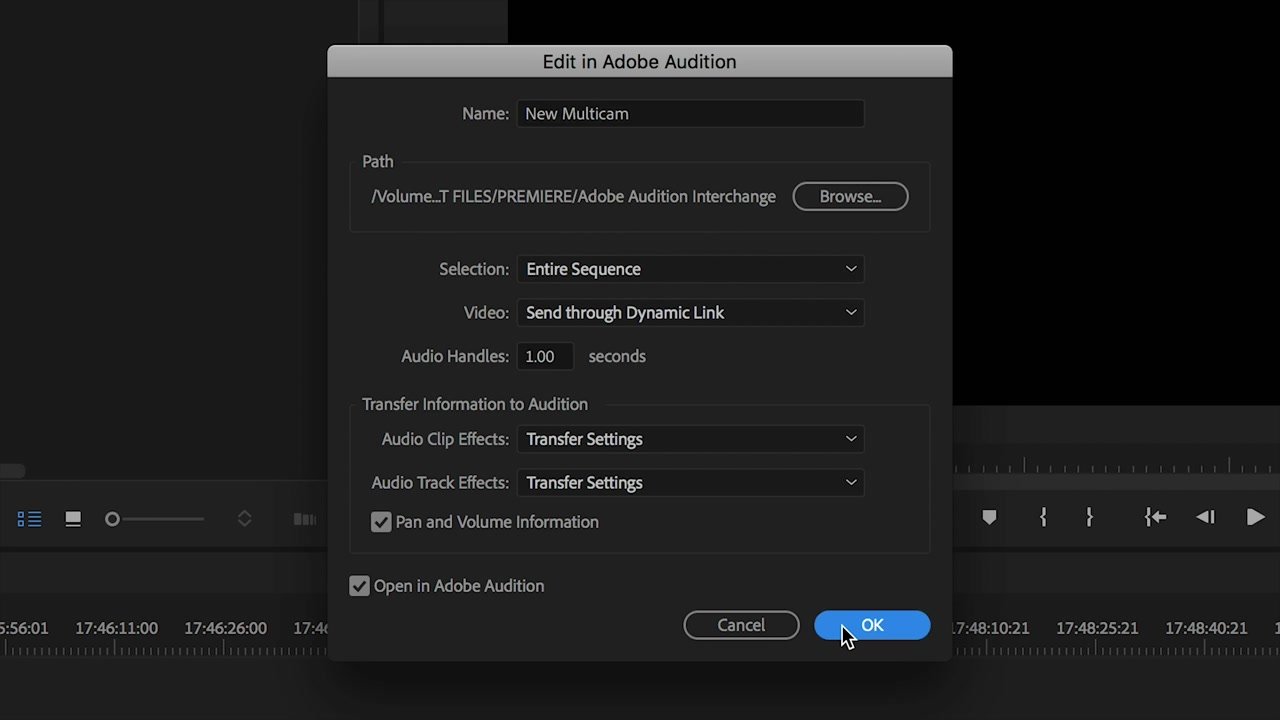
You can leave all the options on the default settings, and just click OK.
If your project contains audio tracks you’re not planning to use (such as scratch, or reference, audio from camera, etc), mute the tracks you do not need. In our case, we are only using the boom mic, so we mute the other two.
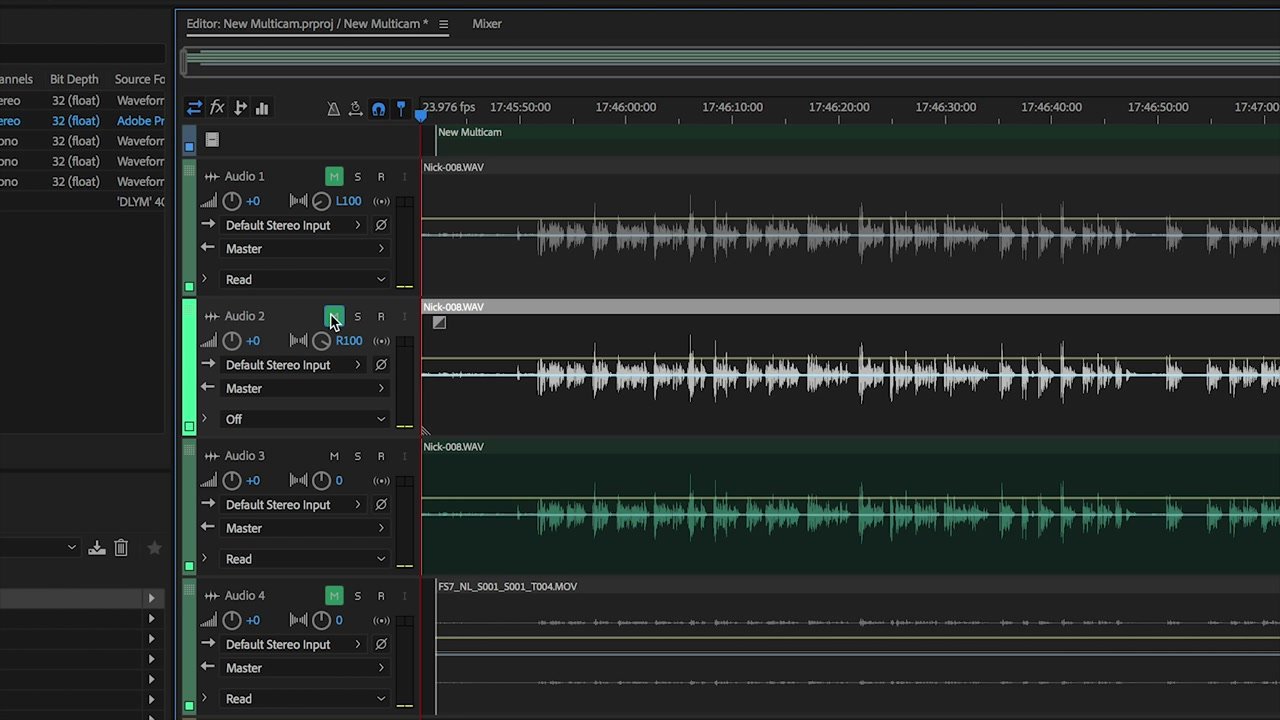
In the image above, the small ‘M’ button will mute the audio tracks you’re not using. They’re greyed out to the right. The track highlighted in green is the unmuted audio from our boom mic, which we’ll clean up in the next couple steps.
Apply a Preset
Audio presets are a great way to save time and effort in Adobe Audition. The right choice comes down to the type of audio you’re working with and the overall effect you’re going for.
In many cases, a clean, rich, natural-sounding vocal track is the goal you’re working towards. Here are the steps to take to achieve it.
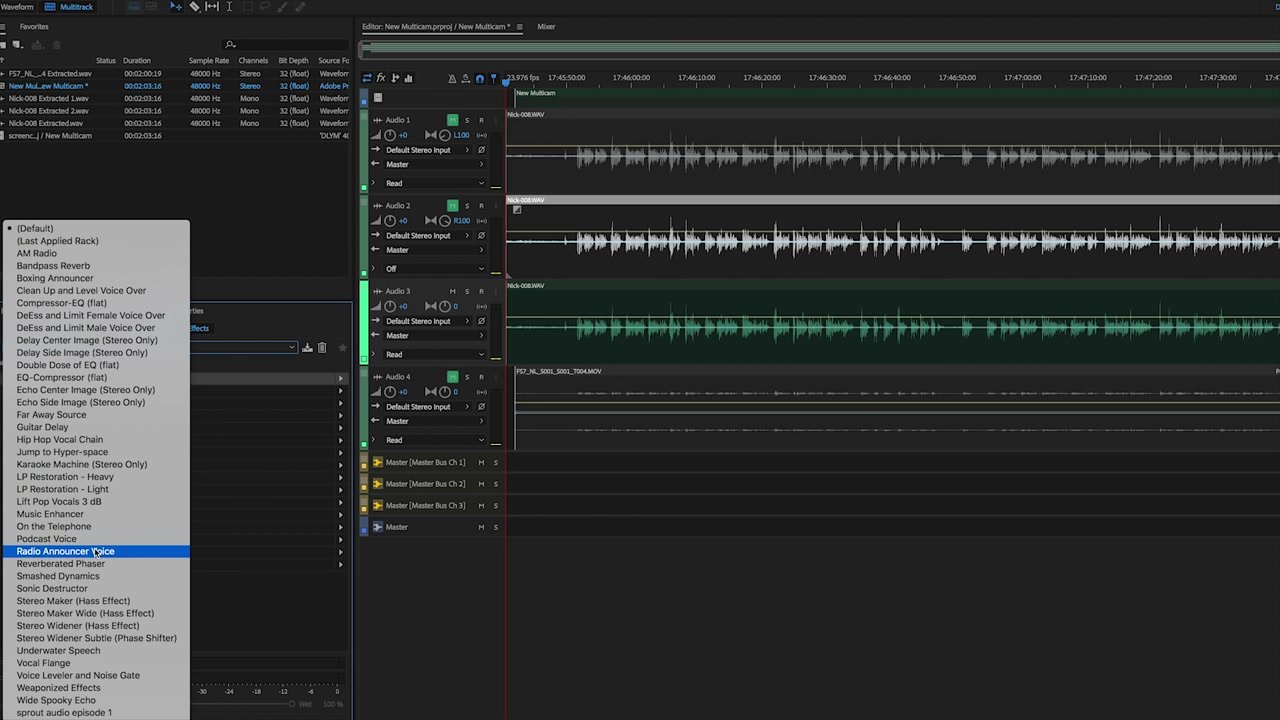
First, select your active track by clicking on the vertical green banner on the right. Next, go to the ‘effects rack’, which is a list of available effects.
The preset for Radio Announcer Voice is a great choice for vocals. It includes multi-band compressor parametric equalizer, and a hard limiter.
For his project, Nick leaves the compressor alone, and tweaks the equalizer. You’re aiming for a full, rich sound. Too much on the low end makes vocals boomy, while too much on the high end will make your “S” sounds harsh and hissy. He also lowers the gain setting to prevent clipping, and then uses the Hard Limiter to change the ceiling to -5 DB.
The exact settings to use here will vary according to your project and the effect you’re going for. Play with the settings until you get the sound you want.
Background Noise Reduction
The last step for cleaning up audio is to apply noise reduction. You can’t do this by track – you have to do this to each individual clip.
For that reason, Nick recommends keeping your audio rolling when in an interview. Don’t start and stop the recording, otherwise you’ll end up with multiple clips that have to be cleaned up individually. You can save a lot of time by avoiding this in the first place!
To remove background noise, you have to first isolate the sound you want to remove. Double click your clip to open it, and use the plus key to zoom in. We’re looking for a quiet spot in between the vocals that contains the background noise (or noise floor or room noise) we want to remove.
Next, choose effects and select “noise reduction,” then “capture noise print.” Pictured below is a quiet section we selected for the noise print.
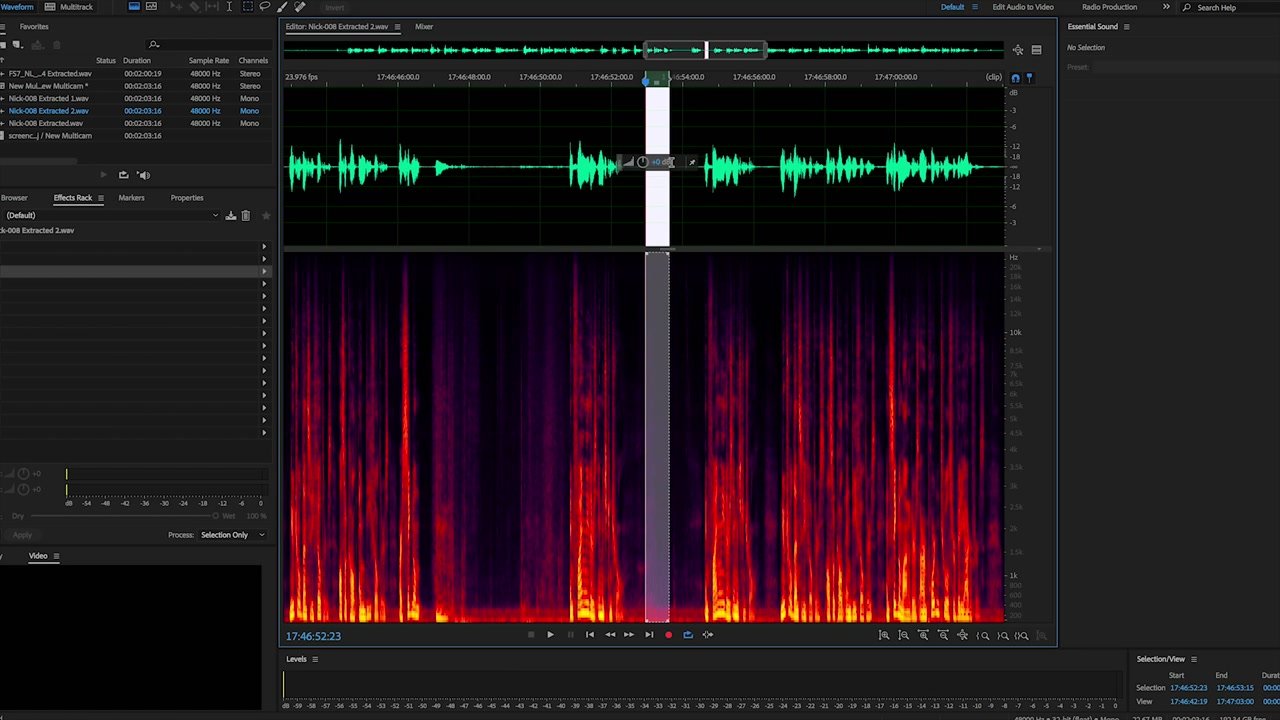
Too little noise reduction, and you’ll hear the noise floor in the room in your audio. Too much, and your subject will sound as though they’re underwater. Similar to the effects applied to your audio, the right amount will be specific to your project.
And there you have it! Your audio should sound clean and polished, and is now ready to be sent back to your video project in Adobe Premiere.
3. Exporting the Processed Audio
Navigate back to your original project. Then, go to File, Export, Export to Premiere Pro.
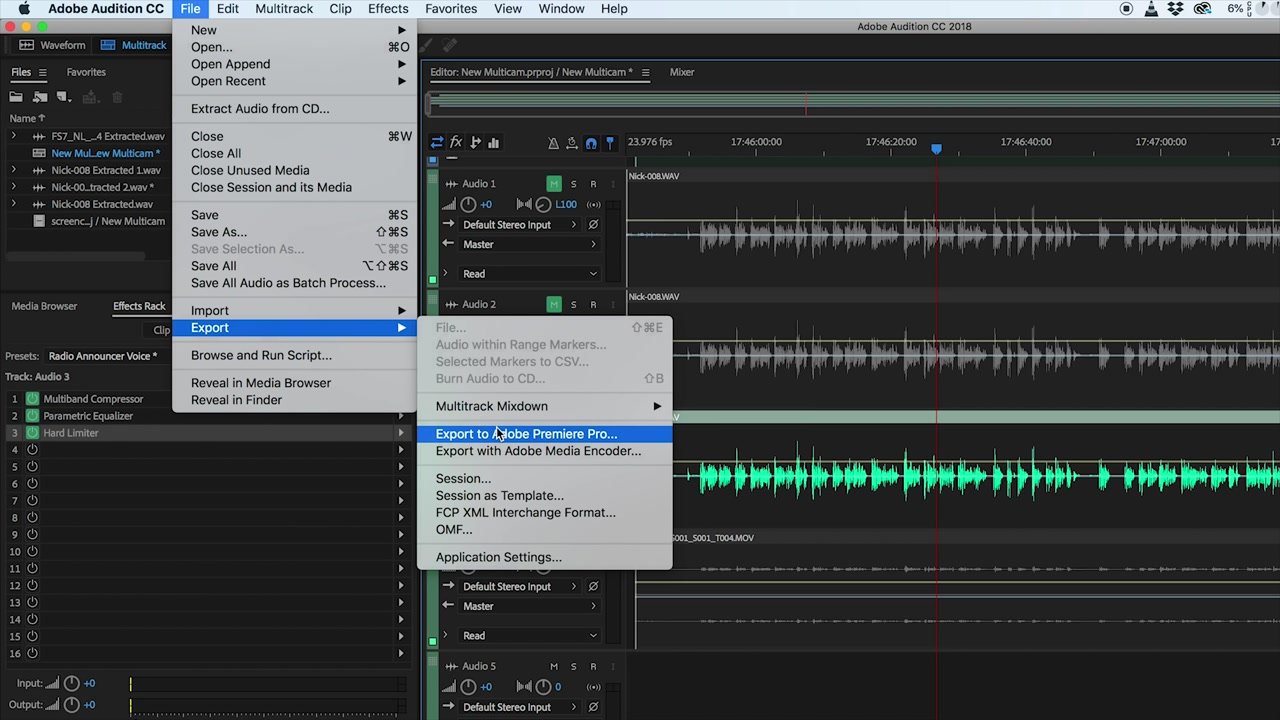
You can either export each track separately as a stem, or mix it all down to a mono track. Since we’re only using the one audio track from our project, we’ll mix it down, and export it as a mono track. You can leave all the options on their default settings, and click OK.
Adobe Audition will now render your new audio file, and export it to Premiere. The best part? It’ll automatically be linked to our Premiere project. Aren’t you glad you synced it all up in step one?
4. Editing With the New Audio Track
Audition has created a new copy of the sequence, and added our mono track as a new track. For this project, we’ll mute everything except the new track.
Now we’re ready to edit our video! To simplify things for editing, first you’ll want to create a new normal sequence from this multicam sequence. Select and drag your multicam sequence to the New Item icon in the lower right-hand corner of the project window.
![]()
The resulting new sequence is the one you’ll edit.
Efficient Post-Production Workflow
The great thing about this workflow is that all your audio is nested into your multicam sequence. No matter how much you edit down your new sequence, you can always go back and make changes to your audio track in your multicam sequence, and those changes will automatically update over your entire edit sequence.
In just three short episodes, we’ve covered a lot! We showed how to select the right type of microphone and place it correctly, advanced audio techniques and dual recording systems, and audio editing in Adobe Audition.
Now that you’ve learned how to perfect the audio in your videos, it’s time to put them to work. Here at SproutVideo, we provide premium video hosting that comes with a variety of top-notch marketing features including a variety of calls-to-actions and lead capture forms you can use to engage your audience. Try us free for 30-days to see for yourself.