You’ve probably heard of white balance or have the setting on your camera, but do you actually understand how it works?
In this How to Video episode, we’ll be taking a look at all things white balance. We’ll explore what it means, the science behind it, and suggest some tools you can use to achieve your desired look.
In the video below, Nick LaClair, Creative Director at Sproutvideo, will walk you through everything you need to understand about white balance.
What is White Balance?
White balance is one of the most well-named camera functions. It quite literally means the process of setting the color temperature of your video so that it matches what our eyes see. In other words, finding the balance to make objects look the way they are supposed to look, or not look if you’re going for an artistic vibe. It’s finding the sweet spot between an image being too warm and too cold.
The Science Behind White Balance
To get a true understanding of how and why white balance is important, it helps to understand the more in-depth science behind how light interacts with everything.
Temperature Ranges
As mentioned above, the goal is trying to find a balance between warm and cool tones in your footage. White balance measures the differences in color temperature with Kelvin. You might remember hearing about Kelvin back in science class. Kelvin is the base unit of temperature in the international system units of units.
Kelvin differs from Celcius and Fahrenheit in that it uses molecular energy given off by objects to describe extremely cold or hot temperatures. The coldest point being absolute zero or 0K, a point where even atoms stop moving.
One example to help illustrate this idea is the use of infrared night vision goggles or cameras. The photo below demonstrates this perfectly.
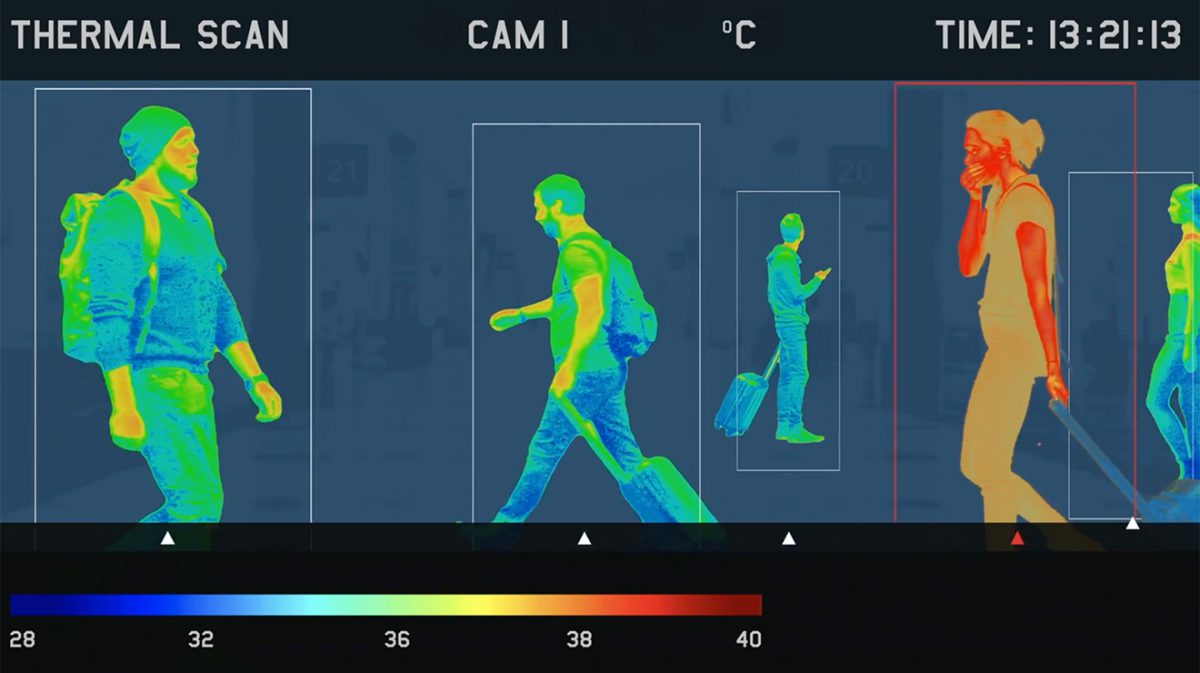
The people give off a certain level of energy since their temperature is around 98 degrees Fahrenheit or 309 Kelvin. You can see them glowing brighter than the cooler backdrop behind them or the suitcase.
You might be wondering what molecular energy has to do with photography. Measuring white balance uses these same principles. The color temperature we use for cameras is based on the principle that certain objects emit light at specific frequencies that can be measured on a temperature scale. For example, the photosphere of the sun has an effective temperature of 5778 K, so the color temperature of daylight is around that number.
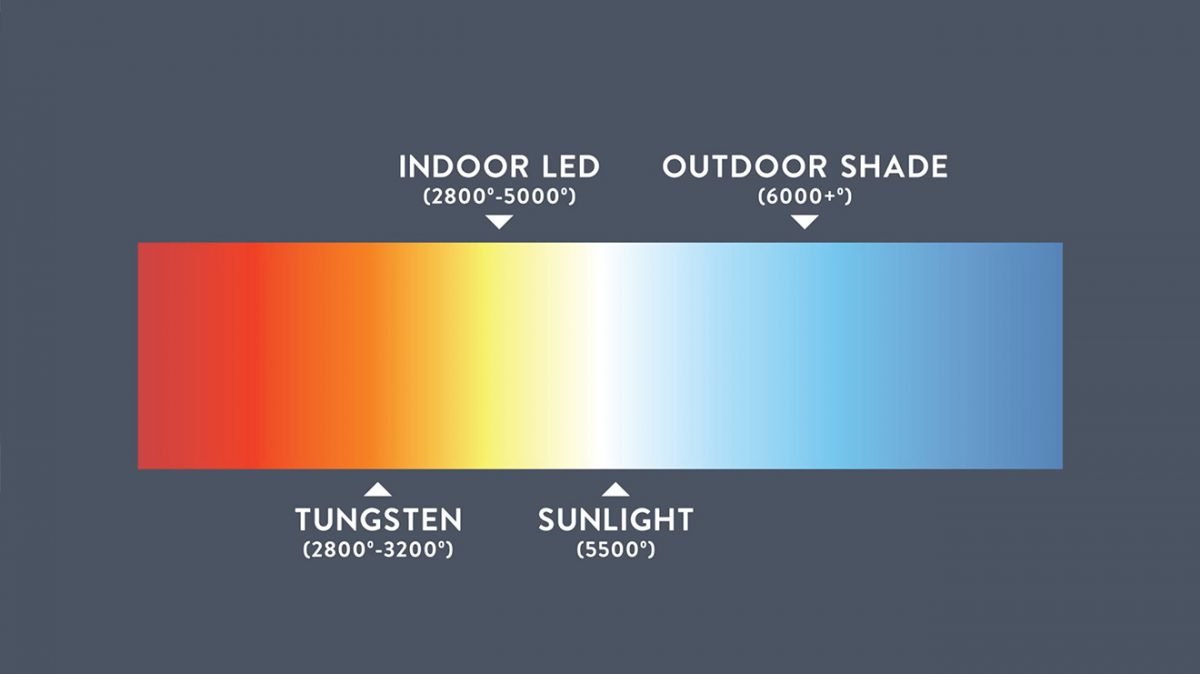
Temperatures below 4000 Kelvin are more reddish, while temperatures that approach 6000 Kelvin and above are very blue. This chart shows some of the common light sources you may encounter, and places them on a Kelvin scale, with tungsten being the warmest and outdoor shade being the coolest.
Our brains are wired to adjust to changing light values very quickly. For instance, think of your eyes adjusting when putting your phone in night mode, or stepping inside on a bright sunny day. Cameras need a bit more help, which is where the white balance settings come in.
Your Camera’s White Balance
A lot of people will leave white balance set to auto, which allows the camera to automatically adjust the setting in changing light conditions. This is fine in many situations, but with some of the information provided in this post, you’ll know when specific settings could be a better choice. The first crucial decision you need to make is whether to shoot RAW or graded footage.
Shooting RAW Formats
If you’re shooting your footage in a RAW format, you actually don’t need to worry about white balance. Since your camera is capturing all of the visual information provided by the scene, you’ll be able to go back in post-production and adjust the white balance to your liking.
That might sound like an ideal solution. However, most people don’t shoot in RAW formats for good reason. To learn more about shooting RAW footage, watch our How to Video episode on demystifying codecs.
Shooting Graded
Graded footage refers to footage captured in full color. The camera is automatically applying a color grade as it records video. This can speed up your editing process after the fact, assuming you like the color grade.
However, you might occasionally find that your footage does not appear true to life in terms of coloration. It could be too cool, making your subject look sickly, or too warm, causing skin tones to look more orange or red.
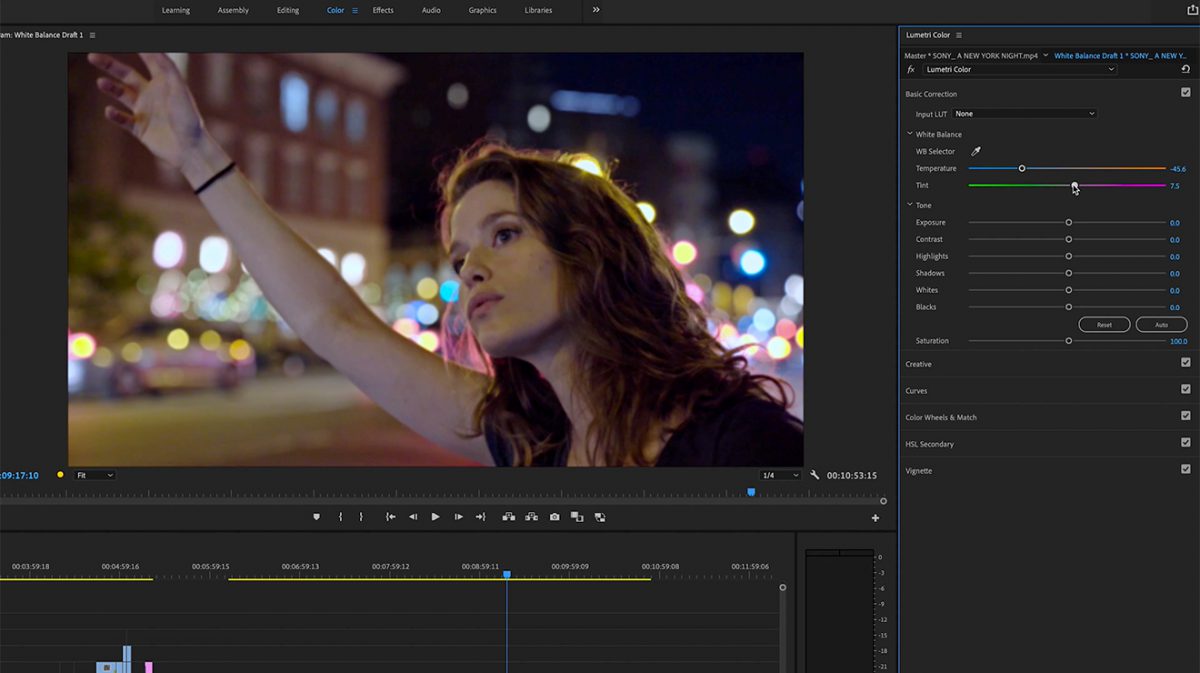
Your white balance settings are the way to correct those types of issues with graded footage. Typically, there is an auto setting, along with custom options, Kelvin settings, plus various recognizable light choices such as tungsten or daylight.
The auto setting works as you would imagine. The camera uses an algorithm to do its best to match the color temperature to what it thinks is most accurate. While this can be somewhat reliable in a controlled environment, if you’re shooting in different locations or the light changes, the camera might struggle to keep up.
The Kelvin setting lets you choose a temperature or range of temperatures, and set your camera to that. This is great if you have a studio with controlled lighting since you’ll be able to match your white balance to the light temperature in the room.
The various options ranging from tungsten to daylight, e.g. warm to cool, allow you to choose which type of light is illuminating your scene, and then adjust the white balance to match, similar to the chart above. These settings will help you achieve accurate color in your footage, and any further adjustments could be made in post-production.
Tools You Can Use
Luckily you don’t have to tackle this process empty-handed. There are several tools you can use to determine the correct white balance setting to use with your camera to help with color accuracy.
First up, and the most expensive, is an electronic color meter. If used in a studio setting, this tool will measure the exact temperature of your lights so you can set your white balance accordingly. The one shown in the video is the Sekonic C-800 SpectroMaster Color Meter, which comes in at a hefty $1,599.
Next, you could opt for a white balance card set or grey cards. Before rolling, you’d hold up the card and adjust the white balance so the greys are neutral. This will help your footage look more natural. These cards are very affordable compared to a color meter, but lack precision. We’d recommend the Vello White Card Set, which comes in various sizes.
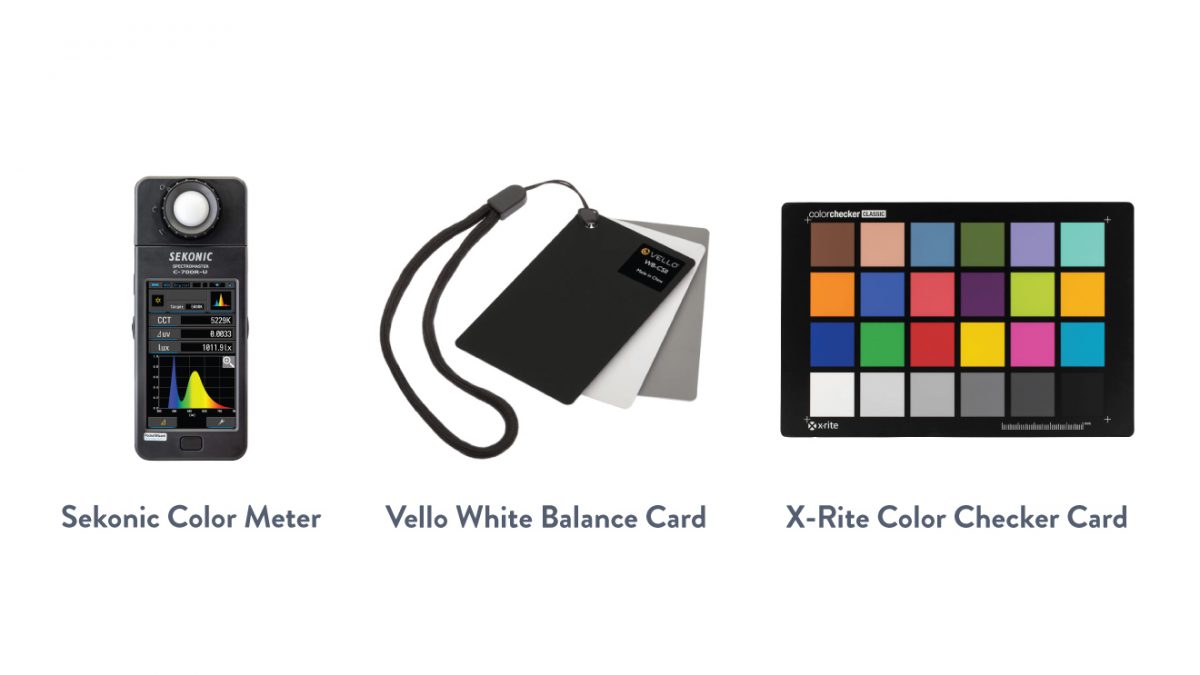
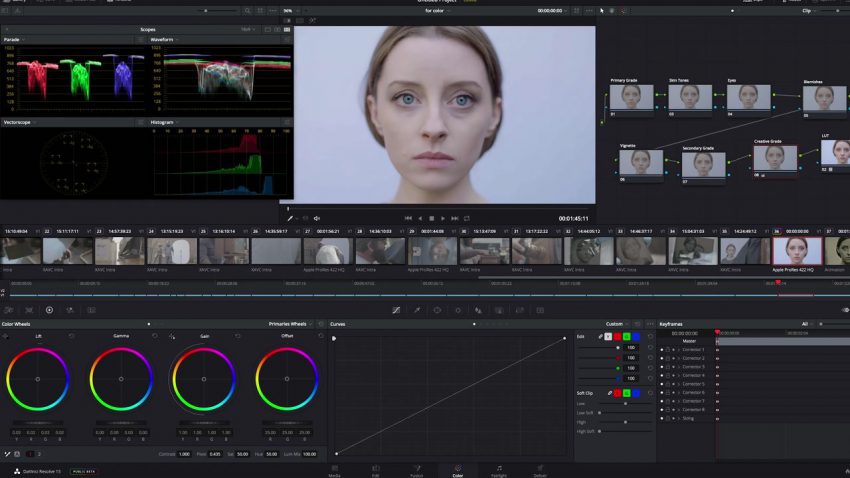
Lastly, a color card is another very commonly used tool to achieve an accurate white balance in your footage. This method combines a physical color card, like the X-Rite Color Checker Card, along with software like DaVinci Resolve. While shooting, be sure to get a clear shot of your color card under the light source you’ll be using. Then, in post-production, your software will analyze that color card and set the temperature and hue of your footage to match how that card should look in real life.
How Important is White Balance?
The short answer is: very important. All camera functions serve an important role in filming. The long answer is: it is important, but the amount of importance depends on what you’re filming.
Color balance is of the utmost importance when filming items that absolutely need to be true to color. Think of product or clothing shoots. If the product is represented inaccurately, it could cause headaches for your business or your customers.
Where white balance becomes less important is if you’re shooting scenery, a project with a specific artistic vision, or subjects where you can take liberties with the coloration. With people, for example, you definitely have some wiggle room on what is acceptable for the right tones. Just don’t go too far in either direction. Too cool and people start to look sick, and too warm and you get the Oompa Loompa look. As long as their faces look correct to you, the rest of the scene will fall into place.
While this post was primarily about white balance, color grading plays a big part in post-production adjustments. Be sure to watch our episodes on post-production for more information.
The science behind white balance can be tricky at first, but understanding how it works will set you worlds ahead of the competition. Let us know what methods you’ll be using to achieve the perfect white balance during your next shoot.