In this episode of our How To Video: Filming Solo series, our Creative Director, Nick LaClair, breaks down how to execute a professional video shoot all by yourself.
To ensure that you get off to the right start, we’re looking at the gear you’ll need as well as three key steps to take prior to shooting. Watch the video below and keep reading to learn all the secrets to being the star of your own show.
Minimum Gear
If all your fancy equipment is packed away at the office, never fear. You can still achieve excellent results with minimal gear.
After all, filming yourself is technically as easy as pulling out your smartphone, turning on the camera and pressing record. However, with a few add-ons and adjustments, your production value can increase exponentially.
Camera
While filming yourself at home, just about anything will work. Of course, the better the camera, the better your result. You can use your smartphone, a point-and-shoot camera, DSLR/Mirrorless cameras, a camcorder, or if you happen to have it, a professional cinema rig. Our main camera is the Sony FS7 camcorder with a Fujinon 18-55mm zoom lens.
The one type of camera we wouldn’t recommend is your webcam. While using your computer to film your video might be convenient, the quality of your video will take a pretty drastic hit. Webcams are usually much lower quality than smartphones, so if you have to pick between them, go with your phone.
If you have multiple options, or are looking to purchase a camera for your at-home filming, take a look at our guide to the camera features that matter.
Tripod
Next, you’ll want to make sure your shot is as steady as possible. A tripod is an ideal choice in this situation. After all, if you have to film yourself for more than a few seconds, you can’t really hold a camera at the same time.
Having a stable shot instantly makes your video seem more professional. For our video purposes, we use the Sachtler Flowtech 75.
If you can’t get your hands on a tripod, opt for propping your camera up on a flat surface so that it’s level and secure. The ideal height and distance of your camera from your subject will depend greatly on how you compose your scene, which is covered below.
Lights
Lighting is an extremely important part of any professional video production. Too dark, and even the best camera will struggle. Too bright, and your shot will be blown out or silhouetted.
While you can use dedicated lights to film yourself, a big window is an easy option to light your scene, as Nick did in the video above.
The most important tip is to face the light source. This will illuminate your face and background in a flattering manner.
When your light source is just a window, it will be hard to make any fine-tuned adjustments. Your best bet is to prepare as much as possible and be open to testing different times of the day to see what looks the most aesthetically pleasing.
If you do have lights, check out our post, “Achieve Flattering Lighting on Camera in an Office Environment.” While that post was written for the office, all those tips apply to your home as well.
Microphones
Another extremely important aspect of your video is going to be how you sound. Similar to the last two pieces of equipment, using an actual microphone will be your best bet. We suggest using a lav or external boom microphone for the best result. Check out our previous “How To Video” episodes for an in-depth overview of your audio options.
If you don’t have an external microphone, do your best to record in a quiet room. Check for any sounds that might be picked up as background noise, such as fans, an A/C unit, or your family in the other room. Removing these background noises help with sound clarity more than you think.
Set Composition
Composition refers to the placement of everything you can see through the viewfinder of your camera. To create an ideal composition for filming yourself at home, look for an area of your home with ample room to position yourself in front of a simple, clean, and distraction-free backdrop.
The first thing you’ll want to do is frame your shot. This is essentially as easy as it sounds. Once your camera is in place, take a look at your viewfinder to make sure that your background looks the way you want. Check the edges and corners, and make sure nothing looks out of place.
Background
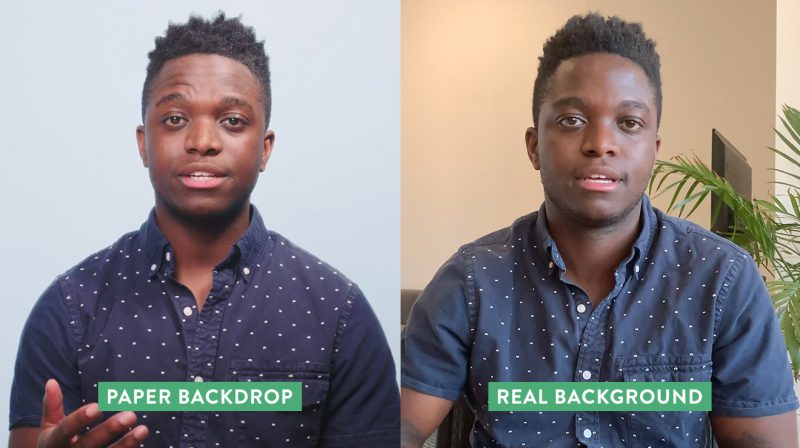
Your background setting could go one of two ways depending on the materials you have available. First, you could go with a real background, meaning the actual space you’re sitting in. Depending on the video you’re filming, that could be your living room, home office, or whichever room is available. This has the benefit of adding a more personal look and feel to your video.
The second option, if equipment permits, would be to set up a paper backdrop as if you were in a studio. You can also use a wrinkle-free sheet in a pinch. This keeps the composition very clean and simple, and focuses the attention more on you.
Framing The Subject
Next, you’ll have to get into the shot to make sure that you, the subject, are framed correctly. You’ll need to decide if you want to stand or sit, and how much of your body you want to be shown in the video.
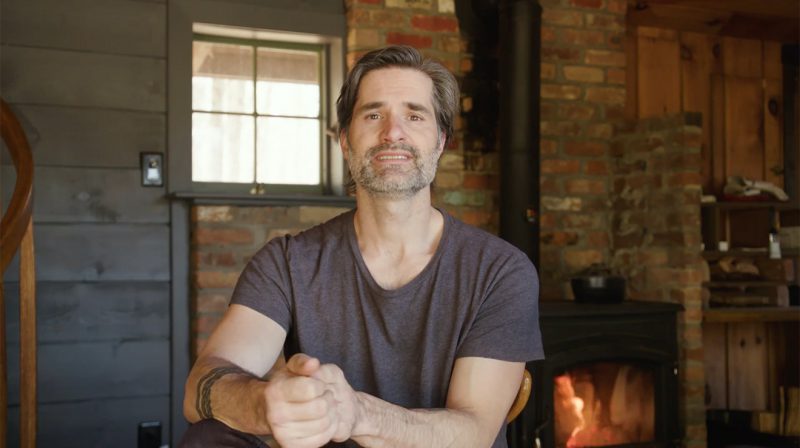
In our How To Video series, we generally use a medium shot, and a real background with the subject seated, as seen below. This is a great shot to use if you’re just starting out.
Checking Your Composition
To check your composition while shooting solo, you have several options. Many cameras have a flip-out screen so you’ll be able to see just enough to make adjustments to your scene. When you’re using your phone, you can set it up in selfie mode to check your composition. If your camera doesn’t have a flip-out screen, you could purchase an external monitor, or potentially use an app to connect your smartphone as an external monitor.
If none of those options work for you, simply turn on the camera, sit down, and record yourself for a few seconds. Once you’ve done that, go back to your camera to review and adjust your composition from there.
Focus Types
In this context, focus refers to the region of space that will be visually sharp in the video as opposed to being fuzzy or blurry. In almost every instance, you’ll want your subject to be ‘in focus.’
Autofocus
For most cameras, you’ll have the option of choosing manual focus or autofocus. If you go with autofocus, it will without a doubt make it easier to film yourself. It basically makes this process a “set it and forget it” situation. Autofocus uses in-camera or lens technology to keep the focus on the subject while filming, which is ideal for a solo project.
However, autofocus isn’t always as reliable as we would like it to be, and varies from camera to camera, if available at all. All smartphones, DSLR/mirrorless, and point-and-shoot cameras have autofocus built-in at this point.
However, not all lenses support it. Most photo lenses do, but rehoused lenses are less likely to. And, if you’re using a camcorder, only the newest models support autofocus, such as Canon’s cinema line with face detection autofocus built-in.
Review your equipment specifications, and record a quick test to see how reliable the autofocus is before you start filming yourself for real.
Manual Focus
If you’re choosing to go the manual route, or autofocus isn’t available, there are ways to ensure that your focus is tack sharp without someone monitoring the camera.
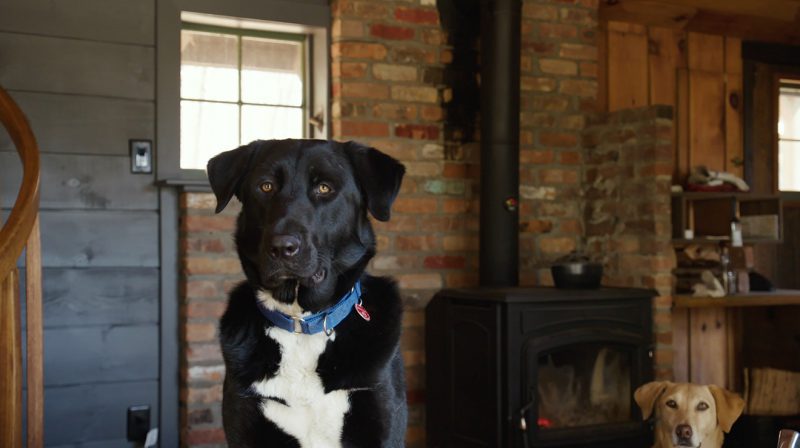
One option is to lock in focus prior to filming. To do this, you’ll need to place something in the frame right where you would be sitting or standing. This allows you to head back to the camera to focus on that object. In the shot below, we had a very good boy stand in as our subject.
Once you get back in the frame, you should be completely in focus and ready to move on.
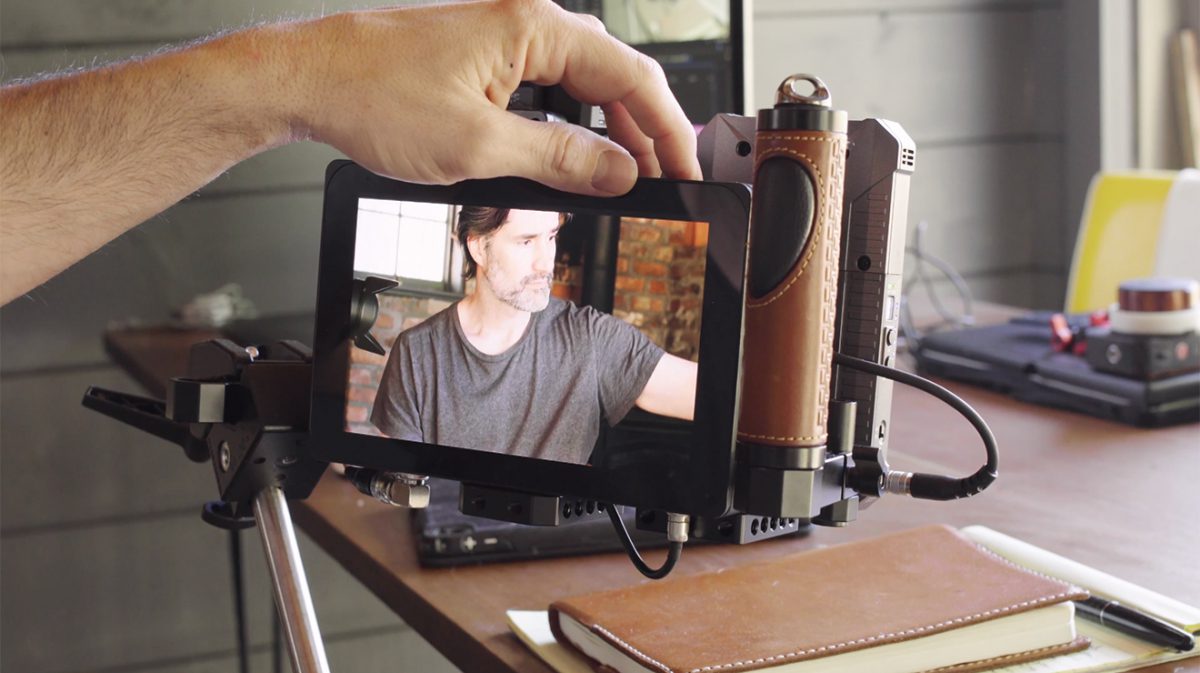
A more professional option would be to attach a follow focus to your camera, and then pull focus while looking at an external monitor. A viewfinder or flip-out screen is most likely too small and too far away to pull focus, so you’ll need a dedicated external monitor to pull this off.
The last (and the most fun) option would be to get a focus dog like Lucy in the video above.
Last Looks
This is the last step before hitting the record button. Last looks is your chance to troubleshoot any visual details that you need to before you start rolling. Check for lint on your shirt, put the final touches on your hair or makeup, check your background for any distractions, and go over any other small details that you might need to adjust.
An easy way to check for these types of issues is to start filming for a few seconds and say a few lines. When you review this short clip, look for absolutely anything out of place. Be meticulous about it, while also reviewing your natural body movement to make sure you stay in focus. If you have an external monitor, it can be used for last looks as well.
Pro Tip: You can also take this time to amp yourself up before recording. Even the most experienced speaker can get nervous in front of the camera. Check out our post “27 Ways to Feel Like a Natural in Front of the Camera.”
Shooting at home may seem like a daunting task, but with a little planning and review, you will be filming a professional-looking video by yourself in no time. Questions about getting started? Get professional advice in the comments below.