It’s one thing to shoot a video in a studio where you have total control over the lighting setup. It’s quite another to shoot in a typical office environment, with a mix of natural and artificial light sources.
In this episode of our How to Video: Lighting series, we’re focusing on how to successfully craft indoor environmental lighting to achieve a beautiful end result. This particular tutorial builds on skills we covered in our previous episodes on video interview lighting, and studio lighting.
Whether you have a lot of lighting gear, or just a bright window in a cool space, this guide will help ensure your subjects look their best on camera in an office setting.
Indoor Lighting Video Tutorial
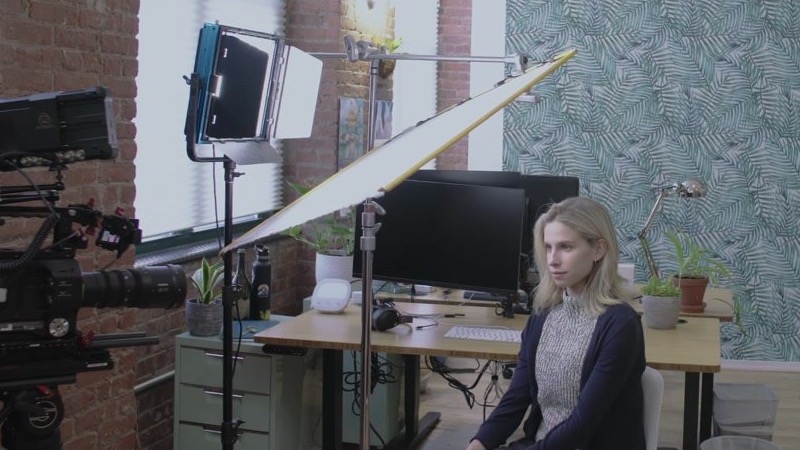
Watch as Nick, head of video production for SproutVideo, walks you through crafting the lighting in a typical office environment to achieve an appealing, natural look. The goal is to work with what you already have, while enhancing the level of detail visible on camera.
The Challenges of Indoor Environmental Lighting
In the last episode, we lit our subject against a backdrop. Today, we’ll be working with a more dynamic background, and mixing our studio lights with the light streaming in from the windows in the office.
Indoor environmental lighting is usually an asset, especially if you have nice, big windows on an overcast day. All you really have to do is position your subject the right distance from the window to get a nice soft glow on their face.
However, it can be challenging because if the windows are too bright, you’ll lose detail in your subject’s face, and they’ll appear washed out on camera. If it’s too dark, you’ll lose dimension, and their features will be obscured.
Also, windows alone might not provide the right amount of light for the whole room. Meanwhile, overhead lights commonly found in offices tend to flicker on camera, and cast harsh shadows. You may find the addition of just one or two more studio lights can really enhance the overall look of your shot.
We’ll be working through two setups to illustrate the difference multiple lights can make in addition to natural sunlight indoors. You can get really far with just two lights and a silk, but we’ll also show you how to use extra lights if you’ve got them.
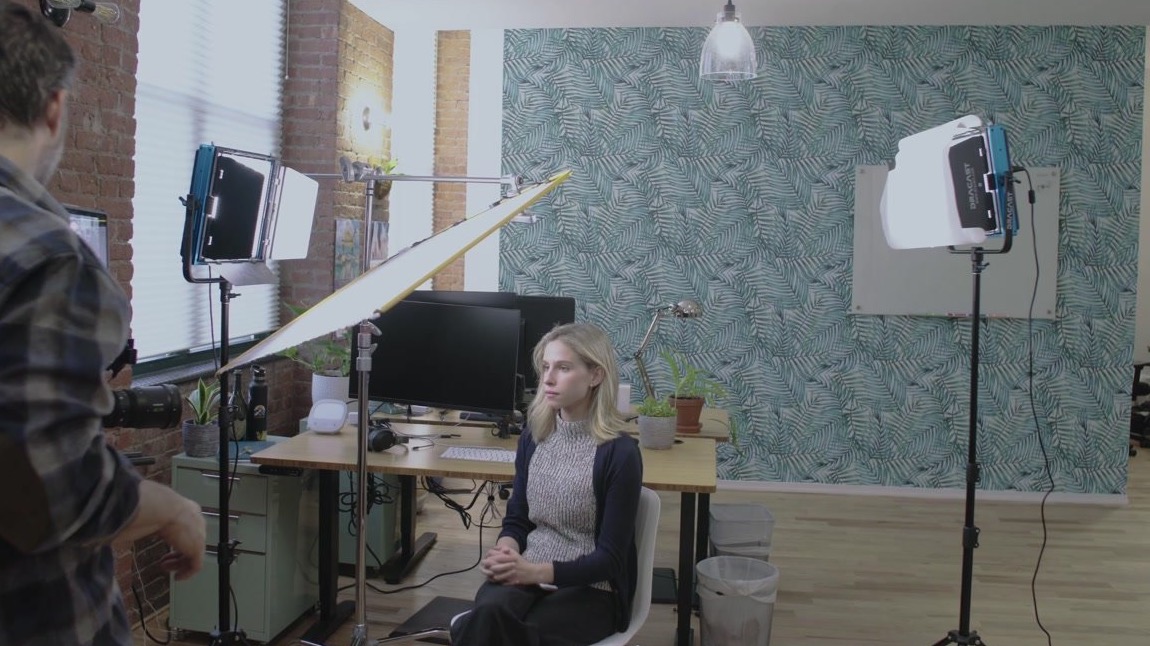
In the first setup, we’re using a smaller travel kit. We have two 1×1 panels and a flag kit. We’ll show you what’s possible with just these pieces of equipment because sometimes that’s all you need. In our second setup today, we’ll show you what you can do with additional smaller LED lights to really tweak the lighting in the room.
Composition and Balance
The first step is to choose our composition. When you’re not in front of a plain backdrop, there are more decisions to make regarding the position of the camera and what’s included (or not) in the frame.
We chose an angle that would allow us to show interesting aspects of the space, like the decorative wall, and plants. We also made sure to show plenty of depth to help make the space seem expansive. Finally, we placed our subject so that the background would not be in focus, creating an ideal separation on camera.
Adding Lights
It’s all about working with the ambient light instead of against it. Generally speaking, you’re try to match the intensity and color temperature of the natural light sources.
That means removing any light sources that don’t blend in well, like overhead lights, and adding back the right ones. The end result will be a seamless look that enhances the visual appeal of the scene without looking artificial. Let’s get started.
Key Light
For our key light, we’re using a 1×1 light panel and shooting through diffusion. It’s positioned off camera to our left, as you can see below. It’s pointing slightly down at Leigh’s face in a similar angle to the sunlight coming from the window.
The goal is to replicate the natural light, but with more directionality so that the light is shaped properly across Leigh’s face. The diffusion through the silk keeps the light soft and flattering, helping to avoid harsh shadows on her face.
If you don’t have a light to use as your key light, you can use a window, and adjust the amount of light coming through it with sheer curtains (or a similar material) to get the look you want. For more ideas on thrifty ways to optimize your lighting on a budget, read 7 Quick Steps for Simple Affordable Lighting.
Back Light
The next step is to add our backlight. The backlight helps separate Leigh from the background, and illuminates the silhouette of her head and shoulders.
We’re using a 1×1 lighting panel with a piece of diffusion on the light. Your backlight is usually positioned opposite your key light and behind your subject. Here’s a look at how we placed ours:
Fill Light
And finally, we’ll add a reflector for the fill. A reflector is a large shiny surface usually placed in front of the subject at a similar but opposite angle to the key light.
The reflector bounces some of the key light back into Leigh’s face on the shadow side, helping to wrap the light in a natural way around her face. It softens the shadows and helps make sure we get plenty of detail on her face.
Finishing Touches
With the key light, backlight, and fill in place, completing our first setup, you could stop right there and start filming. However, if you’re going for a little extra polish, you’ll want to dress up the background just a bit.
For instance, the shot of Leigh below looks good, but there are two areas that could be improved – can you spot them?
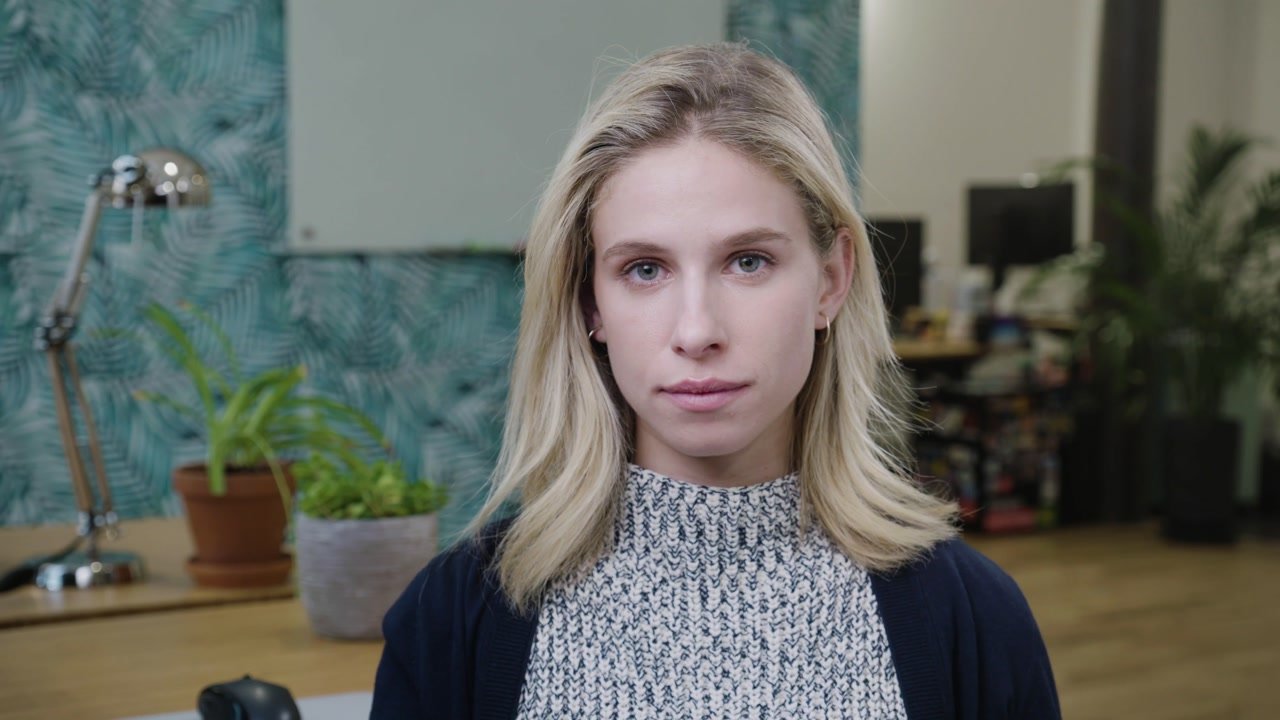
The wall behind her to camera left is a little dim, and the room to camera right is a bit dark. So, for setup two, we’ll add some small LED lights to illuminate those areas, and give us an overall brighter feel to this scene.
To camera left, we added one light washing over the wall. To camera right, we used two lights: one to light the wall, and one to light the floor. On camera, this reads like one large light source filling the area.
Here is the final result:
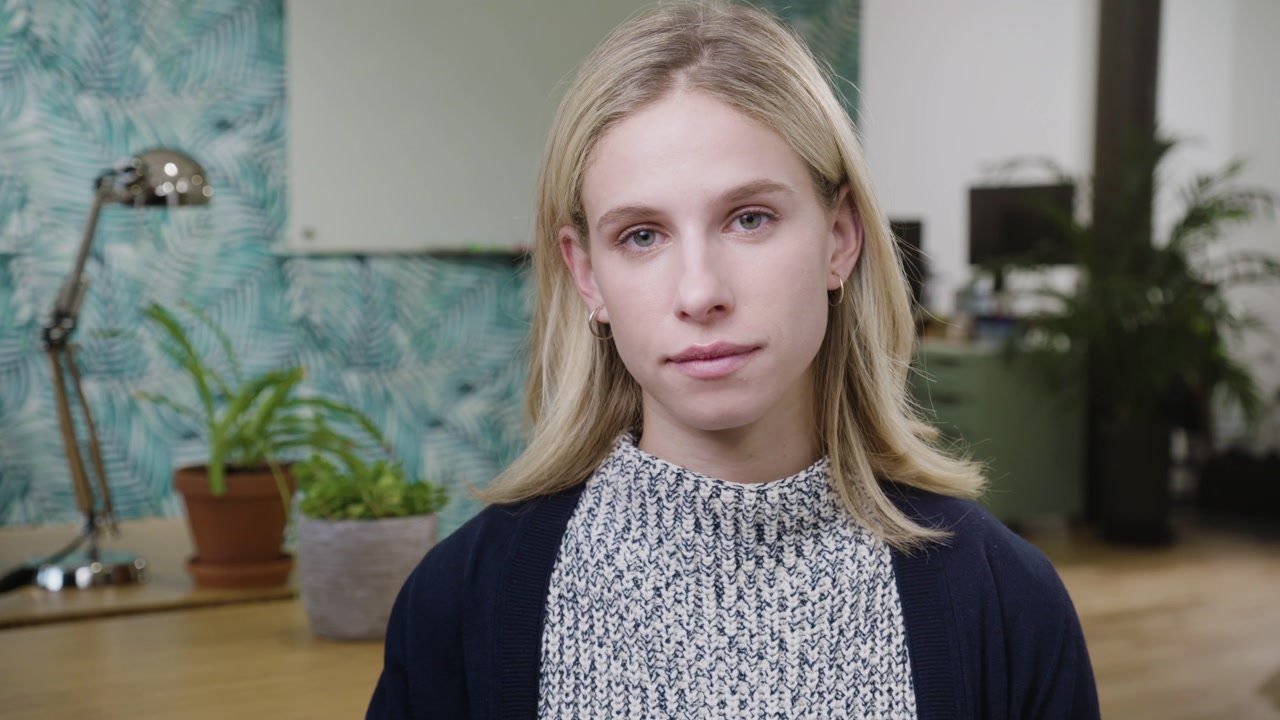
In indoor environmental shoots, it’s important to try to make your lighting look natural. You don’t want your subject to look overly lit compared to the ambient light. Keep that in mind, and your indoor environmental shoots should turn out well.
Have questions about indoor environmental lighting, or any of our video lighting series videos? Drop it in the comments below or find us on Twitter @sproutvideo!