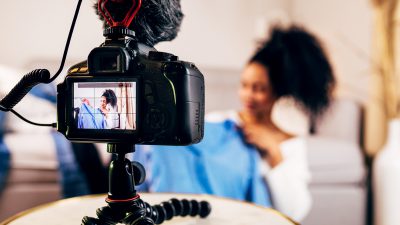
Nothing ruins a video faster than bad audio. And, of all the aspects of your video, it’s the hardest to correct if you don’t get it right in the first place. You can cover a bad shot with b-roll, or correct many visual issues in post. Rerecording or cleaning up audio is a challenge few want to be faced with.
In this How To Video: Audio episode, we’ll walk you through the process we took to transform a normal office into an acoustic masterpiece. We’ll cover the fundamentals of acoustic treatments, and share some tips and ideas on how to optimize your recording space at home.
In the video below, Nick LaClair, Creative Director at Sproutvideo, will walk you through our exact process for improving the sound in our video studio.
Acoustic Treatment
A basic understanding of how sound works will set the stage for better acoustic treatment. When a sound wave hits a flat surface, like a bare wall, it bounces off the wall. If the room has primarily flat surfaces, the sound will reverberate as the waves bounce off all the surfaces. To your ears (and to a microphone), it will sound like an echo. The smaller the space, the tighter the echo. This is a big part of the reason why an untreated room sounds less desirable on camera.
When recording audio, you’ll capture direct sound and reflected sound. Direct is from the source right to your ears or your recording device. Reflected sound is what is bouncing off the walls and being captured slightly later. It’s also what causes distortion, echo, and other audio problems. There are two ways to help minimize these unwanted audio elements: absorption and diffusion.
Absorption
This is exactly what it sounds like. Using the materials we’ll cover below to absorb as much of the excess sound waves as possible before it hits the microphone. While this isn’t 100% effective, it generally does an amazing job of helping control the sound.
Diffusion
Diffusion takes that excess sound, and scatters it into different directions. Typically, this is used in conjunction with absorption. When absorption works well, sometimes the room will sound too empty. Utilizing diffusion materials will take any remaining excess sound and spread it around to create an even, natural tone.
Room Evaluation
Before you get to the materials and setup, it’s important to evaluate the room you plan on using to make sure that you can achieve exactly what you want. The wall materials, windows, and the general shape and size of your room will all be a factor in your audio treatment.
From the get-go, you should just assume the room you choose to work in won’t have the best acoustics. Take a cathedral for example, the acoustics are brilliant for a reason. That room was designed from the ground up to produce an amazing sound experience. Most bedrooms or offices are not built with sound in mind.
Designing Your Acoustic Treatment
Based on the wall materials and dimensions of your space, you’ll want to address the way sounds travel in the room itself. And, any sources of background noise, like windows, air conditioners, or fridges will have to be mitigated or removed.
Live End Dead End (LEDE)
The general idea is to adjust the amount of sound reflected in the space by using one end of the room to absorb more sound than the other.
The live end is usually behind the person listening or the device recording and opposite the source of sound. It reflects some sound back into the room to create a natural-sounding audio environment.
The “dead end” of the room refers to the half of the room that is set up to deaden sound and absorb more of it than the “live end”. This LEDE setup will ensure the sound reflecting off the live end will be absorbed by the dead end, resulting in cleaner audio.
Alternative Setups
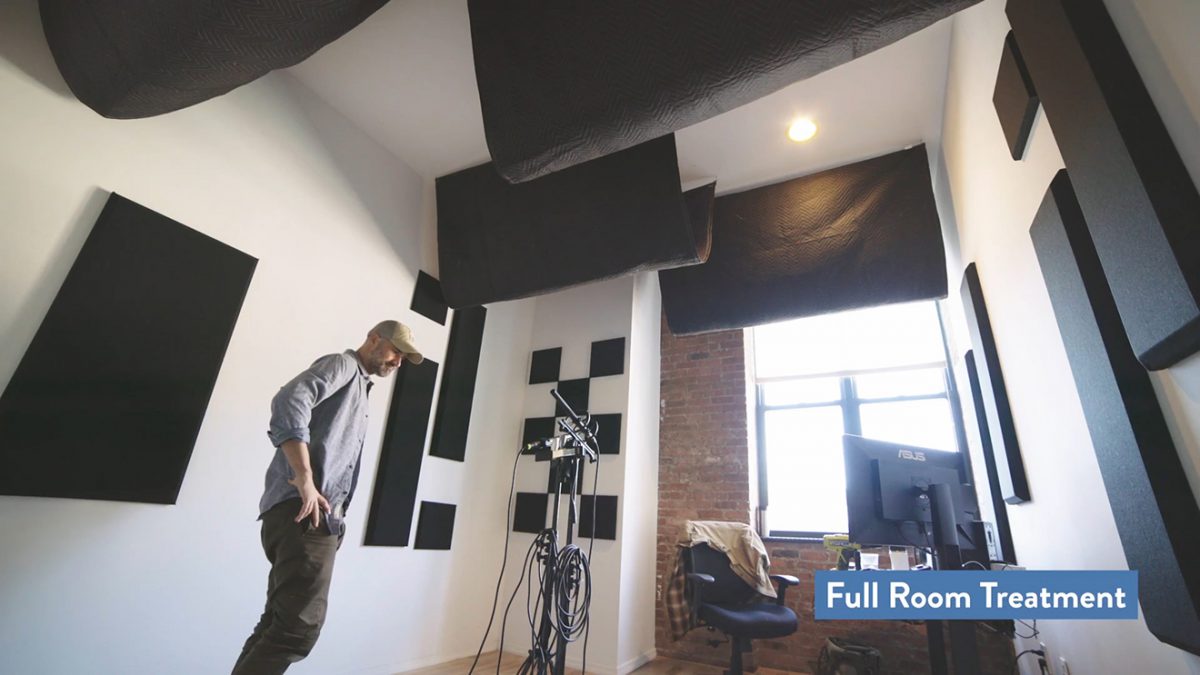
While a live-end-dead-end setup might work for your space, there are other approaches that might fit the bill depending on the acoustic treatment you’re looking for. We wanted less reverb because of the types of filming we would be doing in our studio.
After consulting with some audio pros, they recommended alternating live and dead zones on different walls to allow for some room noise, but less reflection overall. We mounted different types of sound absorption panels on the walls, and hung baffles from the ceiling to create this setup.
Background Noises
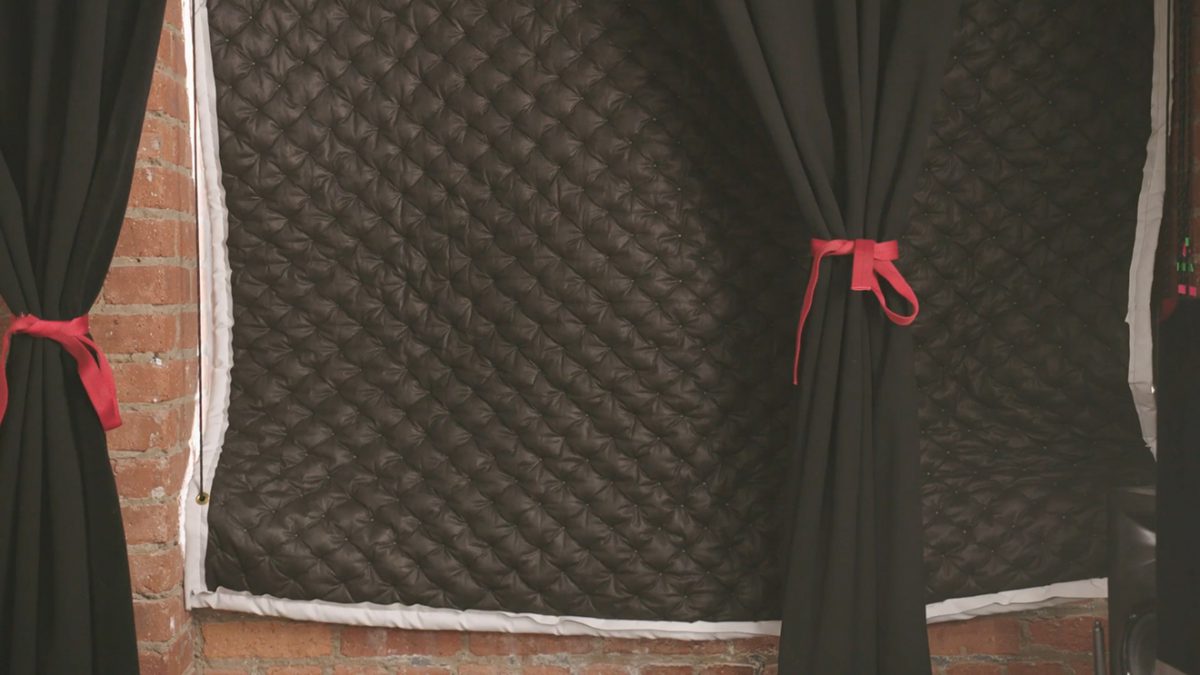
Our main background noise challenge came from the window in the studio. Even though it overlooks a courtyard, it lets in a significant amount of street noise.
Scan your space for anything that could create background noise. Fridges, HVAC systems, and street noise are typical culprits. It can be as easy as turning off the appliance or device during filming, or you may have to take extra measures like we did.
We doubled up a furniture blanket to create a large, stiff panel that fit perfectly in the window frame. We also rigged a pulley system to be able to raise and lower it to let in light when we weren’t filming. Finally, we added heavy-duty stage curtains with noise-blocking material sewn on in an additional layer for added noise absorption. We suspended them from the top of the window frame with a large tension rod and a ceiling bracket.
As far as unexpected noises, that could be anything from an excited child, a dog barking at a mailman, or even a siren in the distance. You’ll want to control your environment as much as possible, but also be flexible since some things we just can’t control.
Materials
We used several different items to reduce the amount of sound reflected off the walls in our studio. Ultimately, we went with a mix of purchased and DIY solutions to create a custom acoustic treatment in our studio.
Acoustic Panels
There are many solutions for acoustic panels out there, from DIY to professional-grade products. We went with a kit from Primacoustic suitable for our studio space that included:
- Eight 1 x 4 foot large panels
- Twelve 1 x 1 foot “scatter blocks”
- Two 2 x 4 foot “bass traps”
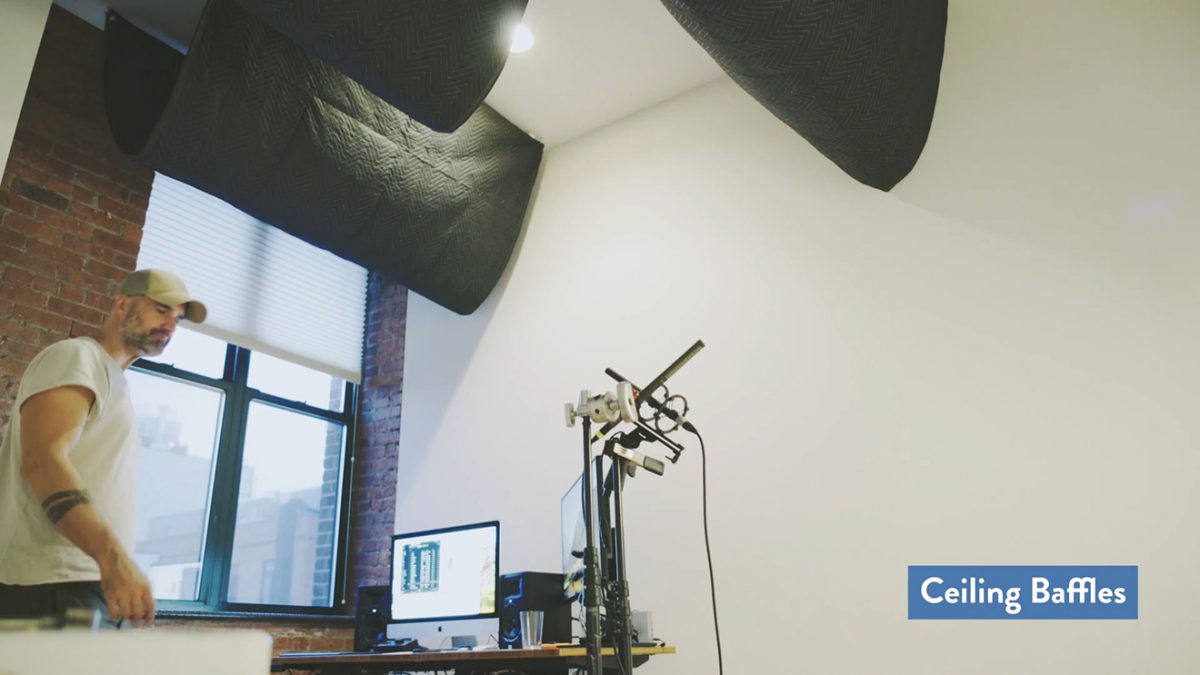
Ceiling Baffles
When planning your acoustic treatment, don’t just address the walls. Depending on what they’re made of, ceilings and floors can reflect sound just like any other flat surface.
We constructed baffles to hang from the ceiling using the following:
- Furniture blankets
- Styrofoam pieces
- Grommets
- Ceiling hooks
Window Treatment
Whether you need a window treatment or not really depends on how noisy your environment is. If you’re on a quiet street, you’re all set. If you’re in a city, like Brooklyn, you’ll probably need to take some steps to reduce the outside noise leaking in. Here’s what went into our window treatment:
- Noise blocking panel – we doubled up a furniture blanket and stitched it together to create a relatively stiff panel we could place in the window
- Heavy-duty curtains – heavy velour stage curtains add texture and additional sound deadening
- Ceiling window bracket
- Heavy-duty curtain tension rod
Installation Materials
Depending on whether you’ve gone the DIY route, or if you ordered a kit, some items may not be necessary. Here are the odds and ends we needed to install all of our acoustic materials.
- Hammer
- Laser level
- Screwdriver, assorted screws
- Ladder
- Wall mounting kits
- Duct tape
Ready to Record
Once you have your room treated, you’ll want to make sure that you have the most optimal mic setup to make the most of your new space. We have a three-part series on audio that will walk you through the following:
Head over to our How to Video section to learn best practices about audio.
When it comes to acoustic treatment, there is a lot you can do to help produce the highest quality sound possible. It may take some work to set up your space, but once it’s done it’ll make all the difference. Let us know in the comments below any other techniques you’ve discovered that help improve your sound.