Tabletop shooting is a very specific type of video shoot that can be really hard to get right. Also referred to as still life shooting, it’s very much what it sounds like. Usually, an object is filmed on top of a flat surface in great detail.
Think products, tutorials, or stop motion videos. These classic examples of tabletop filming require a certain level of perfectionism to get right.
In this episode of our How To Video: Lighting series, Nick LaClair, head of video production for SproutVideo, will walk you through how to properly light a still life video shoot. We’ll specifically address the challenges posed by regular stationary objects, shiny objects, and beverages, with tips for enhancing the end result.
Still Life Shoots are Surprisingly Difficult
At first glance, tabletop filming seems very straightforward. Place an object on a table, film it, and that’s all she wrote. Turns out, there’s much more to it than that.
As anyone who’s ever attempted a still life shoot will know, harsh shadows can be very difficult to work with, as can glare bouncing off the object itself.
If you’re not experiencing those lighting extremes, you might be dealing with the opposite problem: an object that reads as flat on camera. A lack of dimension means a lack of interest for the viewer.
Not to worry, Nick’s simple trick for getting the lighting just right will ensure your objects take center stage, for all the right reasons. Learn how to bring out the best in your tabletop shoot in this detailed tutorial:
What Not to Do
Just as important as the right lighting choices are those you want to avoid. We recommend staying away from light tents, even though they are inexpensive and readily available online.
While light tents work well for very specific types of objects, they aren’t a good solution for most tabletop shoots for a few reasons. First, light tents surround objects with light, making them look flat on camera. Second, they offer few options for shaping the light around your object. This limits your ability to achieve a specific look on camera, or to add dimensionality.
The bottom line: working with a light tent is likely to result in a flat, one-dimensional image on camera. That’s not going to wow your audiences in a video.
Materials Needed
For a tabletop shoot, you don’t need lots of fancy equipment. Basic studio lights and a few extras will get you very far.
Since we were showing a variety of examples, our equipment list is much longer than yours is likely to be. Also, there are many inexpensive alternatives to most items on this list. A little creativity can save a lot of money if budget is a concern.
Here’s a rundown of all the materials we used for our shoot:
- Two Tungsten lights with color gels
- Two 1 x 1 LED light panels
- Clamps
- Stands to hold the backdrops and lights
- Silk panels (diffusers)
- Seamless backdrop in white
- Black and orange pieces of poster board
- Jib*
- Camera
- Tripod
* A jib is a flexible boom device that holds a camera on one end, with a counterweight on the other. It pivots on a fulcrum closer to the counterweight, enabling you to smoothly move the camera in a very controlled way. In our shoot, we not only used the jib for the camera, but also for changes to the lighting in certain scenarios.
You’ll note we didn’t need a microphone for our still life, and that’s typical for this type of shoot. Usually, the footage from a tabletop shoot is paired with a voiceover recorded separately.
Set and Repair
The basic concept behind Nick’s approach is very simple. It’s similar to classic three point lighting in a studio. The main difference is that your lights are typically much closer to your subject, and as a result, you might not need a backlight.
Here’s the basic process. First, set your key light and your fill light. Then, repair the result by adjusting the effect of the fill light until you get the look you want. What do we mean by “repair” in this context?
Sometimes, your key light casts unwanted shadows, or creates too strong a contrast between the highlights and low lights in your image. A fill light largely solves those issues by acting as an overall scene light.
However, sometimes the fill light is not quite enough to create a balanced, appealing image on camera. You might need to shape the light further by partially blocking the fill light, and/or panning it to reduce its overall impact.
We used a large piece of black poster board and two clamps to create a propped up flag for this purpose. Then, we panned the fill light to adjust the amount of light hitting the background until it looked just right. Check 1:02 – 1:33 for a demonstration of this technique.
Upgrade the Backdrop
Now that we have a grasp of the fundamental process to set and repair our light, let’s add some extras.
The first example uses a seamless backdrop – a popular choice for many tabletop shoots. For some types of objects, however, showing a surface and a wall as the background will make more sense.
You can fake this by using large, colorful pieces of poster board, found at many art supply stores or chain retailers. Simply slide one piece underneath your object, and prop the second card up behind it. Using two different colors usually works well.
Adding Lights
The first two examples in the video show what can be achieved with just two lights. However, you can create even more dramatic effects with just a few additional lights.
When filming stationary objects, it’s important to think about the focal point for the viewer. What really needs to pop on camera?
We used a typewriter to highlight ways additional lights can enhance the end result on camera. First, an overhead light cast through a silk provides a symmetrical, uniform glow across the whole scene. Because of the elevated angle of the main light, we don’t need a fill in this scenario. You can see this light at the top of the image below.
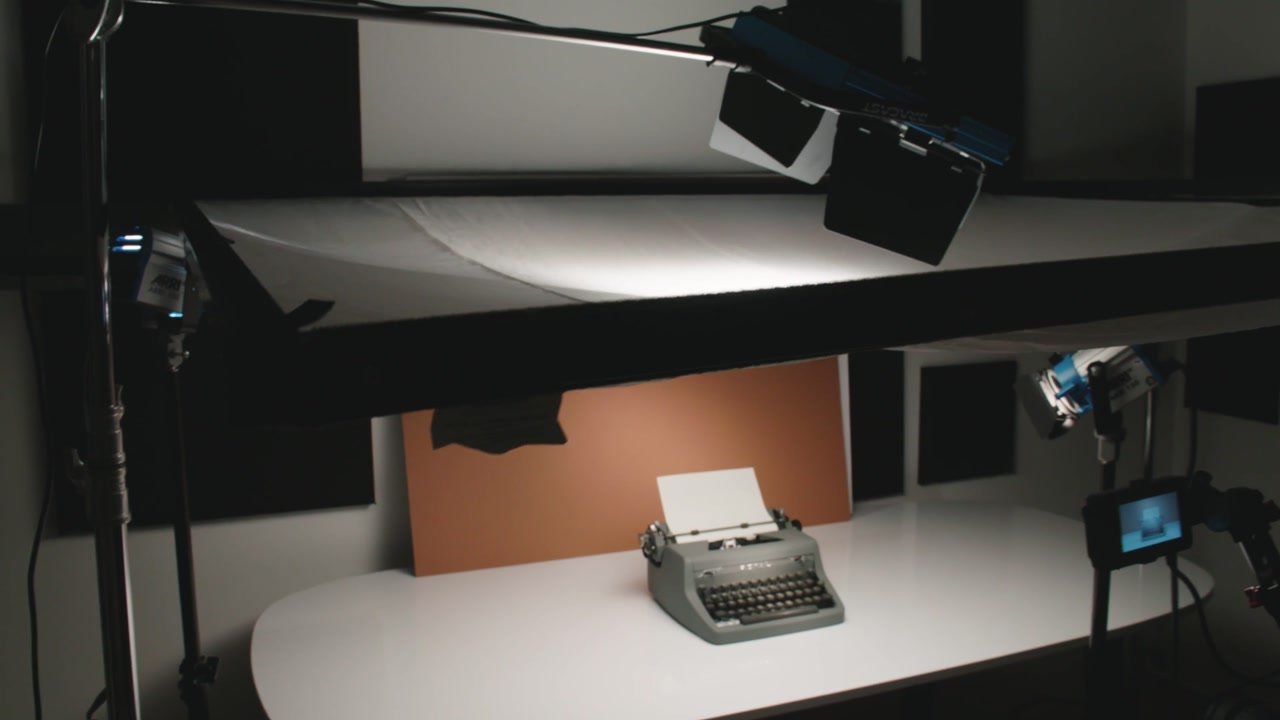
Then, we added a small Tungsten light to spotlight the background. This light is shown in the image above on the left, partially hidden by the silk panel. It helps draw focus to the typewriter and adds interest to the scene.
Finally, we added another small spotlight to highlight the keys on the typewriter. That’s the small light to the right of the camera above.
After all, the keys are the tactile part of a typewriter nearly everyone wants to tap. By highlighting them, you’re drawing the viewer’s eye to the keyboard and building anticipation.
Shiny Objects
Conversely, shiny objects are naturally eye-catching, but present unique challenges from a lighting perspective. The goal is to show off the shininess of the object without blinding the viewer or making it impossible to see the details of the object itself. Avoiding unwanted reflections is key, especially for anything with a mirror-like surface.
Ideally, you want to capture what are known as “catchlights” on camera. A catchlight refers to the light bouncing off a reflective surface. It also refers specifically to the reflection of a light in someone’s eyes, which is a flattering effect in photos or video.
To achieve a uniform, appealing reflection on a shiny object like our knife, you’ll need big light sources to cover the surface with even reflection. We’ve used one soft light as our fill to light the scene, then we added a lightweight LED as our catchlight.
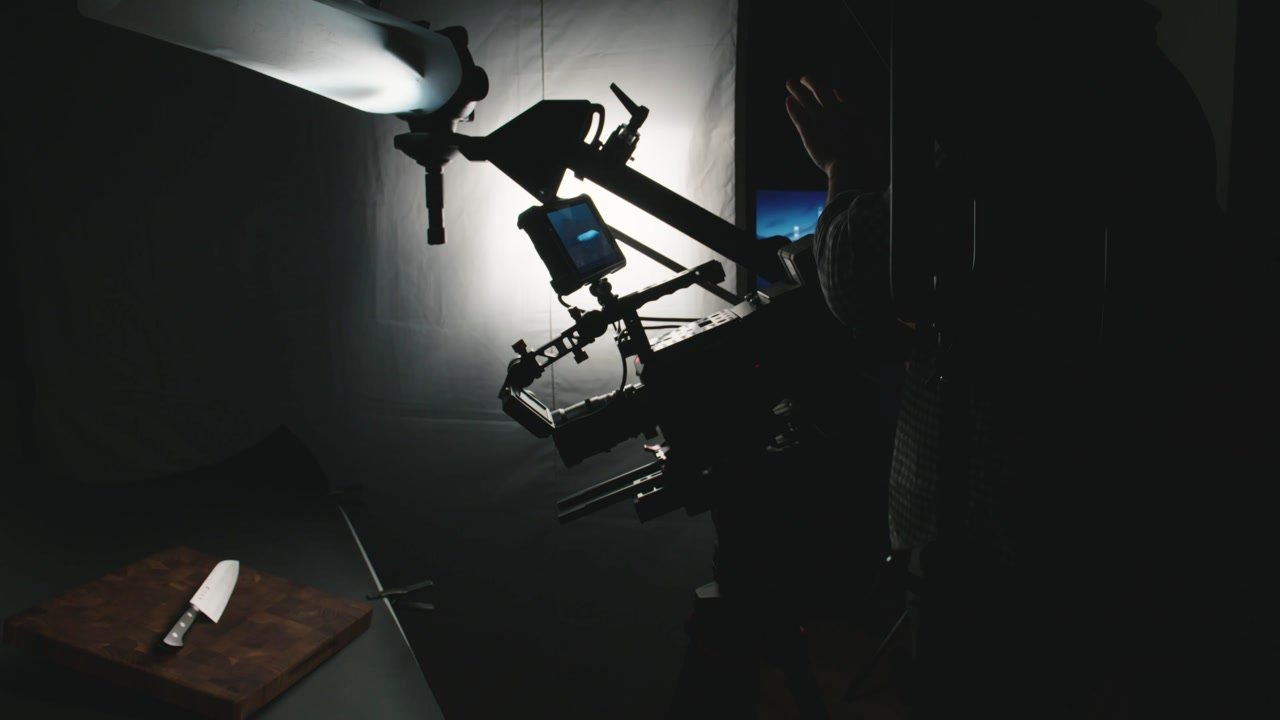
In the image above, you can see the silk in the center with a light (not visible) directed through it to diffuse light evenly onto the scene. Then, the complicated looking light in the upper left corner of the image is our LED light on the jib, also with a diffuser on it.
Similar to how the keys are the focal point of the typewriter, the sharp blade is the key feature we want to show off for the knife. We mounted the LED to a jib so we could move the catchlight across the blade. This helped highlight the smooth, precisely engineered blade.
After all, you want to trigger excitement about the product you’re showcasing. Look for similar ways to draw attention to the most important aspects of the item you’re filming.
Better Beverages
Beverages can also be hard to capture in an appealing way on camera. In this example, we follow the general rules featured in our episode on filming food, and add a special trick to help the drink look particularly appetizing.
For starters, as with other food videography, our key light is backlighting our object. This gives the liquid in the glass a nice glow on camera.
Then, we add a soft fill light to illuminate the glass and the background. The combination of the fill light and the key light is working well for the beverage, but is causing some strange effects on the righthand side of the screen (catch it at 3:12 in our video above).
After adding the same black card we used earlier to partially block the fill light, we now have a nice even light across the frame. At this point, we’re almost ready to film.
For a finishing touch, we emphasize the glow-y effect created by the key light by adding an orange spotlight just to the left of the glass. This adds some ambiance and extra interest to the scene.
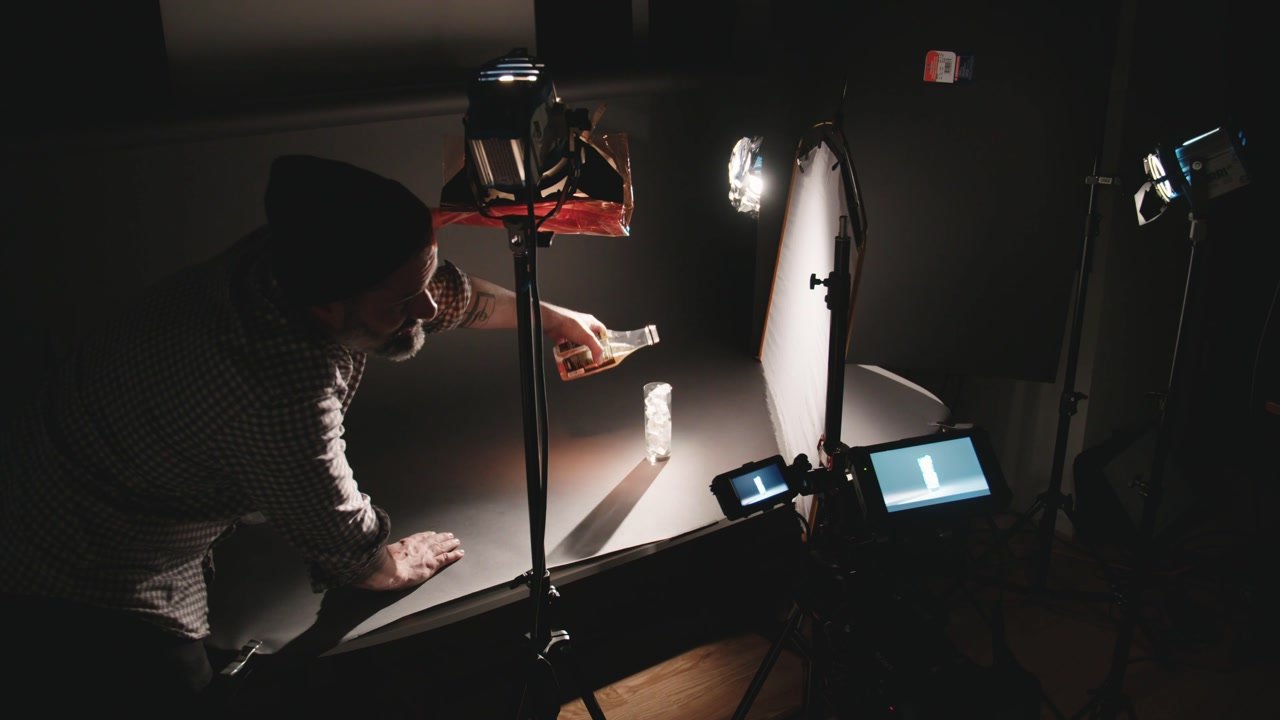
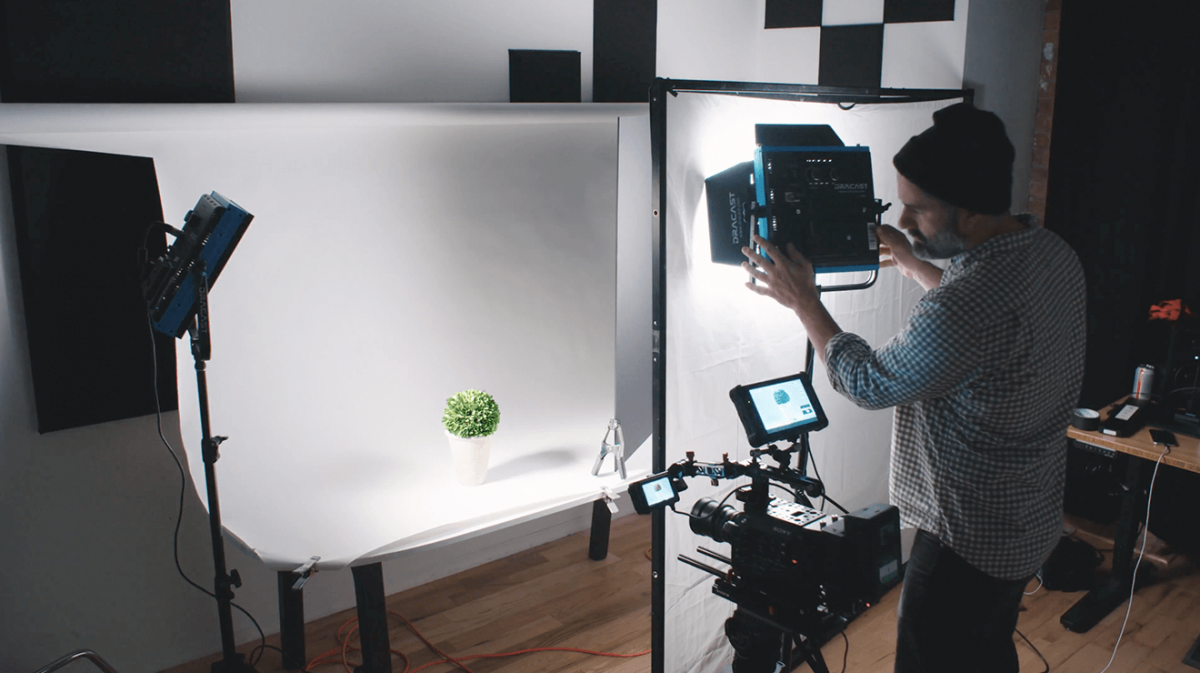
In the image above, Nick is about to pour the beverage, and all the lights are in place. Closest to Nick, you can see the spotlight with an orange gel on it. In the center, you can see the bright key light pointing at the beverage directly to backlight it. Then, to the right, there’s the fill light with a black card and a silk in front of it to shape and diffuse the light.
Adding Action
Except for the very first example, which we used to demonstrate the basic lighting technique, a common thread throughout our tutorial is to add action to your still life shoot.
Granted, that’s a little counterintuitive based on the nomenclature. However, action is required to captivate viewers and hold their interest. The key is to add action in a focused way that doesn’t distract from the object itself.
For instance, we poured the beverage into the glass to show its effervescence and movement; we moved the light around the knife, or rotated the knife itself to show off the blade; and we typed on the typewriter to highlight the fun aspect of using one.
Think about the object you’re filming, and determine which aspect your audience is most likely to be interested in. Which of its attributes are most appealing? Do any play particularly well on camera? What sets it apart from similar items?
Solving the Still Life Puzzle
The subject of a tabletop shoot can vary tremendously, and each object has its own story to tell. If you follow the simple process to first set your key light and fill light, and then repair the lighting until you get the effect you want, you’ll wind up with a professional result.
Set, repair, repeat.
Do you have any still life shoot tips or tricks we missed that are important to share? Sound off in the comments below!