Live video is an incredibly powerful way to drive viewer engagement when done correctly. Forget stale straight-to-camera presentations. Today, we’ll show you how to take your live stream to the next level by mixing in multiple presenters, slides, and video inputs.
Using our first live stream demo as an example, we’ll cover the camera gear, software, and creative elements you need to hook viewers and keep them engaged throughout your next live broadcast.
In this episode of our How To Video: Live Streaming series on live streaming, Nick LaClair, Creative Director at SproutVideo, takes us behind the scenes of our first live stream. If you missed our live demo, you can watch the recording of it in our post, “An Inside Look at Our New Beta Live Streaming Features.”
Keep reading for more details on how to create your own professional live stream presentation. In case you need to cover the basics first, refer back to our previous episodes on setting up a live stream, and using multiple sources in a live stream.
Technical Setup
Since we are all social distancing, we needed to make sure that we had the right equipment on hand to achieve the look we wanted. This included cameras, adapters, dongles, and some software. Let’s take a look at both Nick and Ikey’s setup below.
Nick’s Gear & Setup
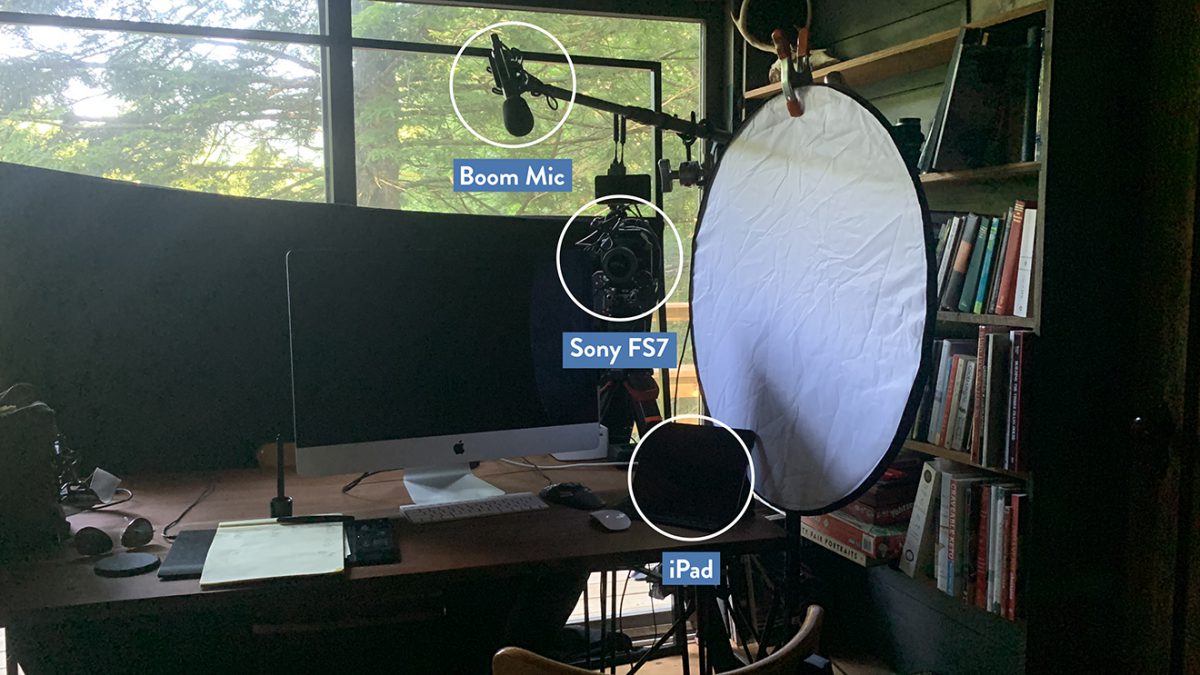
Broadcasting from his home in upstate New York, Nick was the hub of our operation. He controlled the whole live stream from his iMac using OBS and our SproutVideo account.
His video and audio were sent to OBS via video capture device as a source for the broadcast. To control OBS during the broadcast, he had the OBS remote browser app up on his iPad, which made switching between scenes easy and quick.
Gear List
- Sony Fs7
- Boom mic
- iMac
- iPad
- OBS software
- Skype
- Black Magic ATEM Mini
- AJA U-Tap
- Natural sunlight with a reflector
Ikey’s Gear & Setup
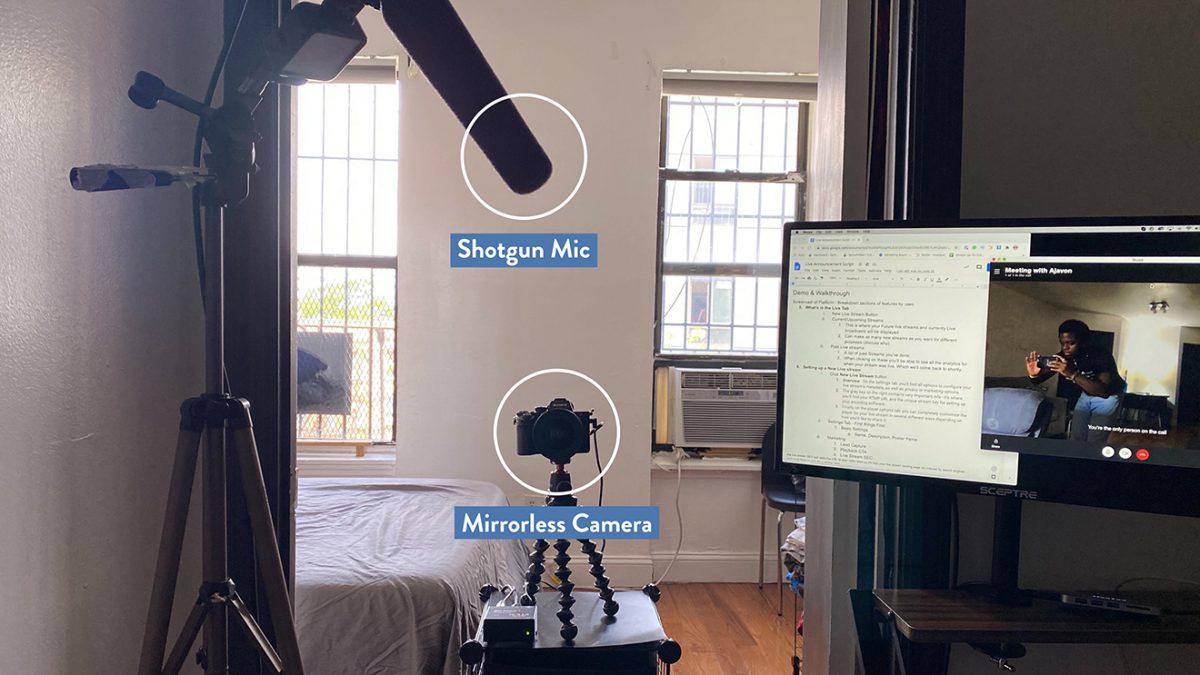
Ikey, broadcasting from his home in Brooklyn, New York, interacted with Nick primarily through Skype. This allowed him to interact with Nick and see the screencast in real-time. He had his boom mic connected to a mirrorless camera, which was connected to Skype through a video capture device.
Gear List
- Sony A7rii
- Boom mic
- MacBook Pro 13”
- Skype
- AJA U-Tap
- Natural sunlight
Creative Elements
The hardware setup was relatively straightforward. However, on the software side, we had to be a bit more creative with our process to deliver the experience that we wanted for our viewers.
Our main goal was to create a look that allowed for both people to be front and center during the broadcast, with the ability to add slides, pre-recorded videos, and various other elements.
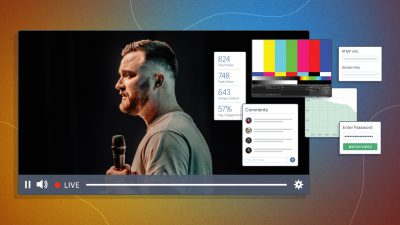
OBS
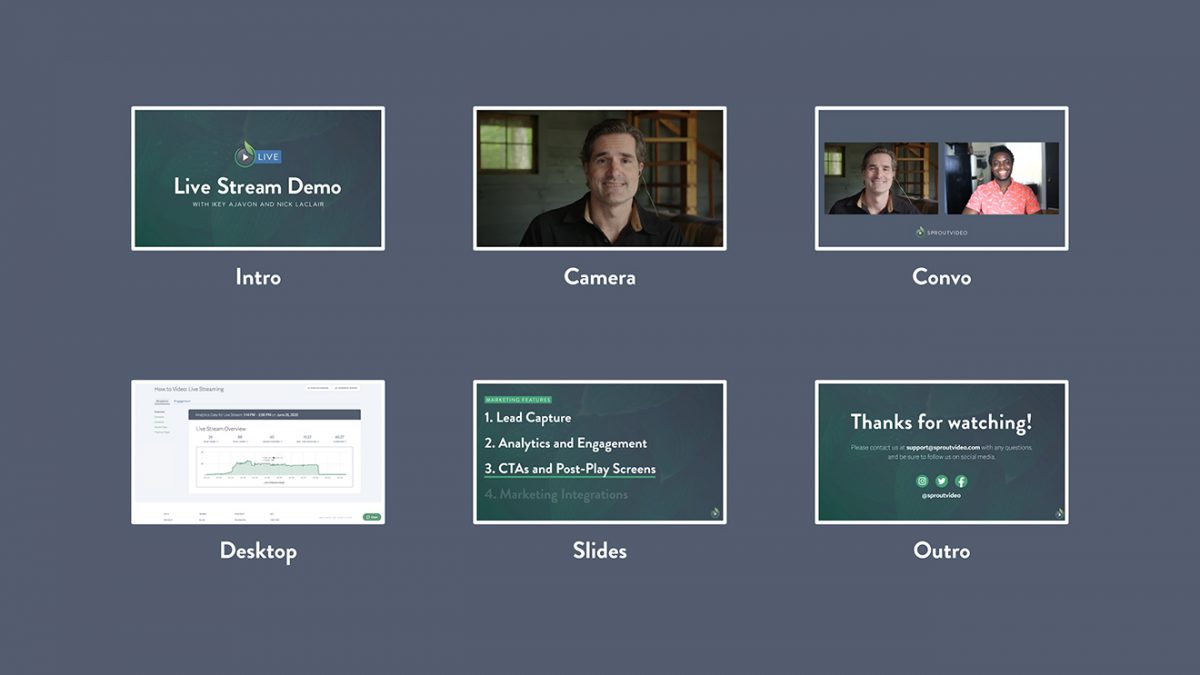
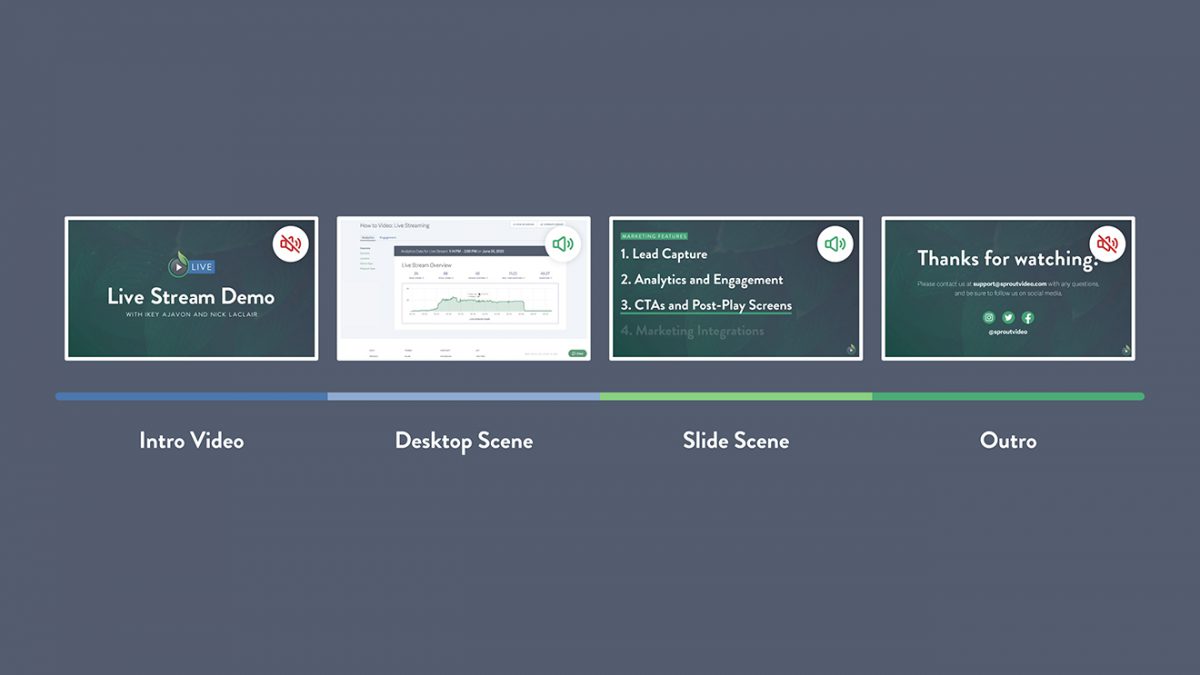
It all started with Nick preparing all of the scenes and sources in OBS. We had six scenes to work with: the intro, on-camera, convo, desktop, slides, and outro. We set it up this way to allow for easy and effective switching during the broadcast.
Intro & Outro
The intro was all one video file that was made up of a 15 minute countdown graphic and a 30 second promotional video. We set it up in this fashion because OBS allows you to choose a media file as your source, and will play it from the beginning when you cut to it.
The outro was the same format. It consisted of a “thank you” video that was queued up to play in its entirety at the end of our broadcast.
We felt it was important to have an intro so our viewers would have time to “take their seats” so to speak. An outro is equally important as an opportunity to deliver a call-to-action, and to avoid the broadcast ending too abruptly.
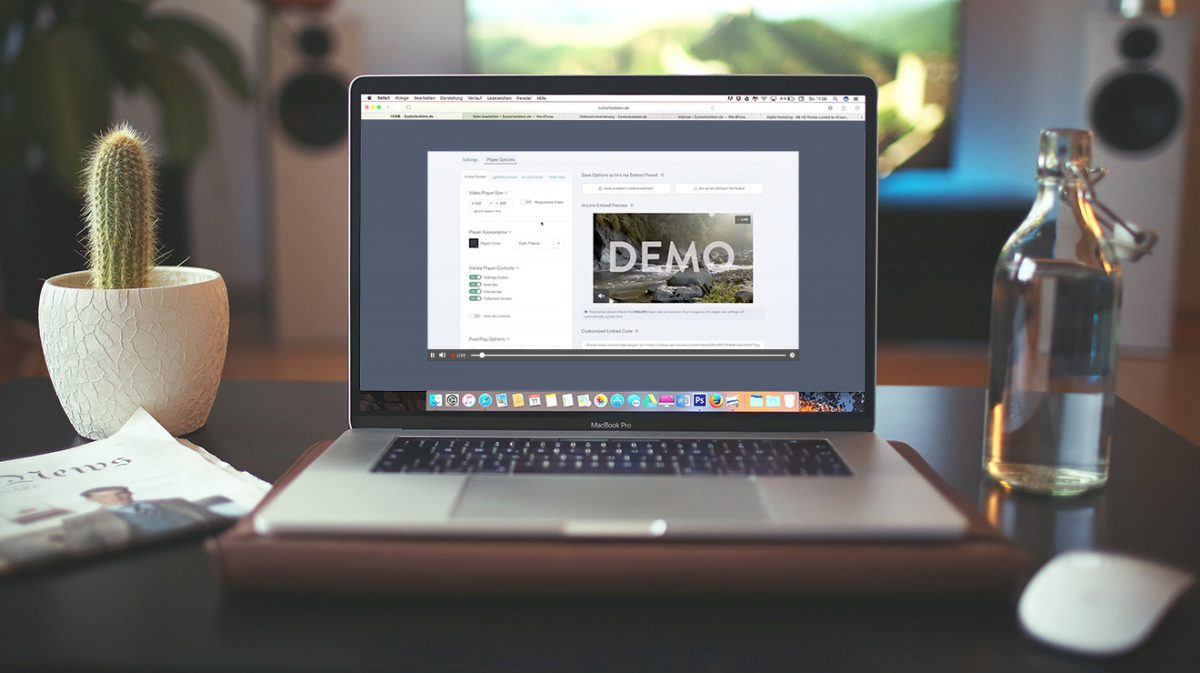
If you don’t have an outro clip to use, you can implement a custom post-play screen for your live stream on the SproutVideo platform.
Video Scenes
We implemented two video scenes, one featuring just Nick on camera, and one with both Nick and Ikey. Nick’s feed was straight from camera using a capture device to connect to OBS, but our conversation scene had a few extra elements, including custom graphics and Skype.
Connecting Skype
For this scene, we had to make sure that not only the audience could see and hear both of us, but we had to be able to interact with each other in real-time.
While Nick was able to use a direct feed from his camera as a source for OBS, we had to use an NDI for Ikey’s source. An NDI is a network device interface, which allows you to communicate, deliver, and receive video in high quality on the subnet of your computer network. Skype allows you to tap into its NDI and use it as a source for OBS.
All you need to execute this is to install the NewTek NDI plugin for OBS, enable the NDI usage within Skype itself, and then choose “NDI source” as a source in OBS. At this point, you can adjust your windows on your monitor to get the Skype feed to show up as you’d like.
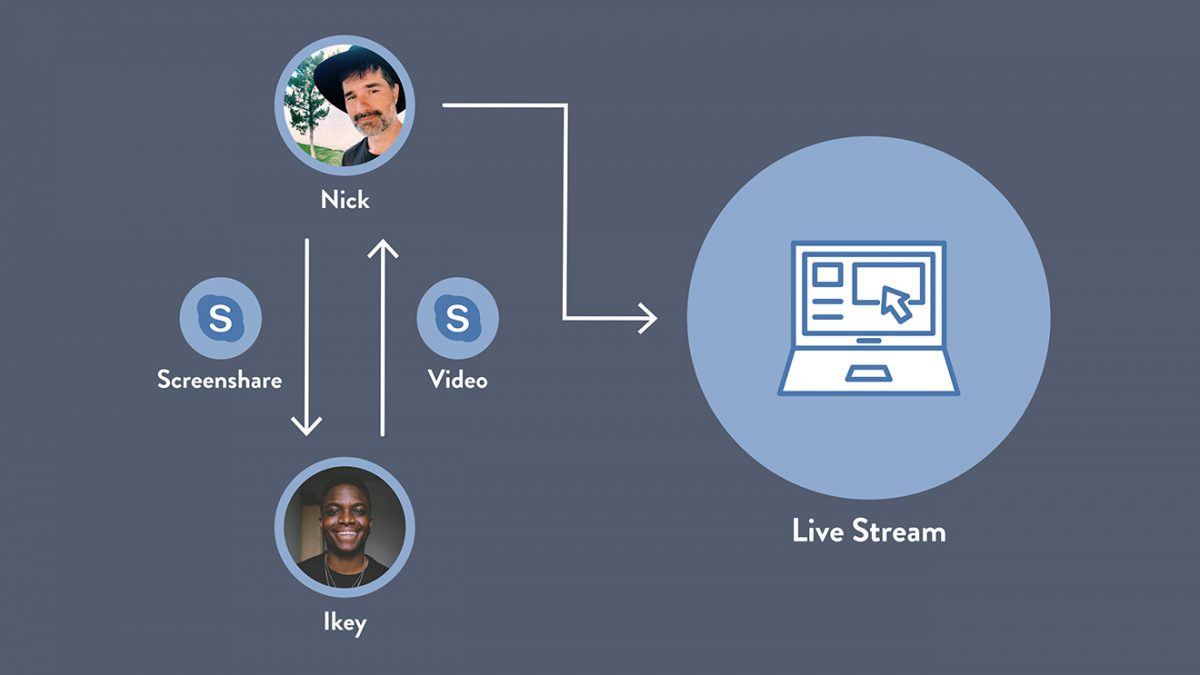
Skype Screenshare
We chose to use Skype because of its NDI connection capabilities, but also because we needed a way to have Ikey see Nick’s screen in real-time so the interaction would seem natural. We couldn’t monitor the actual broadcast because of latency. Latency occurs with every live broadcast. It is the delay between what is captured by the cameras and what your audience sees.
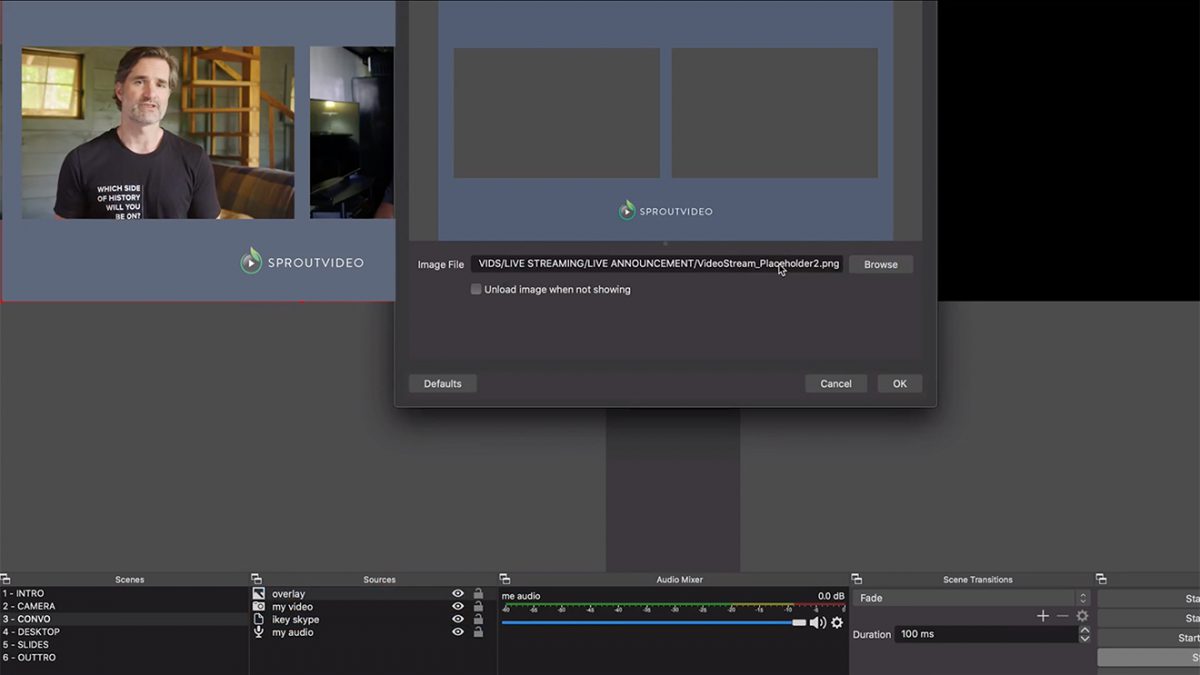
Completing the Look
Since both video feeds import into OBS with the same dimensions as the video source, we created a simple, branded PNG to use as a frame. This made the look and feel a bit more professional, as you’ll see below.
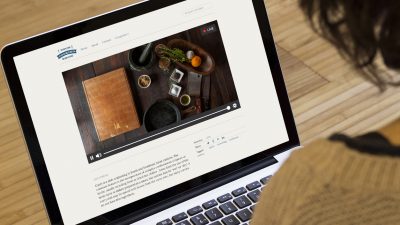
Desktop & Slides
The last two scenes we’ll cover are the desktop and slides. These were our easiest scenes to set up in OBS. OBS lets you screencast either a window or your entire desktop. For this live stream, we used an application window with our slide presentation as one source for that scene, and had another scene with our desktop as the source so viewers could see the platform during the walkthrough.
Audio
Another important consideration we had to make was surrounding our audio. While we ran our mics through our cameras, OBS allows you to separate the audio from your video source, meaning you can add audio separately to whatever scene you’d like even if the video feed isn’t included.
This is exactly how we were able to implement Nick and Ikey’s voiceover during the slides and desktop screencast, and cut their audio out during the pre-recorded intro and outro.
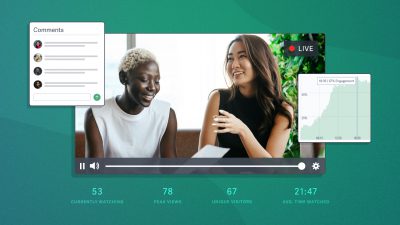
Tracking Viewer Engagement
During a live stream, SproutVideo provides analytical tools to check and see whether your audience is tuning in or dropping off along the way. Ideally, you want to see engagement as close to 100% as possible. That would indicate everyone watched your entire live stream from beginning to end.
Of course, in the real world, very few people manage to achieve 100% engagement. We were happy to see viewer engagement of over 70% for our live stream, especially since the 15 minute intro and outro were included in the overall duration of our live stream.
After a lot of practice in the weeks leading up to the event, we were able to pull the live stream off more or less flawlessly. We have high hopes for future live events like this and would love to know what other topics you would like us to cover. Let us know in the comments below.
If you’re ready to try live streaming for your company, open a free 30 day trial today and get started!